
Sous-vide is not a universal answer to all culinary questions. A good steak turns out beautifully in a cast-iron skillet. Duck legs love the oven. Steamed fish is an entirely different story. But there is a specific category of ingredients where precise temperature control radically changes the result: a chicken breast without a rubbery texture, salmon with a silky center, or a pork tenderloin that does not dry out. For these tasks, understanding how sous-vide works is completely worth the effort.
The concept is incredibly simple. You submerge an ingredient in a sealed bag into water heated to a specific temperature, cooking it to absolute perfection. It requires no excessive heat, no guessing minutes, and no slicing open to check for doneness. A professional immersion circulator handles this automatically. A domestic pot paired with a thermometer requires your participation every ten minutes, but the underlying principle remains exactly the same.
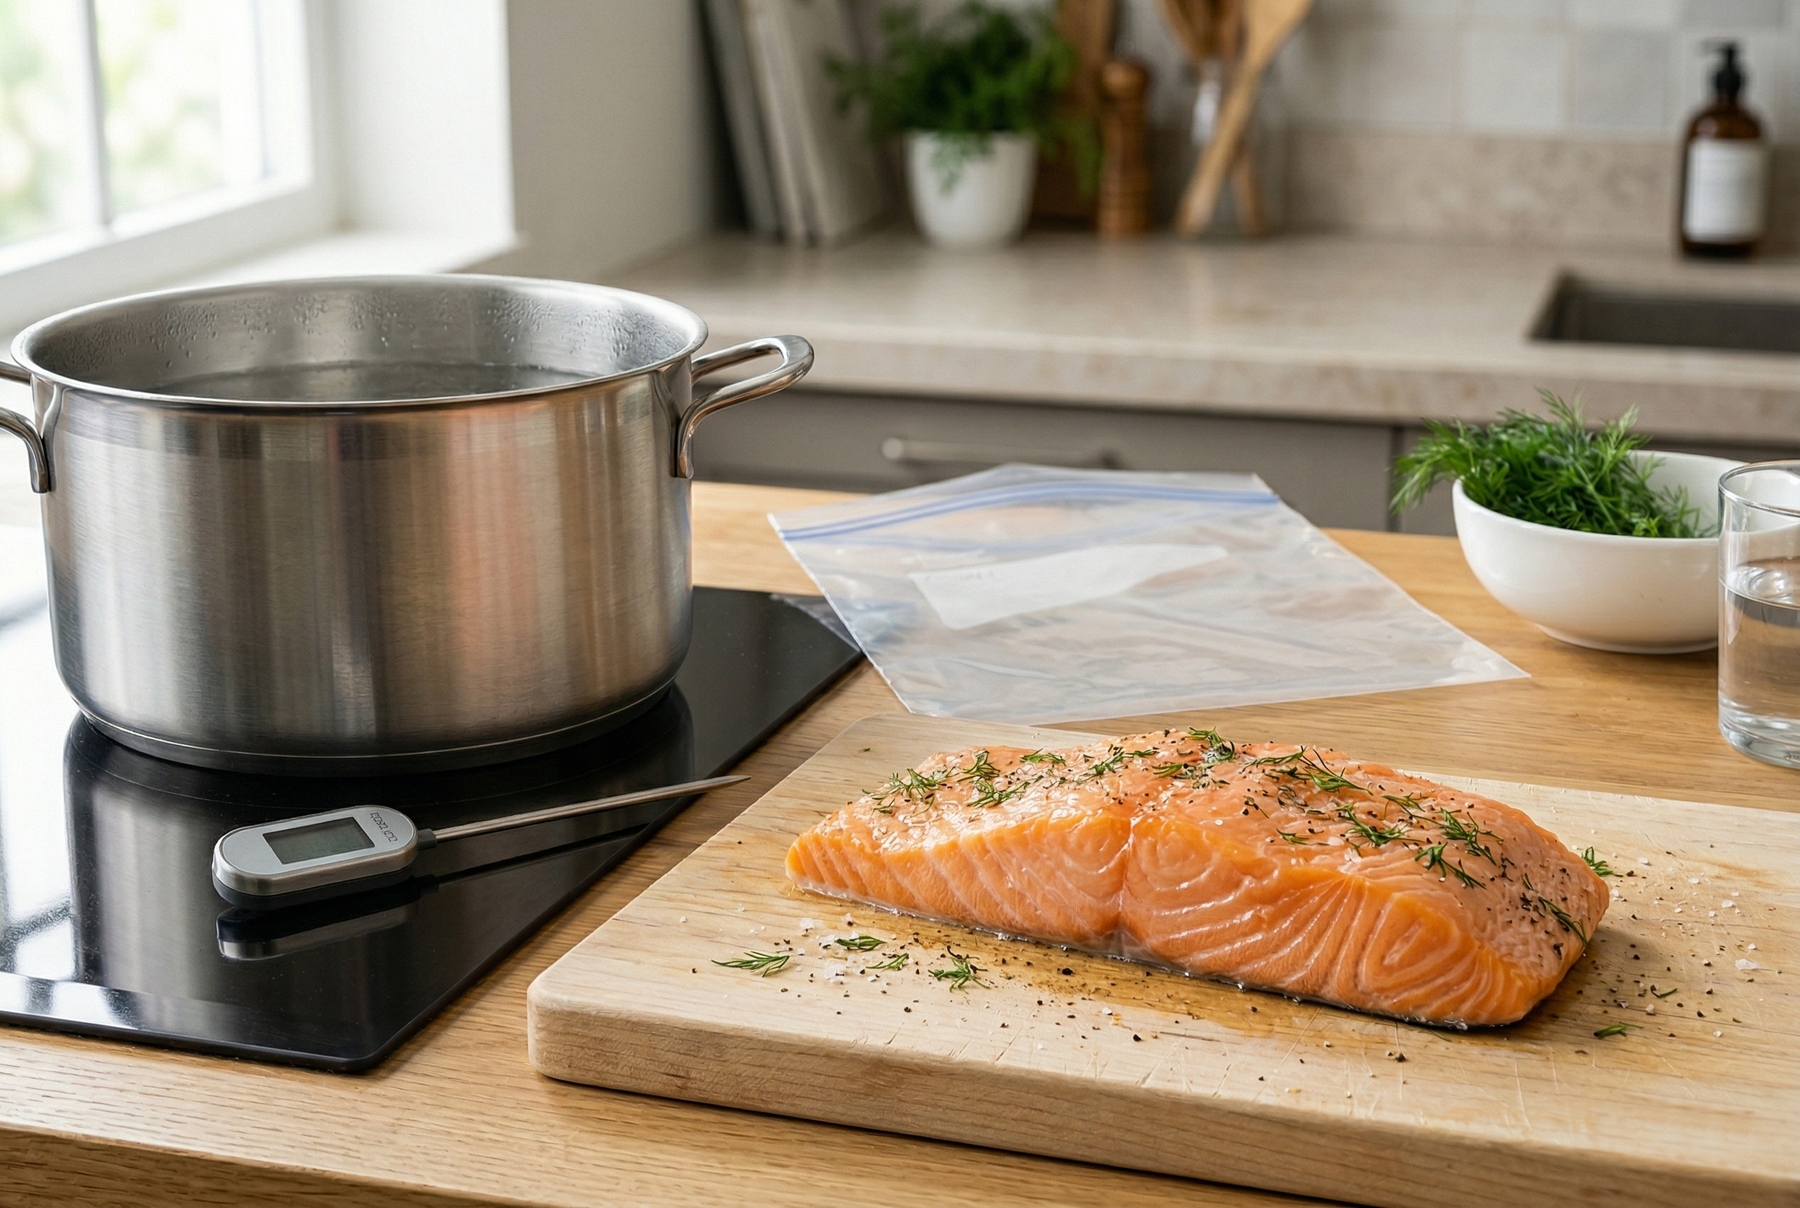
Starting with sous-vide does not require expensive gadgets; a simple pot, a thermometer, and regular zip-top bags are entirely sufficient.
Table of Contents
- Why the Oven Lies, but Water Never Does
- What You Actually Need
- Archimedes' Principle for Your Kitchen
- How to Maintain the Temperature Without a Circulator
- Guidelines for Temperature and Time
- Why the Meat Looks So Strange
- What to Do If the Temperature Spikes
- The 64-Degree Egg
- Is Buying a Circulator Worth It?
Why the Oven Lies, but Water Never Does
Let us take a chicken breast and attempt to cook it at 180°C (350°F) in the oven. The ambient air heats the surface of the meat to well over a hundred degrees while the center slowly creeps toward 74°C (165°F). By the time the inside is properly cooked, the outside has already dried out. Air is a poor conductor of heat; it works unevenly and is notoriously difficult to control.
Water behaves entirely differently. It embraces the ingredient from all sides, transferring heat evenly. If you set the water to 63°C (145°F), the meat will not exceed that temperature. Physics and heat exchange simply will not allow it.
This precise control explains why restaurants rely on immersion circulators, which maintain water temperature with a margin of half a degree. Achieving a remarkably similar result without a circulator is perfectly possible, requiring only a large pot, a thermometer, and a bit of attention to the stovetop.
Sous-vide provides a significant buffer of time. A chicken breast cooked at 64°C (147°F) reaches perfection in an hour and a half, yet leaving it for two hours causes no harm. The meat will not overcook, as it physically cannot become hotter than the surrounding water. This does not imply that time is irrelevant. Leaving an ingredient in the bath for too long eventually alters its texture, softening the fibers in undesirable ways. However, the margin for error is vastly wider here than with a skillet or an oven.
What You Actually Need
Purchasing a specialized device right away is unnecessary. The required setup is remarkably simple:
A pot: The larger and deeper, the better. A significant volume of water provides thermal inertia, meaning minor fluctuations from the stove do not instantly cause temperature spikes. A pot with a capacity of at least six liters (6.5 quarts) is highly recommended.
A probe thermometer: Cooking without one quickly turns into a guessing game. A standard kitchen probe thermometer, which you can submerge in the water to monitor the readings, works perfectly. It usually costs around $5–$10 at any home goods store. Infrared thermometers are not suitable, as they read only the surface temperature rather than the depth of the water.
Zip-top bags: Opt for heavy-duty, freezer-safe food bags with a secure seal—the type typically used for storing meat in the freezer. Flimsy sandwich bags that tear easily will not survive several hours in hot water. The seal must hold tightly without any gaps.
That completes the entire equipment list.
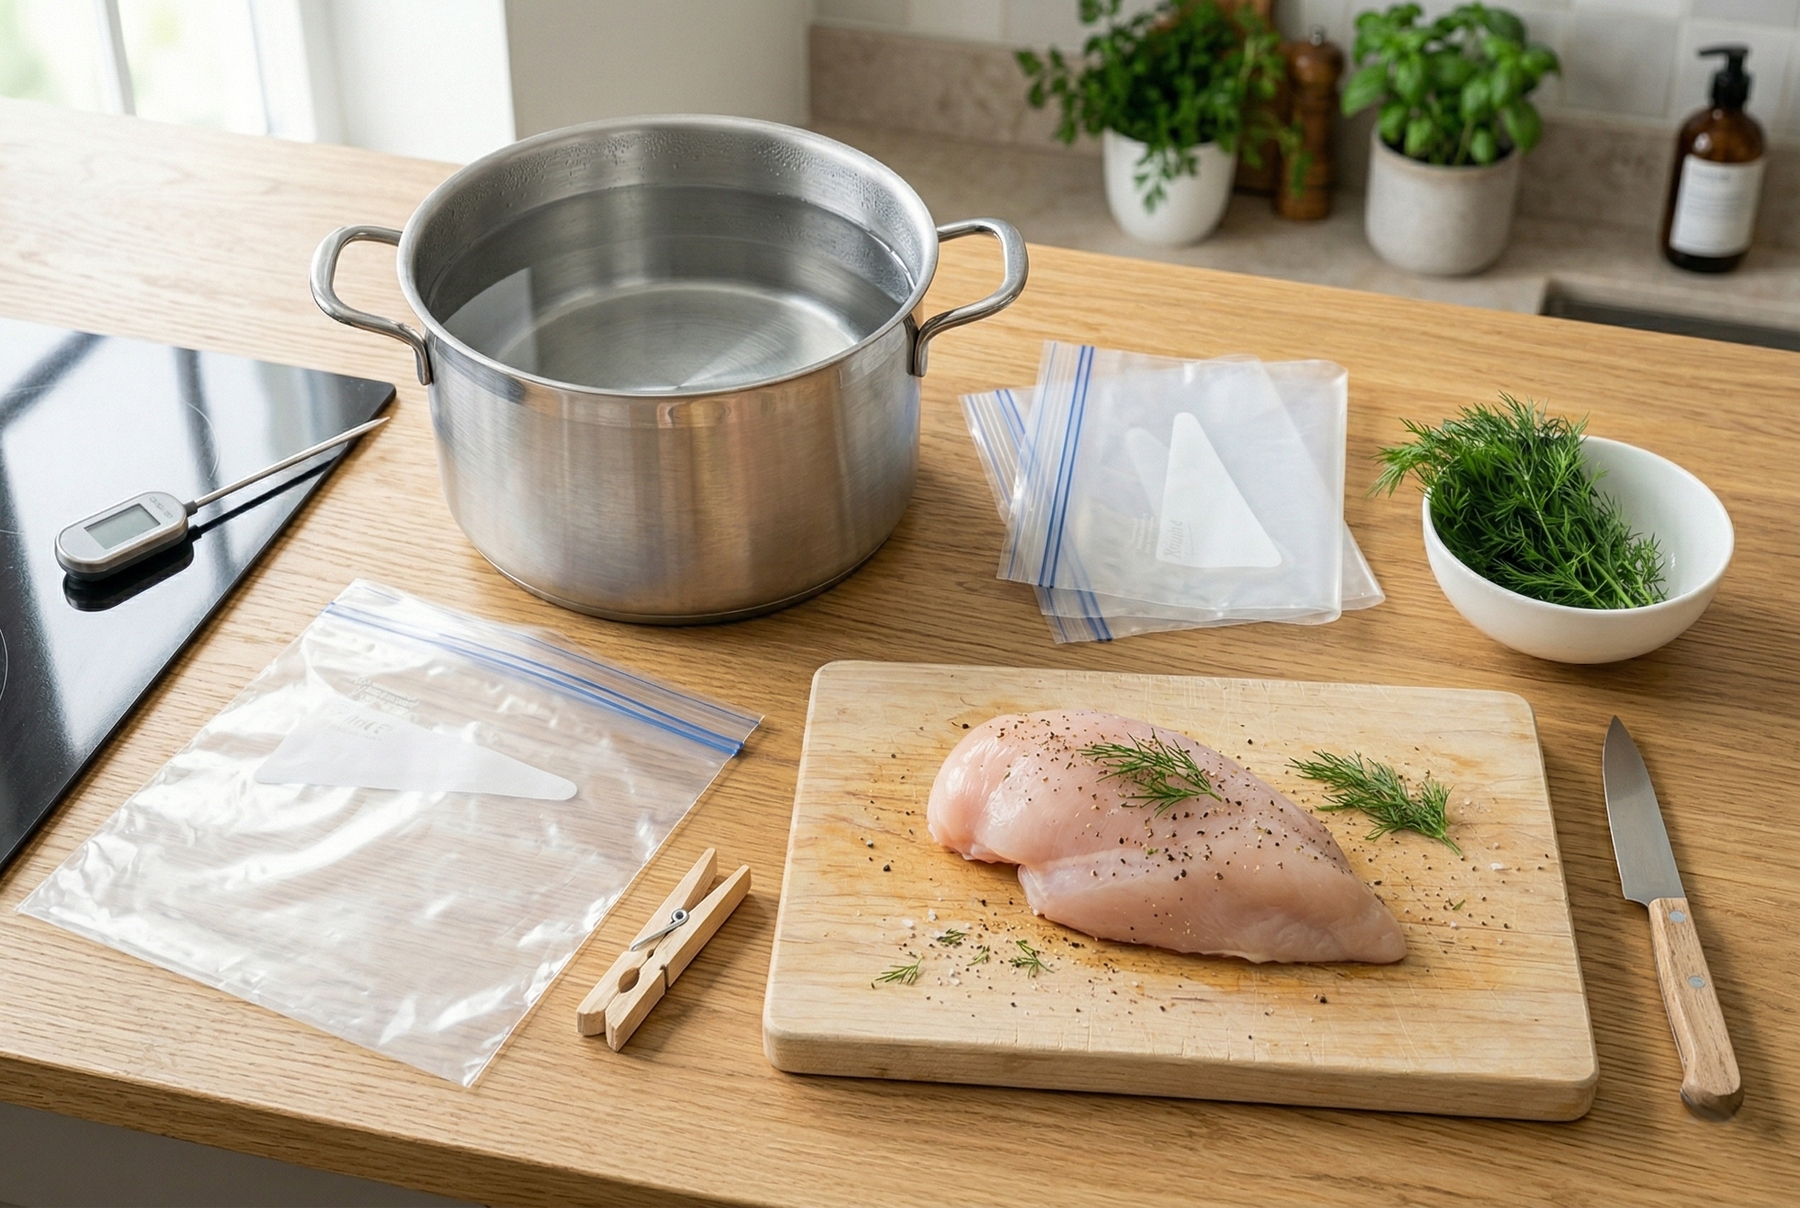
The minimal setup for the technique includes heavy-duty zip-top bags, a probe thermometer, and a spacious pot.
Archimedes’ Principle for Your Kitchen
A professional vacuum is created by a machine that extracts air from a plastic pouch before sealing it. You can easily manage without one at home.
Placing the ingredient inside the bag is the first step. You then slowly lower it into the water, keeping the unsealed top just above the surface. The water pressure naturally pushes against the plastic, forcing the air out through the opening. Once the bag is nearly submerged and the air has escaped, you seal it completely.
A few small bubbles remaining inside are nothing to worry about; they will simply float to the top near the seal. The primary goal is to ensure the plastic tightly hugs the ingredient without any trapped air pockets around it. An air cushion acts as an insulator, causing the food to heat unevenly.
If the bag attempts to float, weighing it down with a small plate or clipping it to the side of the pot with a binder clip works perfectly.
How to Maintain the Temperature Without a Circulator
This represents the most delicate phase of the home setup. It is not overly complex, but a stovetop heats rather aggressively, making overheating the primary challenge, particularly near the bottom of the pot.
Heating the water to the target temperature is the first step. If the ingredient is coming straight from the refrigerator, aiming one or two degrees higher compensates for the chill. After submerging the bag, allowing the water a minute or two to stabilize before checking the thermometer again is essential.
From that point, checking the temperature every 10 to 15 minutes is required. If the heat begins to rise, simply removing the pot from the burner or gently stirring the water is often enough to correct it. Adding cold water is best done in very small increments to avoid disrupting the thermal balance too drastically.
Minor fluctuations of a degree or two are generally fine, though more delicate ingredients like fish or eggs demand closer attention to the temperature range.
You are not expected to hover over the stove; rather, you occasionally glance at the thermometer while attending to other tasks.
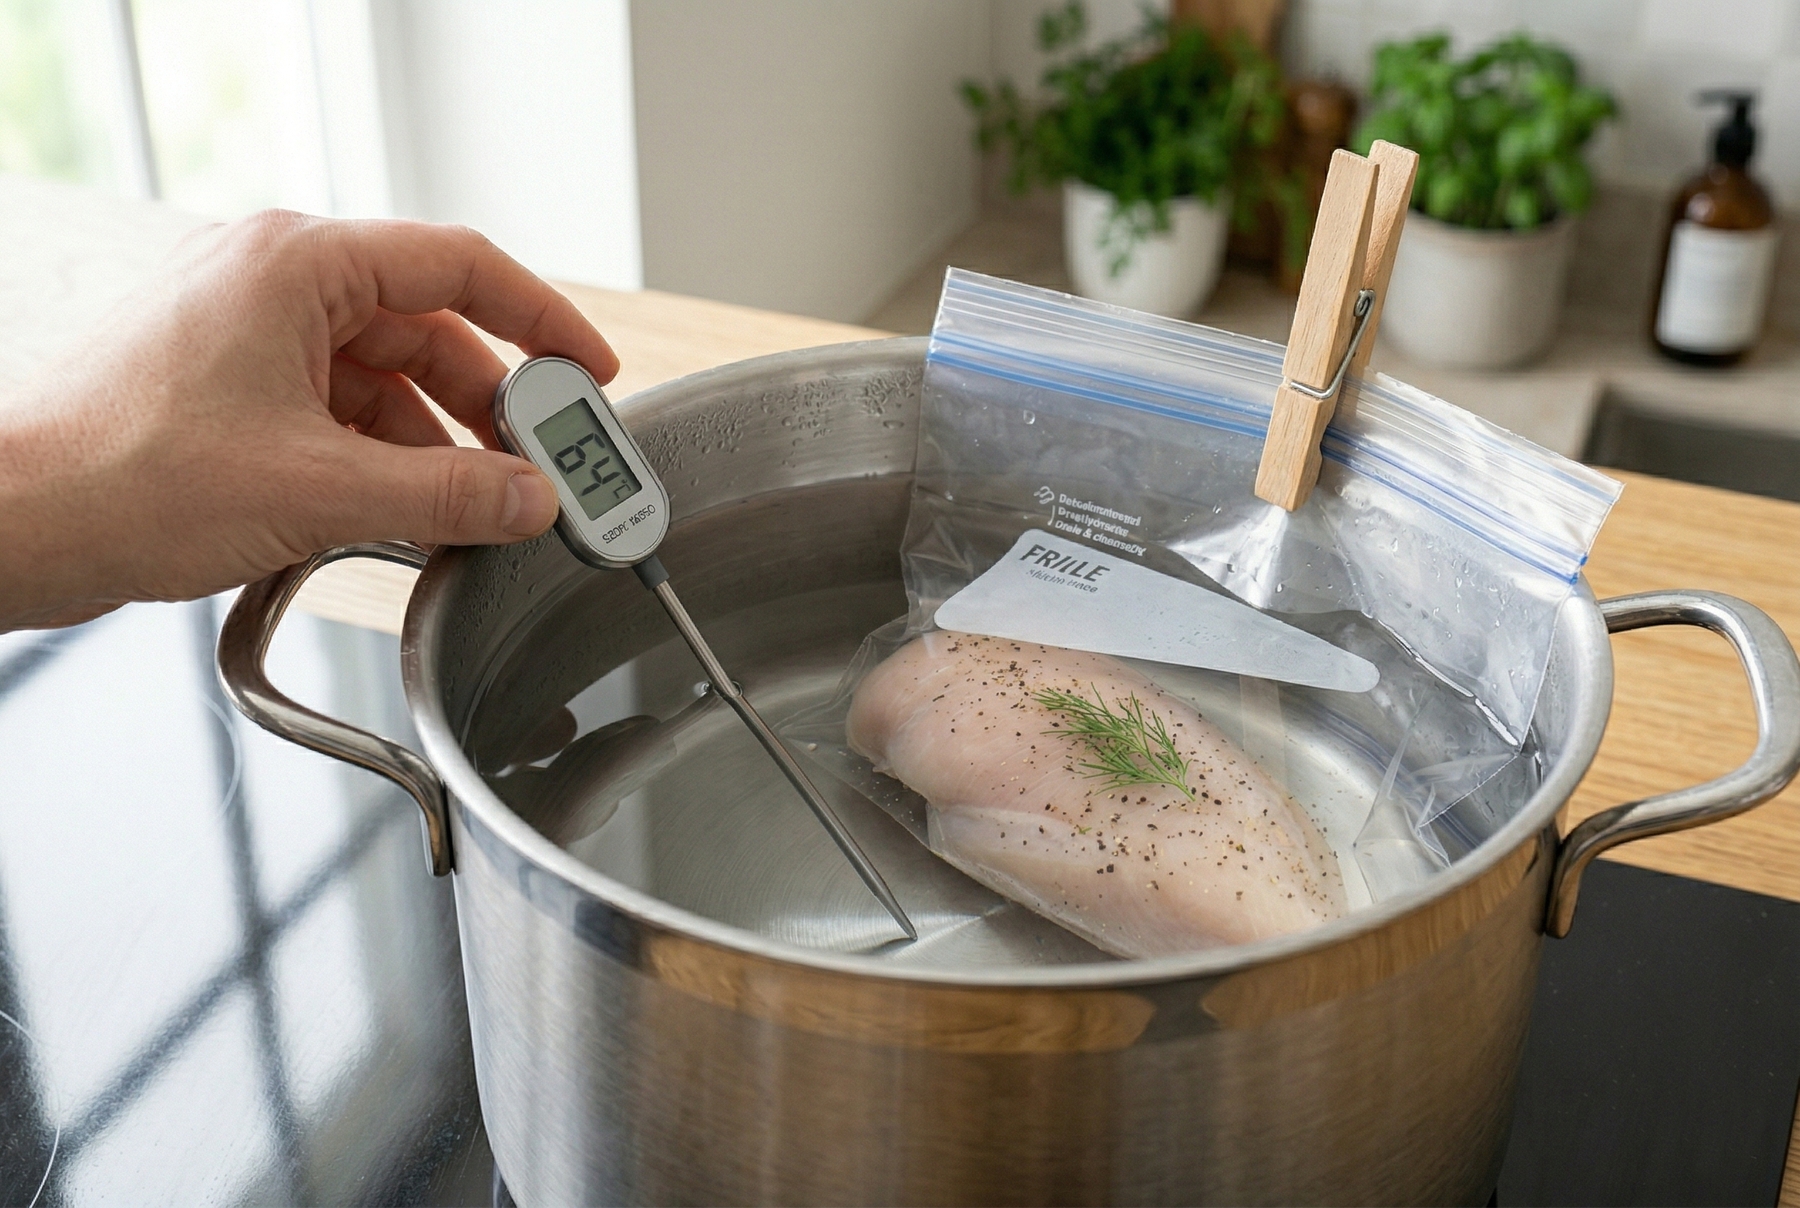
The main challenge lies in maintaining a stable temperature. A chicken breast cooks at 64°C (147°F) for approximately an hour and a half.
Guidelines for Temperature and Time
These figures serve as a starting point rather than strict dogma. The cooking time naturally depends on the thickness of the cut:
Chicken breast: 64–65°C (147–149°F) for 1.5 to 2 hours. The meat emerges tender and exceptionally juicy, entirely devoid of any rubbery texture. Cooking chicken below 60°C (140°F) is not recommended, as food safety becomes a concern.
Beef (medium rare): 56–57°C (133–135°F) for 1 to 2 hours, depending heavily on the thickness of the steak.
Pork tenderloin: 60–63°C (140–145°F) for 1 to 1.5 hours. At this temperature, the pork retains a slight pink hue in the center, which is completely safe and desirable when the time is properly observed. However, experimenting with pork below 60°C (140°F) is best avoided.
Salmon: 50–52°C (122–126°F) for 30 to 45 minutes. The texture becomes incredibly silky, featuring a characteristic creamy center. This represents a distinct culinary style rather than a deep thermal cook, as the fish remains almost raw inside at these temperatures. Raising the temperature to 55°C (131°F) is a good option if you have any doubts about the fish’s quality.
Whole egg in the shell: 64°C (147°F) for 1 hour. We will discuss this fascinating technique in more detail below.
Why the Meat Looks So Strange
Pulling the cooked ingredient from the bag often reveals a somewhat unappetizing sight. The meat appears pale, soft, and completely devoid of a crust, sitting in slightly cloudy juices. This is entirely normal.
The Maillard reaction—the chemical process responsible for a beautiful crust, a deep brown color, and the irresistible aroma of roasted meat—only occurs at high surface temperatures, typically from 140°C (285°F) upwards. Sous-vide simply cannot trigger this reaction. Therefore, finishing the meat in a skillet is an absolute necessity.
Heating a skillet until it is smoking hot is the crucial next step. Adding a high-smoke-point fat, such as ghee or refined sunflower oil, prepares the surface. Placing the meat in the pan and giving it just 30 to 45 seconds per side is all it takes. The inside is already perfectly cooked, so the sole objective is to develop a crust. Aggressive sizzling and a fair amount of smoke are excellent signs. The desired color is dark brown, almost nutty, creating a stark contrast between the crispy exterior and the tender, rosy interior.
What to Do If the Temperature Spikes
Mistakes happen. Perhaps you got distracted, and the water in the pot climbed to 75°C (167°F). A chicken breast begins to toughen significantly at this heat. If the spike occurred recently, immediately removing the bag and plunging it into an ice bath rapidly halts the cooking process. The meat will lose some of its pristine juiciness but remains highly edible.
If the temperature lingered above the ideal range for an extended period, the cut is likely overcooked. Slicing it thinly and serving it with a robust sauce easily rescues the dish. (Many cooks have done exactly this and successfully presented it as the original plan.)
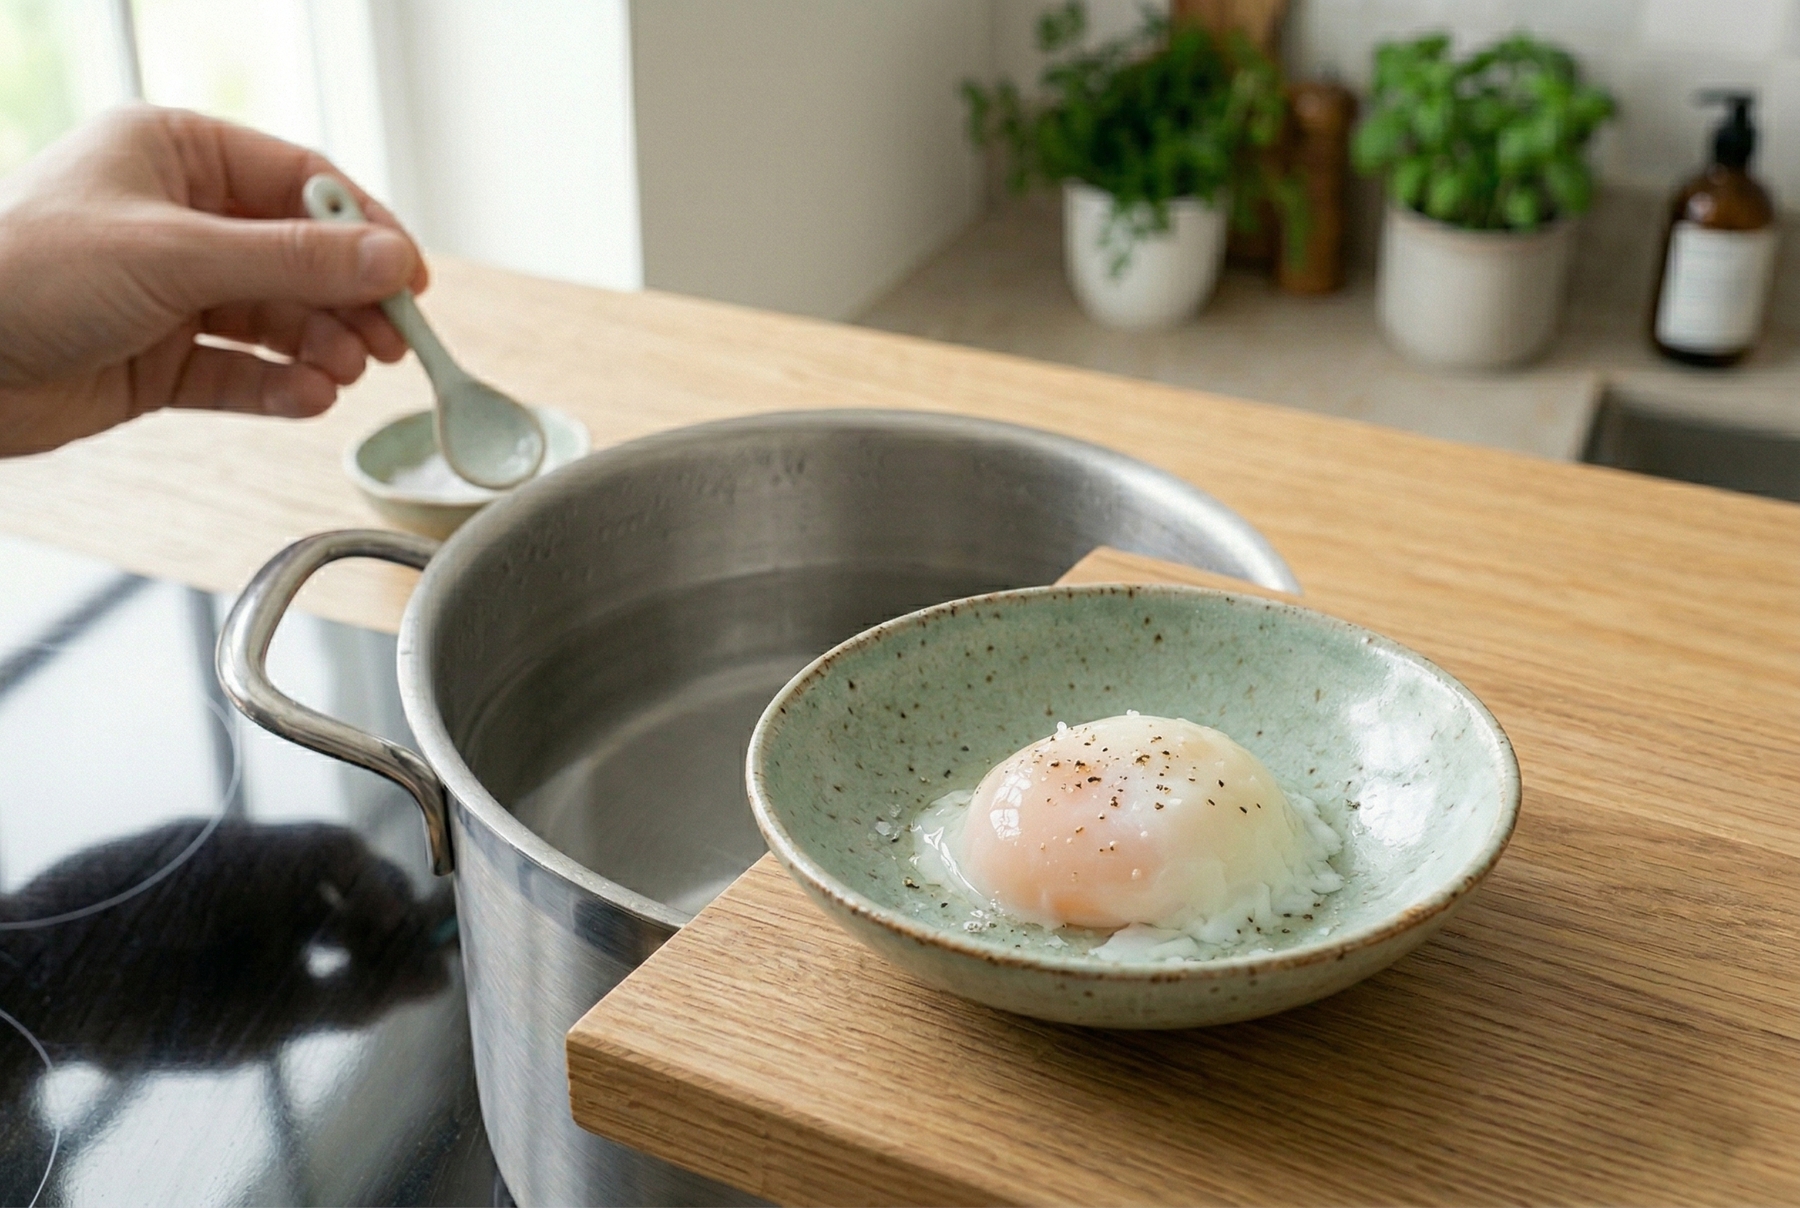
The texture of an egg after one hour at 64°C (147°F) yields a delicate white and a creamy yolk that is impossible to achieve through any other method.
The 64-Degree Egg
This specific experiment is worth conducting simply to understand why this entire conversation about precise temperatures matters.
Gently lowering a raw egg, still in its shell, into a 64°C (147°F) water bath is where it starts. Holding it there for exactly one hour, carefully maintaining the heat, leads to a remarkable transformation before you crack it onto a plate.
The egg white will be barely set: milky-white, trembling, and almost creamy in its consistency. The yolk emerges warm and slightly thickened, yet entirely runny. No other cooking method produces anything quite like it. High-end restaurant menus frequently feature this as a “64-degree egg,” often serving it alongside fresh truffles and a Parmesan foam.
Is Buying a Circulator Worth It?
Two or three attempts with a standard pot will quickly reveal where the method excels and where manually controlling the heat becomes tedious. An immersion circulator performs exactly one task perfectly: holding a precise temperature without demanding your attention.
If you find yourself captivated by the technique and plan to cook this way regularly, a circulator easily justifies its cost. Reliable models start around $50–$75 and can effortlessly last for a decade. If the experiment felt interesting but not life-changing, a good pot and a trusty thermometer remain more than sufficient for most culinary tasks.
0 comments