
My collection includes a Japanese bamboo whisk for tempura, a French wire frying basket, and an old tin grater for breadcrumbs. Three tools from different cuisines and eras, and none can replace the others. The same rule applies to frying coatings.
Tempura, wet batter, and dry breading are often grouped together, but they perform very differently. Each coating sets in the oil and traps moisture in its own unique way. Tempura delivers a fragile shell that shatters under a fork with a gentle crackle. A classic batter is softer, enveloping the ingredient in steam. Meanwhile, breading creates a dry and resounding crunch that echoes across the dining table.
The primary distinction among tempura, batter, and breading lies in the desired outcome in the hot oil. Choosing between a delicate, brittle crust, a soft, pillowy shell, or a dry, heavy crunch remains the ultimate culinary decision.
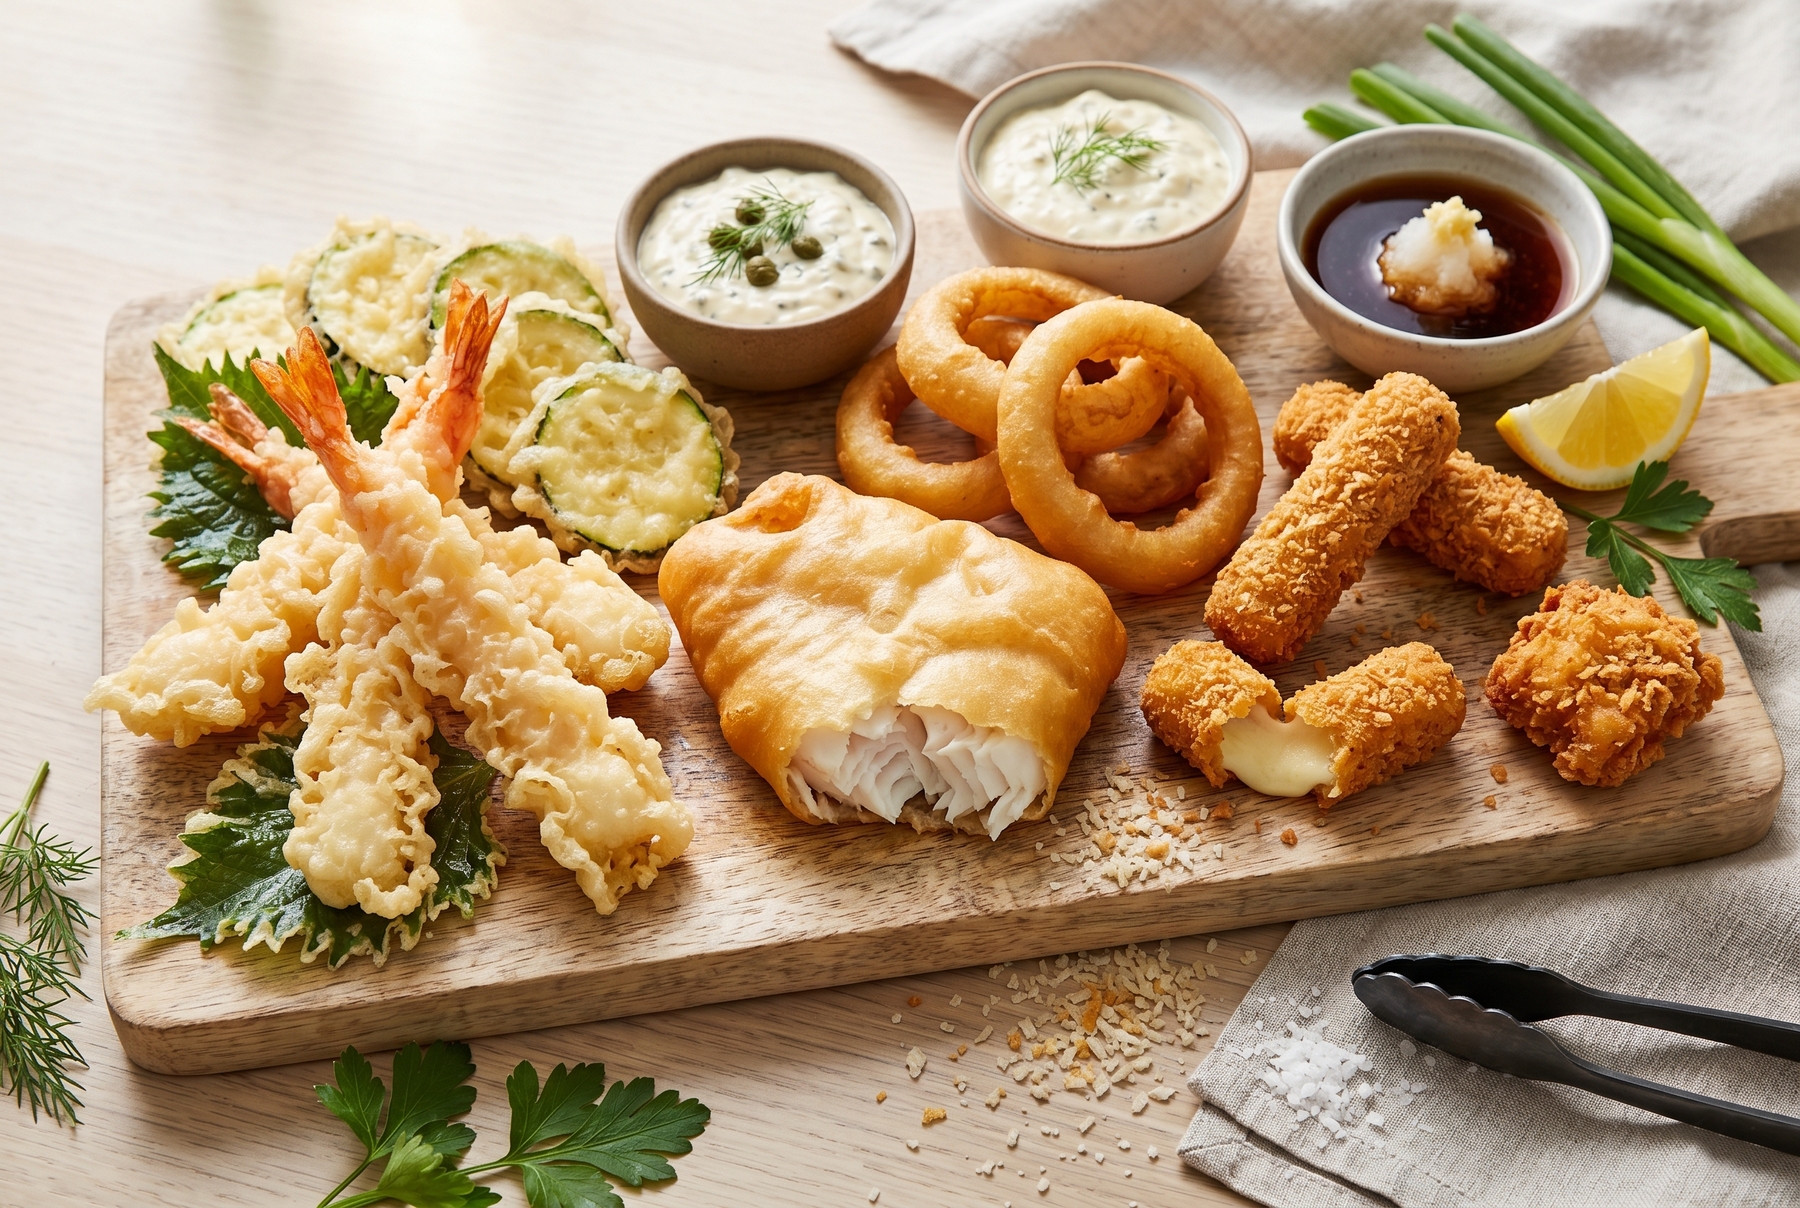
Tempura, classic wet batter, and dry breading yield entirely different visual effects and crust textures on fish, vegetables, and cheese.
Table of Contents
- What Covers the Ingredient Before Frying
- How They Behave in Oil: Crunch, Richness, and Temperature
- What Works Best for Fish, Seafood, Vegetables, Meat, and Cheese
- Cheat Sheet: What to Choose
- Why the Crust Falls Off, Gets Soggy, or Absorbs Oil
- The Difference Between Breadcrumbs, Panko, Starch, and Homemade Alternatives
- How to Make Them at Home: Three Working Formulas
- Choosing by Purpose, Not by Trend
What Covers the Ingredient Before Frying
Tempura: A Cold Suspension, Not Just a “Japanese Batter”
Tempura is often referred to as a Japanese batter, but this is merely a convenient label rather than an accurate one. In reality, it represents a distinct technique for achieving a paper-thin, crispy crust.
A standard batter behaves like a dough: it requires mixing to achieve a smooth consistency and sometimes needs time to rest. Tempura functions more like a suspension. Mixing it thoroughly is actively discouraged, and leaving lumps in the mixture is entirely intentional. The main objective involves preventing gluten development, which would otherwise turn the shell viscous and heavy. The foundation relies on simple ingredients: flour, ice water, and occasionally an egg or a touch of starch. Combining it takes just a few swift motions—eight to ten short strokes with a whisk before stopping. The resulting mixture should resemble a thin, uneven slurry, appearing slightly cloudy with visible patches of dry flour floating on the surface. This very irregularity produces its signature lacy, almost porous structure.
Ice water plays a crucial role in tempura by halting gluten formation, ensuring the mixture remains fluid for longer without clinging to the food in thick, heavy threads. When this cold suspension hits the hot oil, the water vaporizes instantly, leaving behind a delicate, brittle shell on the ingredient.
Batter: A Liquid Dough With Endless Possibilities
Wet batters come in many variations, ranging from a basic mix of flour, water, and salt to a robust beer batter enriched with egg and carbonation, which puffs up into a soft, golden crust in the fryer. Cooks often experiment with milk, eggs, cheese, baking powder, or turmeric for an added burst of color.
A standard batter differs from tempura primarily in its preparation, requiring a smoother, more even mix where lumps are undesirable. However, overmixing remains a risk, as excessive gluten makes the resulting crust dense or rubbery. Achieving a homogeneous texture signals the right time to stop. The final crust emerges noticeably thicker and denser than tempura. While it is softer than breading and less crunchy than tempura, it excels at retaining moisture and shielding the delicate ingredient from direct, scorching heat.
Breading: Dry and Multilayered
Breading operates on an entirely different logic, relying on three distinct layers instead of a fluid mixture. The sequence begins with flour, moves to a beaten egg (or an egg wash mixed with a splash of milk), and finishes with a textured crumb, such as traditional breadcrumbs or panko (Japanese-style airy breadcrumbs).
The initial layer of flour adheres tightly to the surface, particularly if the ingredient is slightly moist. The egg acts as an edible glue, securely binding the flour to the final layer of crumbs. Once submerged in hot oil, these outer crumbs dry out and transform into a deeply crunchy, porous exterior.
Breading adheres much more firmly when the ingredient is first patted dry with a paper towel, dusted with flour, and shaken to remove any excess. Dipping it into the egg and firmly pressing the crumbs on with the palm of the hand ensures a secure bond. Allowing the breaded item to rest for five to ten minutes helps the crumb layer adhere properly to the surface.
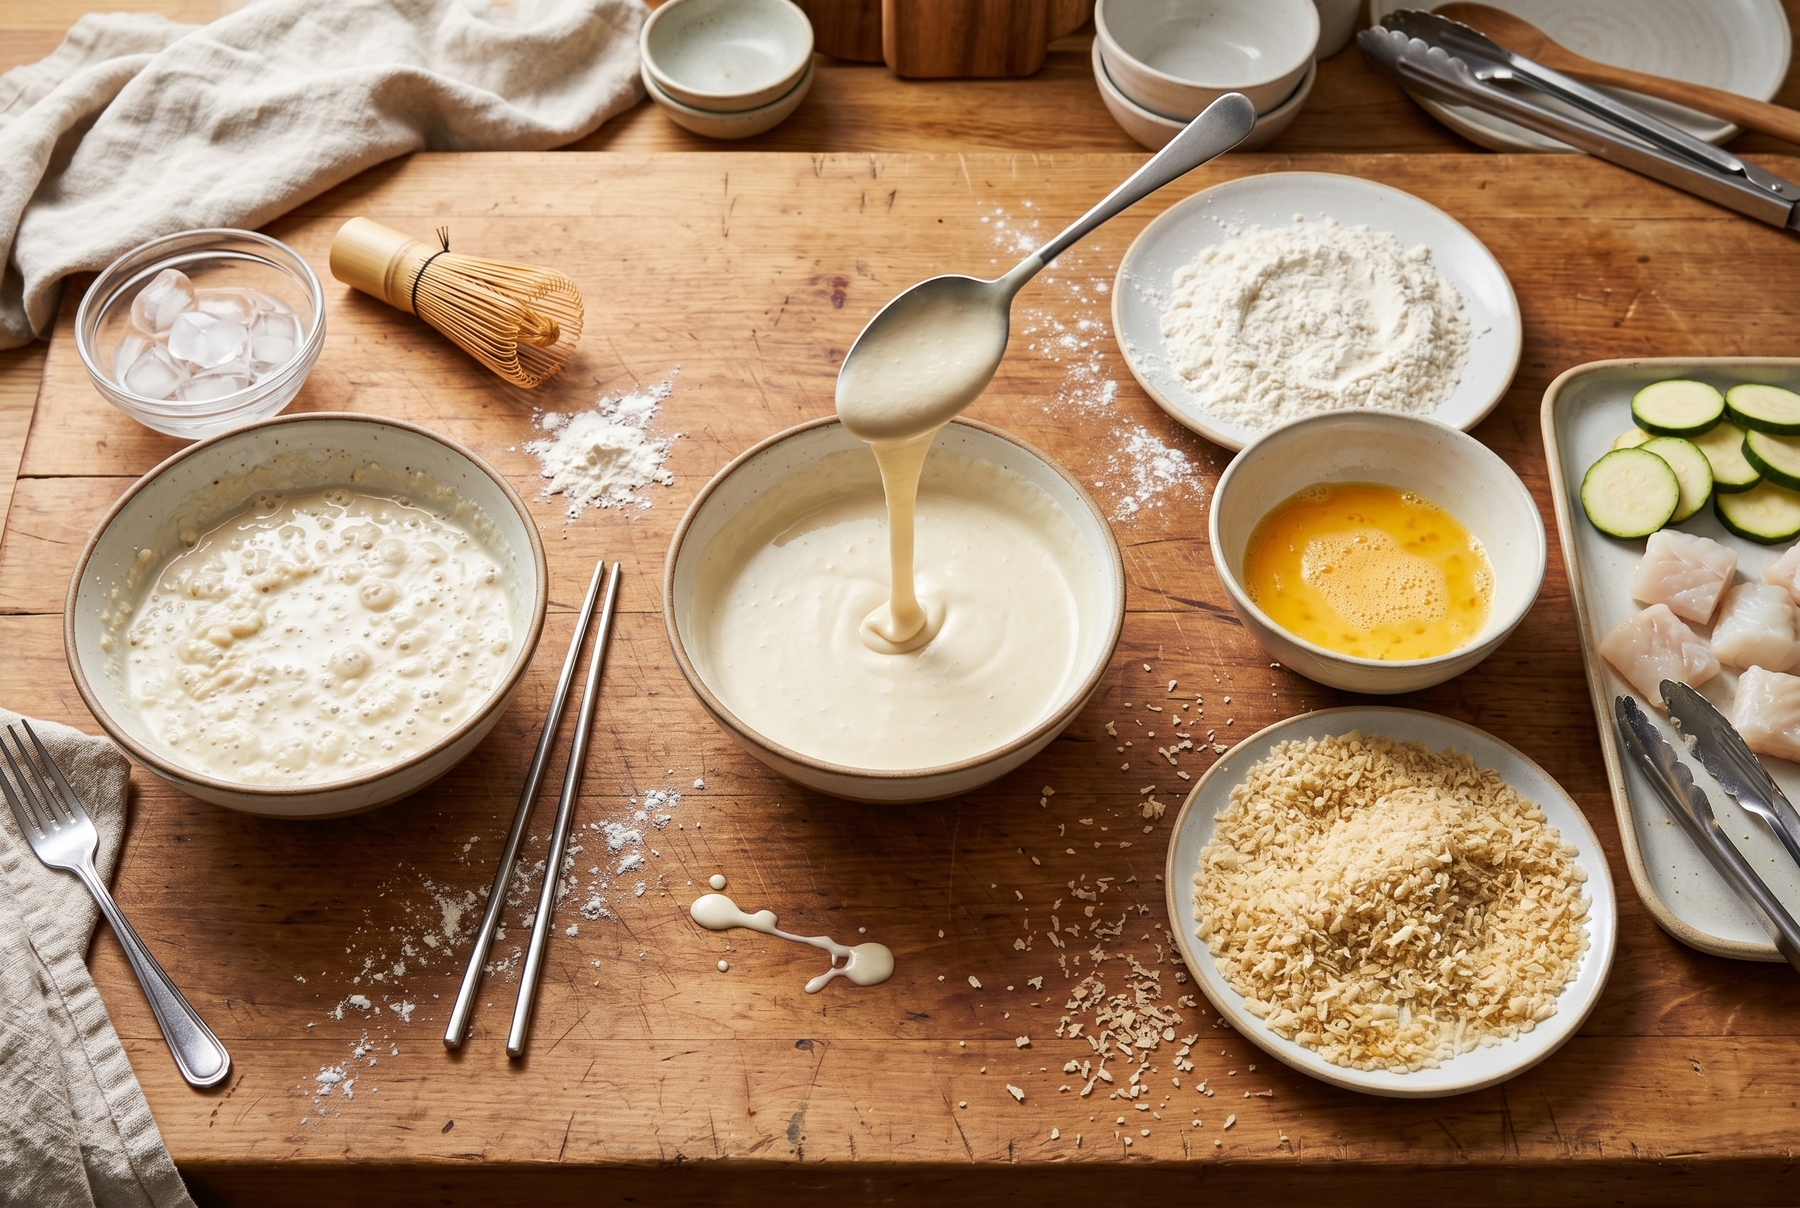
Each coating type demands a specific sequence, ranging from a lumpy tempura suspension to a multilayered dry breading.
How They Behave in Oil: Crunch, Richness, and Temperature
Why Temperature Contrast Is Crucial for Tempura
Tempura batter is kept ice-cold, while the oil in the wok or pot is heated to 170–180 °C (340–355 °F). This sharp contrast is precisely what brings tempura together. When the icy batter hits the hot fat, the water inside the mixture rapidly converts into steam. This expanding steam puffs up the batter from within, escaping through the pores and lumps deliberately left in the mix. This volatile reaction creates the iconic lacy texture.
At the correct temperature, the oil bubbles rapidly but without an aggressive, violent hiss around the food. Large, noisy bubbles indicate overheating, which will quickly cause the oil to smoke and impart a bitter flavor. Conversely, sluggish, sparse bubbles suggest the oil is too cold, prompting the batter to absorb excess fat rather than forming a crisp shell. The perfect indicator involves small, frequent, and even bubbles, closely resembling carbonated water in a glass.
Frying tempura in small batches yields the best results. Introducing too much cold batter into the oil at once causes the temperature to plummet, replacing a delicate, fragile shell with a greasy, limp coating.
Why Wet Batters Easily Become Heavy
Batters most commonly fail due to an overly thick consistency or insufficiently heated oil. When the mixture is too dense, it struggles to fry evenly, setting rapidly on the outside while remaining raw and doughy on the inside. This results in a heavy, greasy crust that tends to peel away from the food at the very first bite.
A properly made batter envelops the ingredient in a thin, even layer without sliding off in clumsy clumps. Lifting a piece from the bowl should reveal the mixture dripping slowly and smoothly, devoid of breaks or thick, gloopy runs. Using a beer batter or one made with sparkling water lightens the final texture, as the trapped carbon dioxide aerates the mixture from within.
Overmixing the batter remains another common pitfall, especially when using a strong flour with a higher gluten content. Extended mixing turns the batter stringy and elastic, ultimately producing a tough, leathery crust.
Why Breading Crunches Louder and What Usually Interferes With It
Breading consistently delivers the loudest crust, offering a dry, resonant crunch with every bite. However, executing the steps in the correct order is absolutely critical for this method.
Excess moisture stands as the greatest enemy of a good breading. A wet ingredient dropped directly into flour produces a loose, crumbly crust that falls apart in the pan. If the flour sits in damp patches, the egg wash pools unevenly over it. Consequently, the breadcrumbs stick irregularly and burn in spotty patches once they hit the hot oil.
Allowing the ingredient to rest for a few minutes after coating makes a significant difference. Five minutes on the counter or a brief stint in the refrigerator provides enough time for the layers to bond securely. This resting period ensures the crust stays intact during frying, preventing it from shriveling or flaking off in chunks.
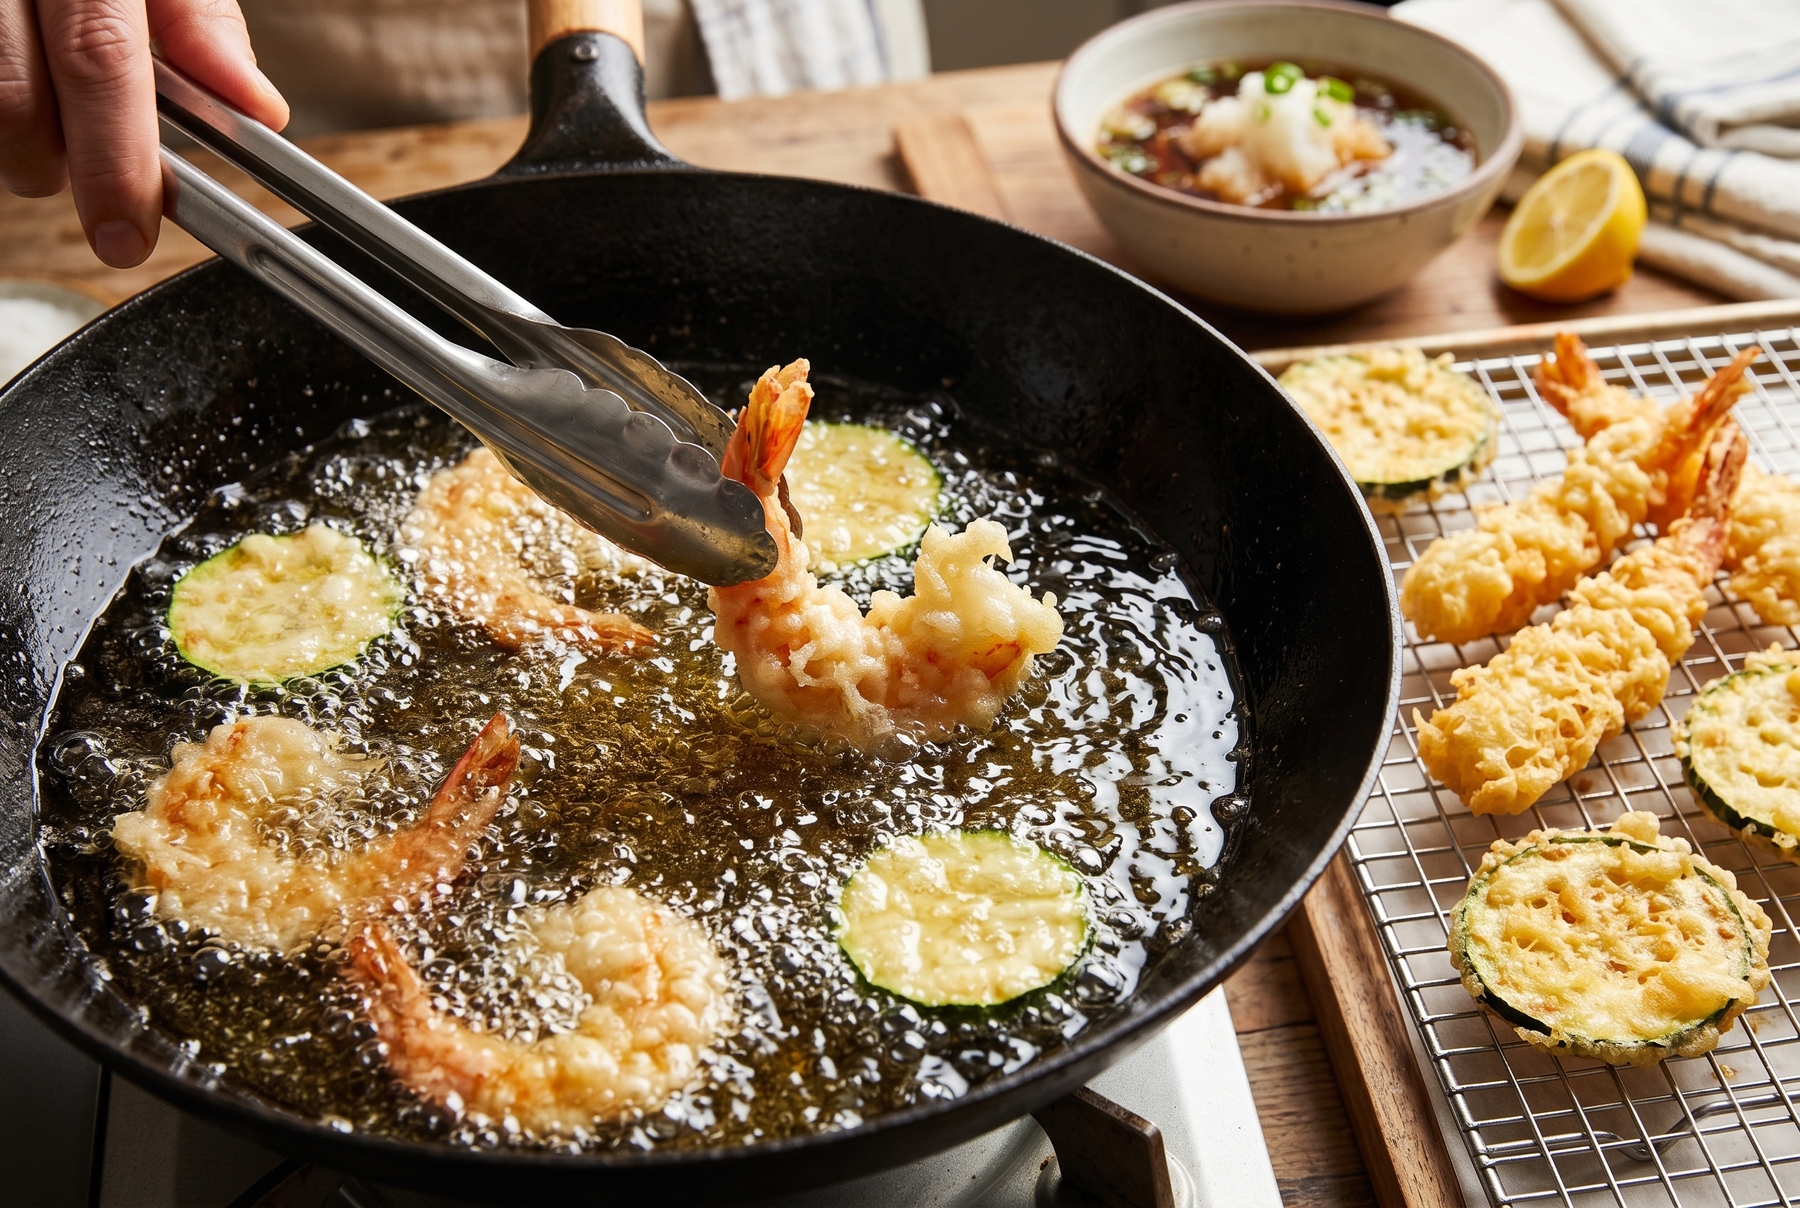
Precise oil temperature and ice-cold batter combine to create the legendary, shatteringly crisp crust of Japanese tempura.
What Works Best for Fish, Seafood, Vegetables, Meat, and Cheese
Fish
Thin fillets of white fish, such as tilapia, cod, or halibut, are exceptionally well-suited for tempura. The delicate shell cooks quickly and refuses to weigh down the delicate protein, leaving the fish incredibly juicy inside.
A thicker wet batter is favored when a more substantial shell is desired. Classic British fish and chips rely entirely on this method, utilizing a fluffy, beer-infused batter that crisps slightly on the outside while remaining soft near the fish. It seals the fillet tightly, allowing the fish to gently steam in its own savory juices.
Breading proves ideal for fish cakes, schnitzels, homemade nuggets, and fish sticks. The dry crumb coating clings beautifully to dense cuts and molded patties, where a highly textured, visible crust is essential. However, breading a very thin fillet easily leads to overcooking, as the fish will likely dry out before the crust achieves its perfect golden hue.
Shrimp, Squid, and Other Seafood
For shrimp, squid, and similar seafood, tempura frequently emerges as the most successful choice. It offers a fast, light preparation without burdening delicate ingredients with a heavy crust. A tempura-battered shrimp cooks in just two to three minutes, retaining a firm, snappy interior. Squid rings in tempura turn out perfectly springy and never rubbery, provided the oil is sufficiently hot and the frying time remains brief.
A standard wet batter works well when preparing a more filling appetizer, as the pronounced crust makes the portion feel noticeably more substantial.
While frying squid and shrimp in a dry breading is entirely possible, strict attention to cooking time is necessary to prevent them from turning tough, as they cook extremely quickly.
Vegetables
Tempura shines particularly brightly with moisture-rich vegetables like zucchini, eggplant, broccoli, button mushrooms, pumpkin, and green beans. The ethereal shell enhances rather than masks the natural flavors, especially when the batter is lightly seasoned.
A traditional batter clings exceptionally well to onion rings. Their flat surfaces give the thick mixture plenty to grip, and a fluffy, golden shell feels perfectly at home here. Sliced zucchini cooked in a wet batter turns out softer and significantly denser than its tempura counterpart.
Breading serves vegetables best when a robust, sturdy crust is required, such as with eggplant or cauliflower patties, or whole breaded mushrooms. However, moisture-heavy vegetables like eggplant and zucchini require pre-drying before breading, or the crust will quickly disintegrate in the hot oil.
Chicken, Pork, Schnitzels, and Patties
Meat preparations almost universally favor a dry breading. The crunchy exterior partially shields the surface from drying out, though ultimate juiciness still depends on the thickness of the cut, oil temperature, and frying time. A classic Wiener schnitzel, a Japanese tonkatsu, or homemade chicken patties all rely heavily on a crisp coating of traditional breadcrumbs or panko.
Wet batters are more appropriate for homestyle chicken bites, liver, or thin cutlets. This method is chosen when a softer, slightly pillowy crust is preferred over a dry, aggressive crunch.
While tempura can technically work with meat, it leaves little room for error. A paper-thin slice of chicken or beef cooks perfectly in the time it takes for the delicate shell to set. However, a thick pork chop in tempura guarantees disappointment, resulting in an exterior that browns long before the center safely cooks through.
Cheese
Breading offers the most reliable method for frying cheese, especially when the goal is to prevent a messy blowout. As cheese heats, it melts and exerts intense outward pressure on its casing. A thin wet batter cannot withstand this force, allowing molten cheese to easily breach the shell and leak into the oil. A dry breading holds its shape far better, particularly when using a double-breading technique: flour, egg, crumbs, a second egg dip, and a final coat of crumbs.
Temperature control proves even more critical here. Cheese must be thoroughly chilled before frying. The cold core slows down the melting process, giving the crust enough time to securely set in the hot oil before the interior turns entirely liquid.
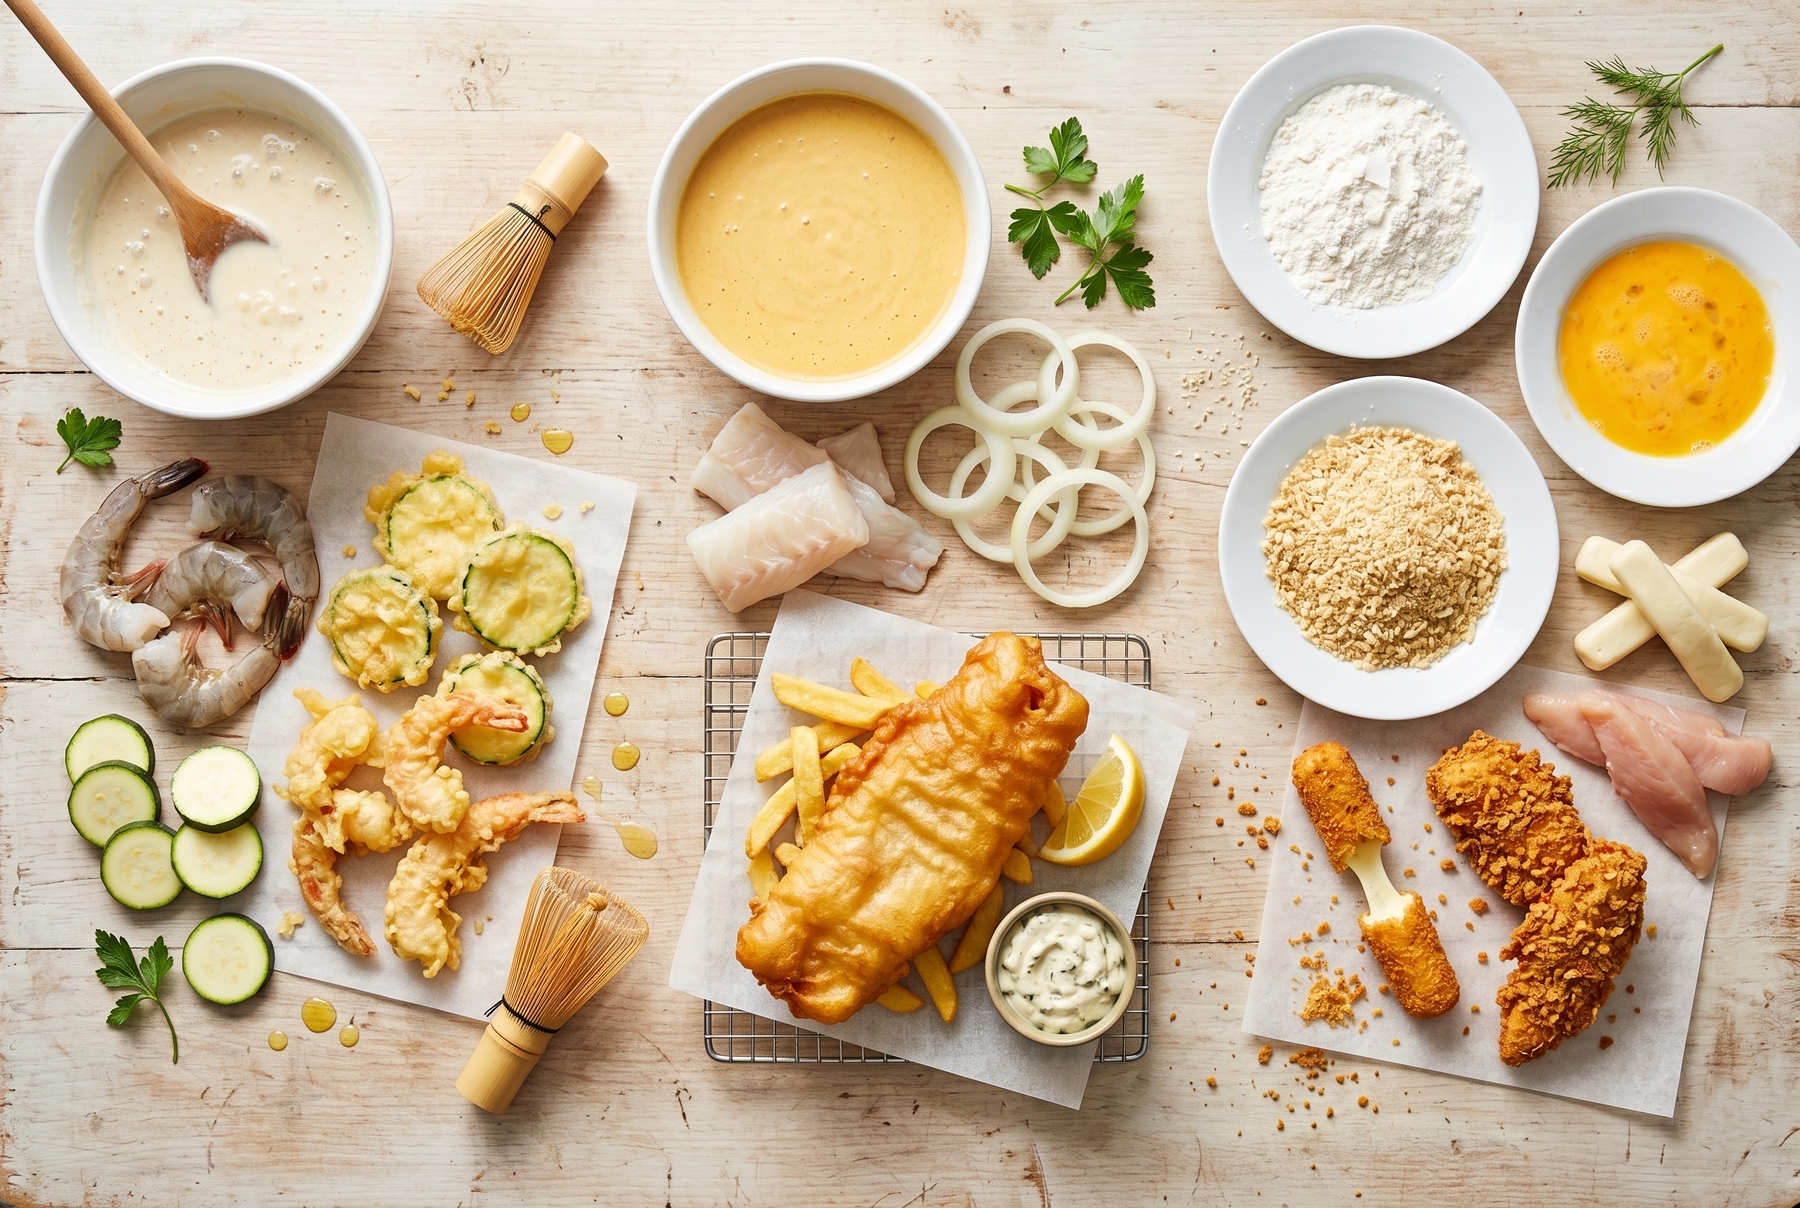
Choosing among tempura, batter, and breading depends heavily on the ingredient and the desired density of the final crust.
Cheat Sheet: What to Choose
| Ingredient | Best Method | Crust Texture | Risk and Solution |
|---|---|---|---|
| White fish, thin fillets | Tempura | Light, fragile | Drying out: use hot oil, fry small pieces |
| Fish for fish and chips | Batter | Fluffy, soft | Heavy shell: avoid making the batter too thick |
| Fish schnitzel | Breading | Dry crunch | Raw center: avoid making it too thick |
| Shrimp | Tempura | Weightless | Rubbery inside: fry quickly |
| Squid | Tempura or batter | Springy or soft | Overcooking: control the time closely |
| Zucchini, eggplant | Tempura | Light, with a crunch | Excess moisture: dry thoroughly before frying |
| Onion rings | Batter | Fluffy | Greasiness: ensure the oil is hot enough |
| Cauliflower, mushrooms | Breading | Dense, crunchy | Coating falls off: dry well, don’t rush |
| Chicken fillet | Breading | Dry crunch | Crust burns: do not fry on maximum heat |
| Pork schnitzel | Breading | Golden, dry | Greasiness: fry without crowding the pan |
| Cheese | Double breading | Crunchy | Cheese leaks: use cold cheese, double layer |
| Button mushrooms | Tempura or breading | Light shell or dense crunch | Internal moisture: dry thoroughly |
Why the Crust Falls Off, Gets Soggy, or Absorbs Oil
The Ingredient Was Too Wet
Excess surface moisture remains the most common culprit. It prevents the coating from securely gripping the ingredient. Flour turns into a muddy paste, egg washes slide right off, and tempura batter droops away.
Starting the process with a paper towel is highly recommended. Moisture-rich vegetables like zucchini and eggplants benefit from being salted 15 to 20 minutes in advance. Waiting for them to release their water before patting them dry ensures both breading and tempura adhere significantly better.
The Oil Was Not Hot Enough
Frying in under-heated oil guarantees a heavy, saturated crust. The food sinks lazily into the warm fat, allowing the coating to soak up the oil rather than crisping up. This invariably results in a dense, greasy exterior entirely devoid of crunch.
Checking the oil temperature without a thermometer is simple: dipping a wooden skewer or the handle of a wooden spoon into the oil provides an immediate answer. If active, small bubbles instantly race around the wood, the temperature is right. Alternatively, carefully dropping a tiny bead of batter into the pot works well. It should pop up immediately and begin frying, rather than sinking silently to the bottom. Using a kitchen thermometer naturally eliminates all guesswork, a highly recommended practice for frequent deep-frying.
The Coating Layer Was Too Thick
The temptation to apply extra batter for maximum crunch is understandable, but the reality yields the exact opposite. A thick layer of wet batter or tempura will never fry all the way through. It effectively steams the food from the inside, becoming heavy and soggy. While the outside might look perfectly golden, the interior remains a gummy, undercooked dough.
Tempura requires a remarkably thin, almost translucent layer. With a classic wet batter, the outline of the ingredient should still be slightly visible before it hits the oil. Breading demands an even application, free from bald spots or thick, clumpy accumulations.
The Sequence Was Broken
In traditional breading, following the exact order is non-negotiable. Skipping the flour before the egg wash guarantees the breadcrumbs will slip right off. Dipping a raw, wet piece of meat straight into the egg simply turns the flour into a sloppy mess.
Tempura demands an entirely different approach. Preparing the batter immediately before frying, keeping it ice-cold, and avoiding unnecessary mixing are absolute rules. A tempura mixture left sitting at room temperature for half an hour and vigorously whisked multiple times will perform poorly, as developed gluten inevitably creates a heavy, doughy crust.
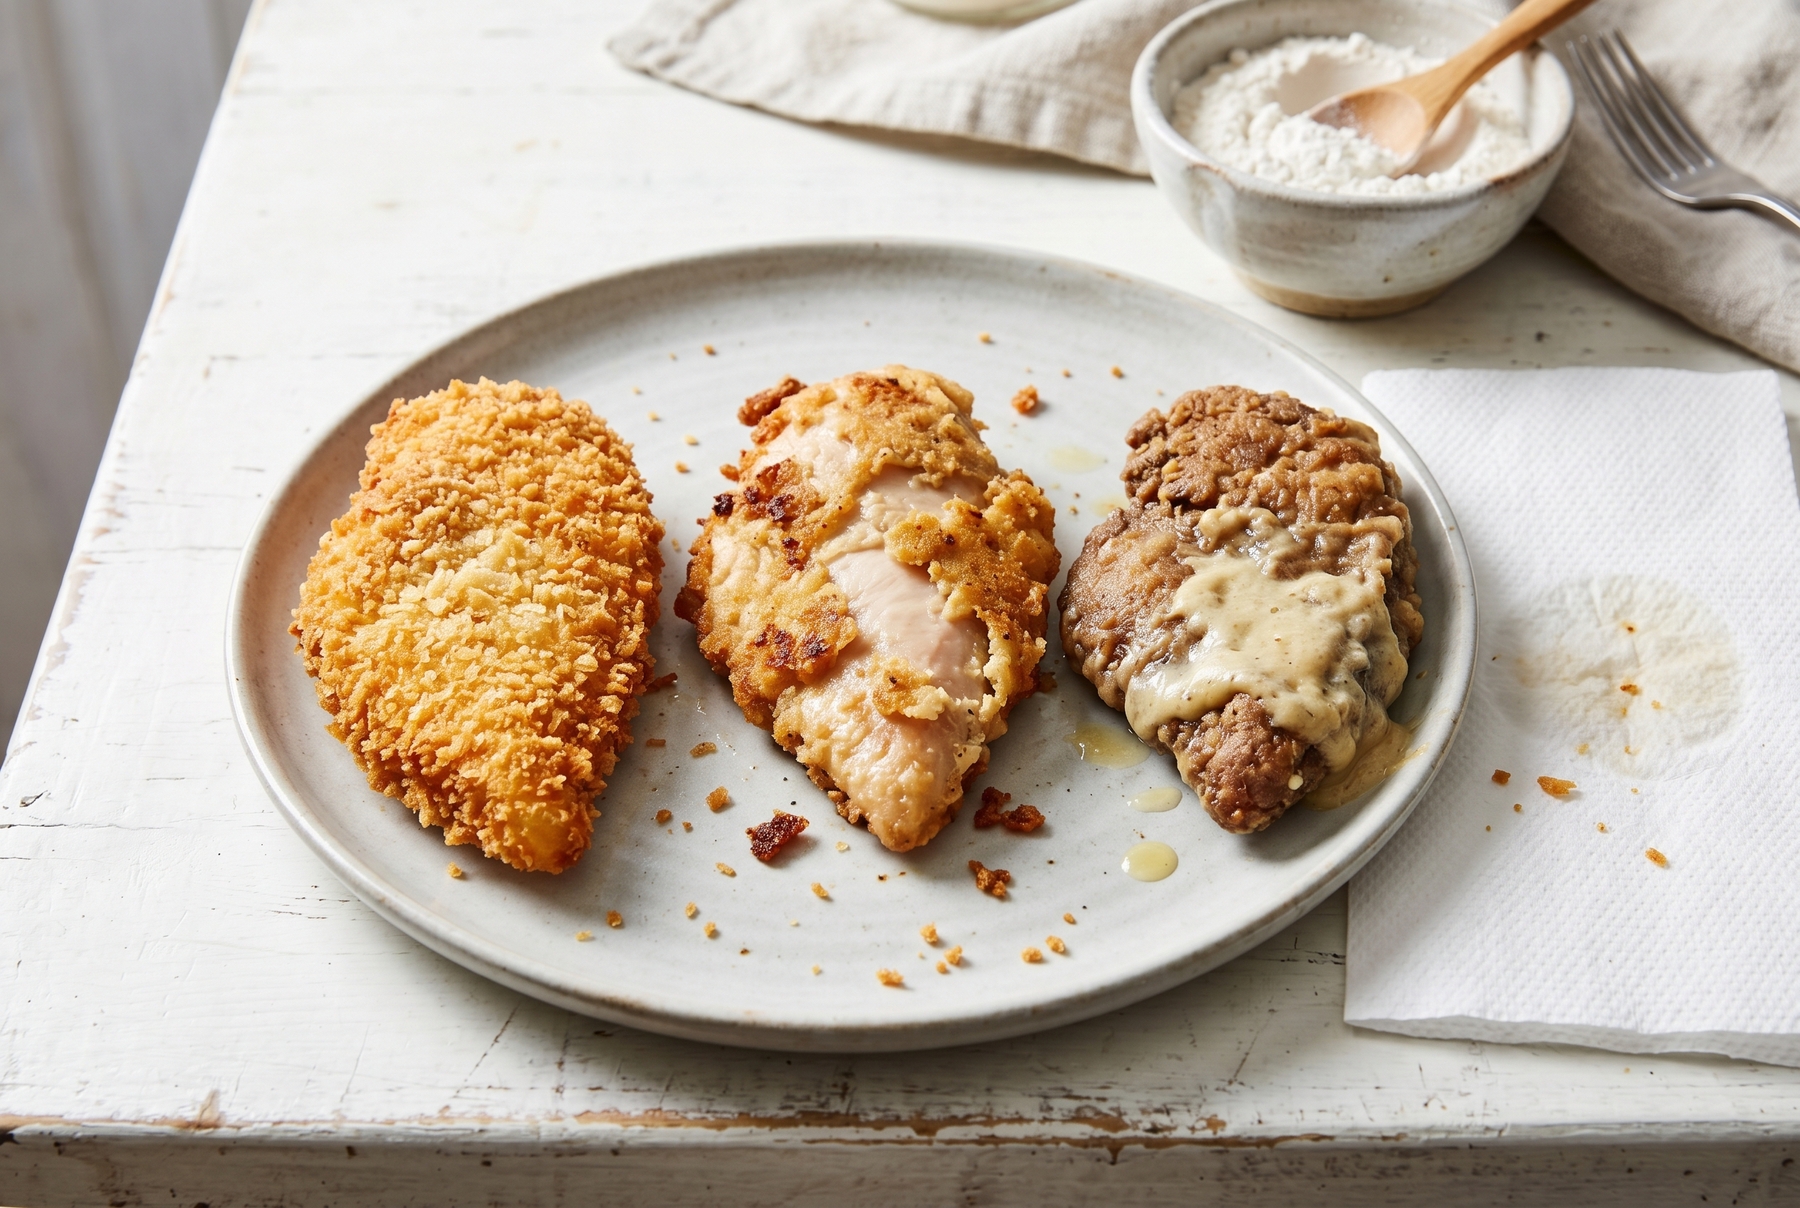
An overly thick layer or improper technique quickly causes the crust to become unpleasantly heavy or flake off completely.
The Difference Between Breadcrumbs, Panko, Starch, and Homemade Alternatives
Standard Breadcrumbs
Standard store-bought ground breadcrumbs produce a familiar, tight crust. It browns evenly and holds together well, though the texture can lean toward the dense side. Another crucial detail to note is that very fine crumbs darken rapidly in hot oil, especially if the temperature drifts too high.
Panko
Japanese panko flakes are significantly larger and airier than standard breadcrumbs. They deliver a pronounced, multidimensional crunch. A panko crust is never monolithic; instead, it is highly porous and textured, which makes the resulting crunch feel incredibly light and expansive.
Panko is widely available in most large grocery stores today, although the quality and flake size vary heavily by brand. Occasionally, products labeled as ‘panko’ barely differ from standard fine breadcrumbs. Examining the flakes before purchasing is advisable: they should be noticeably larger than typical crumbs, irregularly shaped, and incredibly lightweight.
Starch
Incorporating cornstarch or potato starch into a tempura batter (usually substituting about a third of the flour) produces an even more fragile, glass-like crust. Starch also shines on its own when applied as a paper-thin dusting before frying. This technique delivers a delicate, almost imperceptible crispness, a method frequently utilized in Chinese cuisine when flash-frying tender cuts of chicken or cubes of tofu.
Semolina, Cornmeal, and Crushed Cereal
Homemade alternatives to traditional breadcrumbs often save the day when pantry staples run low.
Semolina yields a sturdy, somewhat rustic crust that crunches loudly but feels noticeably heavier than panko. It serves as an excellent backup when standard breadcrumbs are unavailable. However, using semolina on delicate fish or soft cheese creates an overly aggressive shell that overpowers the ingredient.
Cornmeal introduces a distinct, grainy crunch, making it an excellent choice for savory corn fritters or coating sliced hearty, dense vegetables.
Crushed unsweetened cereals, such as rice or corn flakes, sometimes step in as a brilliant panko substitute. They provide a similarly expansive crunch, even though the overall texture carries a slightly different character.
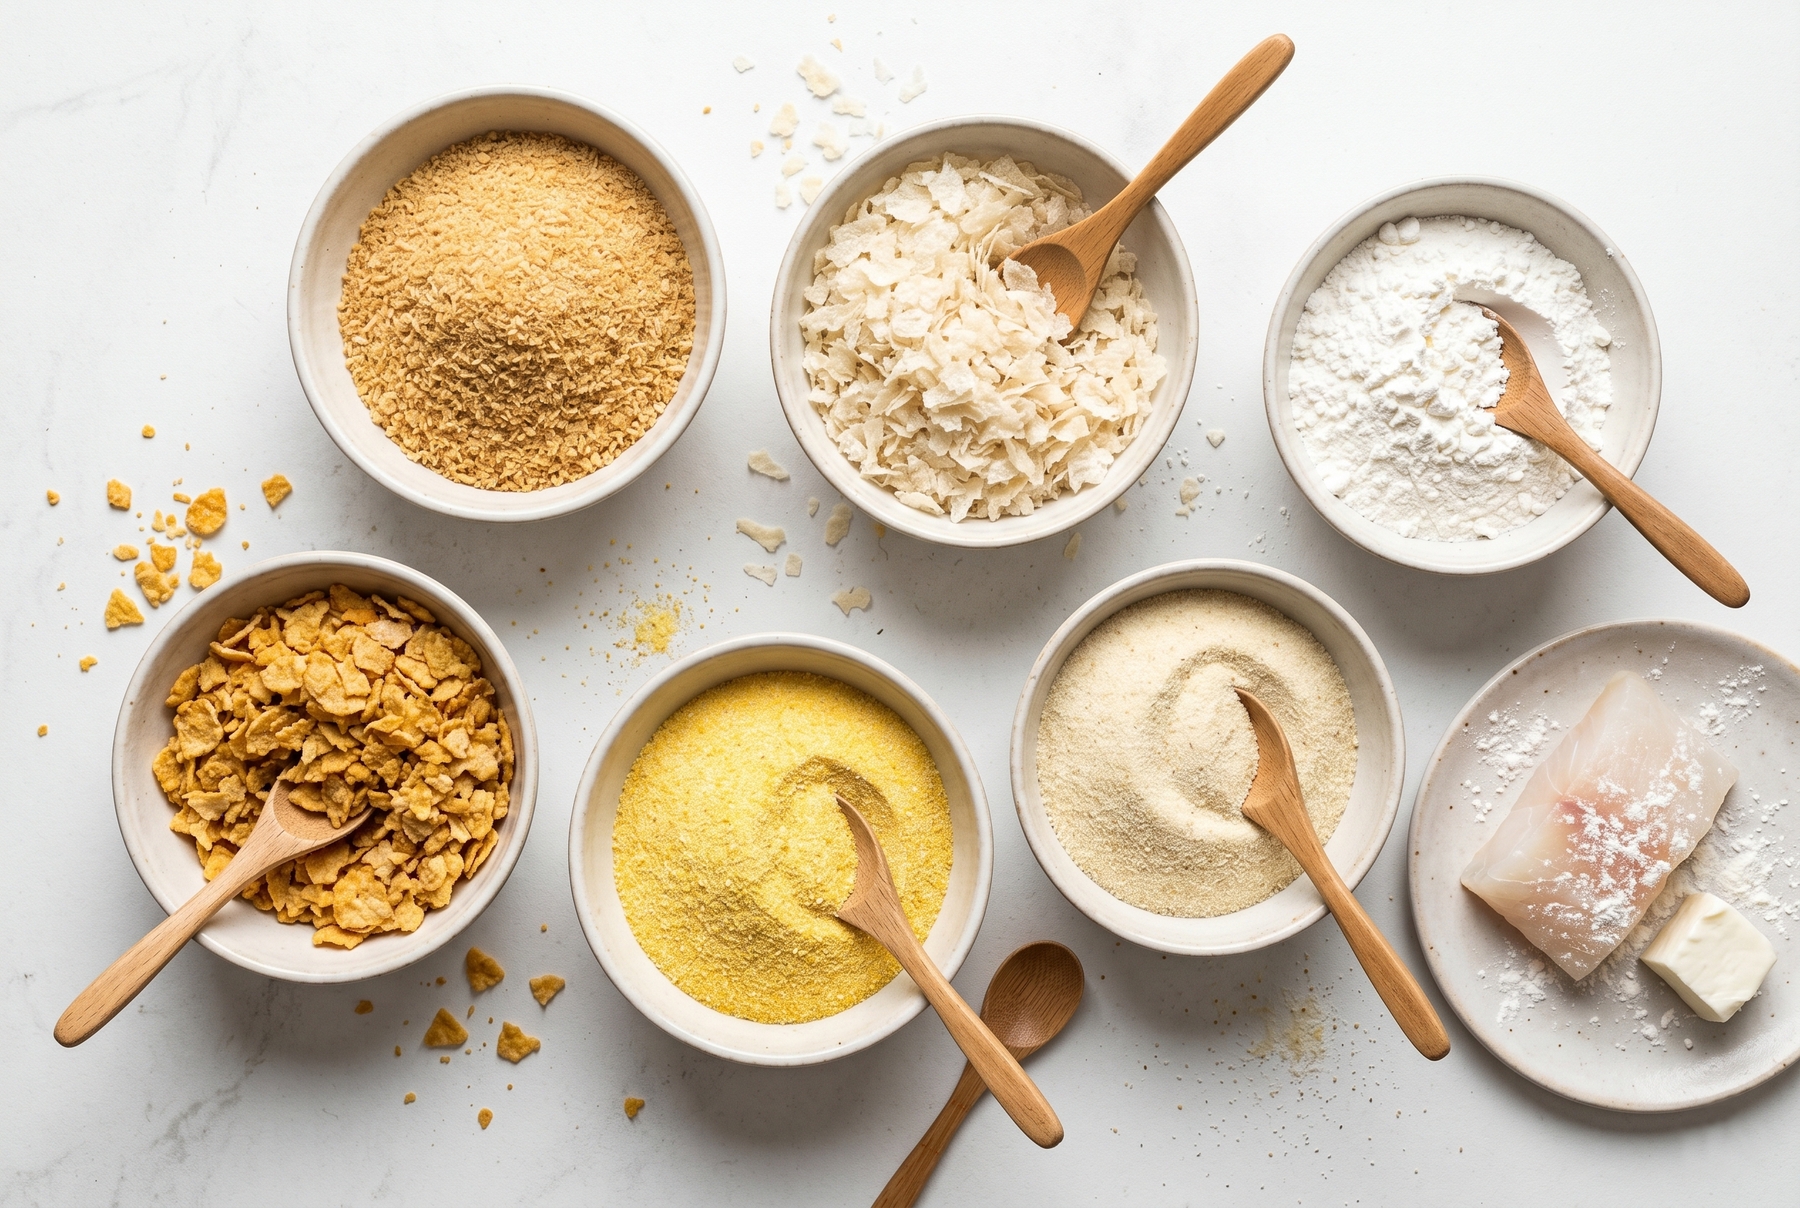
Panko, standard breadcrumbs, starch, and semolina each uniquely influence the volume and character of the final crunch.
How to Make Them at Home: Three Working Formulas
The Tempura Formula
Combining flour and ice water in a roughly 1:1 ratio by volume forms the foundation. Swapping up to a third of the flour for cornstarch adds extra crispness. Whisking one egg into the water before combining it with the dry ingredients is entirely optional. Adding just a tiny pinch of salt completes the mix. Stirring the batter with merely eight to ten brief strokes is essential. An uneven, lumpy appearance means the batter is perfect. Storing it in the cold until the exact moment of frying is strictly required.
Heating the oil to 170–180 °C (340–355 °F) sets the stage. Dipping the ingredient into the icy batter, allowing the excess to drip off, and gently lowering it into the oil in small batches ensures success. Frying happens fast, requiring only two to four minutes for most vegetables and seafood. Eating tempura immediately is mandatory, as the signature crunch disappears completely within ten minutes.
The ideal consistency features a thin, slightly cloudy liquid that glides off the food with little resistance. If the batter stretches thickly and refuses to release the ingredient, thinning it with a splash of ice water easily fixes the problem.
The Universal Batter Formula
Starting with a roughly 1:1 ratio of flour to liquid (such as water, milk, beer, or sparkling water) provides an excellent baseline. Salt is necessary, while adding an egg or a half-teaspoon of baking powder for a lighter texture remains optional.
Creating a thinner batter works best for fish and delicate vegetables, ensuring they are coated in a fine, elegant layer. Thickening the mix slightly suits onion rings and chicken, aiming for a consistency that slowly falls from a spoon in a thick ribbon. Whisking the batter until smooth, but stopping immediately before overmixing, guarantees a tender crust. Allowing the mixture to rest for five to ten minutes before frying yields the best results.
A sparkling water batter generally produces a lighter result, as the trapped CO₂ bubbles aerate the structure beautifully. Beer batter provides a subtle, complex bitterness and puffs up magnificently in the hot oil, thanks to its natural carbonation.
The Breading Formula
Executing three distinct steps in strict order guarantees a perfect breading. Step one involves tossing the thoroughly dried ingredient in flour and vigorously shaking off the excess. Step two requires submerging it completely in an egg wash. Step three finishes the process by rolling the item in crumbs and pressing gently with the palm. Resting the breaded pieces for five to ten minutes remains crucial.
A double breading becomes necessary when the coating faces significant stress, such as containing melting cheese, sealing in highly juicy ingredients, or preparing items for freezing before frying. After completing the first full cycle (flour, egg, crumbs), the ingredient goes back into the egg and receives a second coat of crumbs. This results in a noticeably thicker crust that withstands intense frying conditions effortlessly.
Choosing by Purpose, Not by Trend
Tempura stands out when a delicate, fragile, almost weightless crunch is desired for a fast-cooking ingredient that cannot bear a heavy coating. A wet batter excels when a soft, protective, and satisfying shell is needed to trap moisture and steam inside. Breading takes the crown when the ultimate goal is a dry, resonant crunch that adheres firmly to the food.
A well-executed crust functions as a culinary tool rather than a mere garnish. It locks in natural moisture, takes the initial blast of heat, and is the first texture to meet the teeth. It ultimately decides whether a piece of fish remains succulent or turns to dust, whether melted cheese holds its shape or vanishes into the frying oil, and whether a satisfying crunch happens instantly or requires three heavy chews. Ultimately, tempura, batter, and breading do not just offer different outer layers—they fundamentally change the entire bite on the fork.
0 comments