
The poached egg journey begins similarly for many. A cafe patron spots avocado toast topped with a neat white dome; a knife pierces the yolk, and golden liquid slowly cascades over the bread. Later at home, an egg drops into a pot, the water clouds, the egg white unravels into wispy threads, the yolk rolls to the side, and the kitchen smells of hot vinegar, reminiscent of descaling a kettle.
Poaching an egg appears daunting, yet it immediately reveals any missteps. An older egg, aggressively boiling water, dropping the egg from too high, or swirling the vortex like a bathtub drain all leave clear evidence in the pot.
Crafting a successful poached egg requires just four elements: a fresh egg, gentle hot water, a cup held close to the surface, and a timer within reach. Vinegar, a fine-mesh sieve, a ladle, plastic wrap, and a water vortex offer assistance, but they never replace the fundamental need for fresh eggs and calm water.
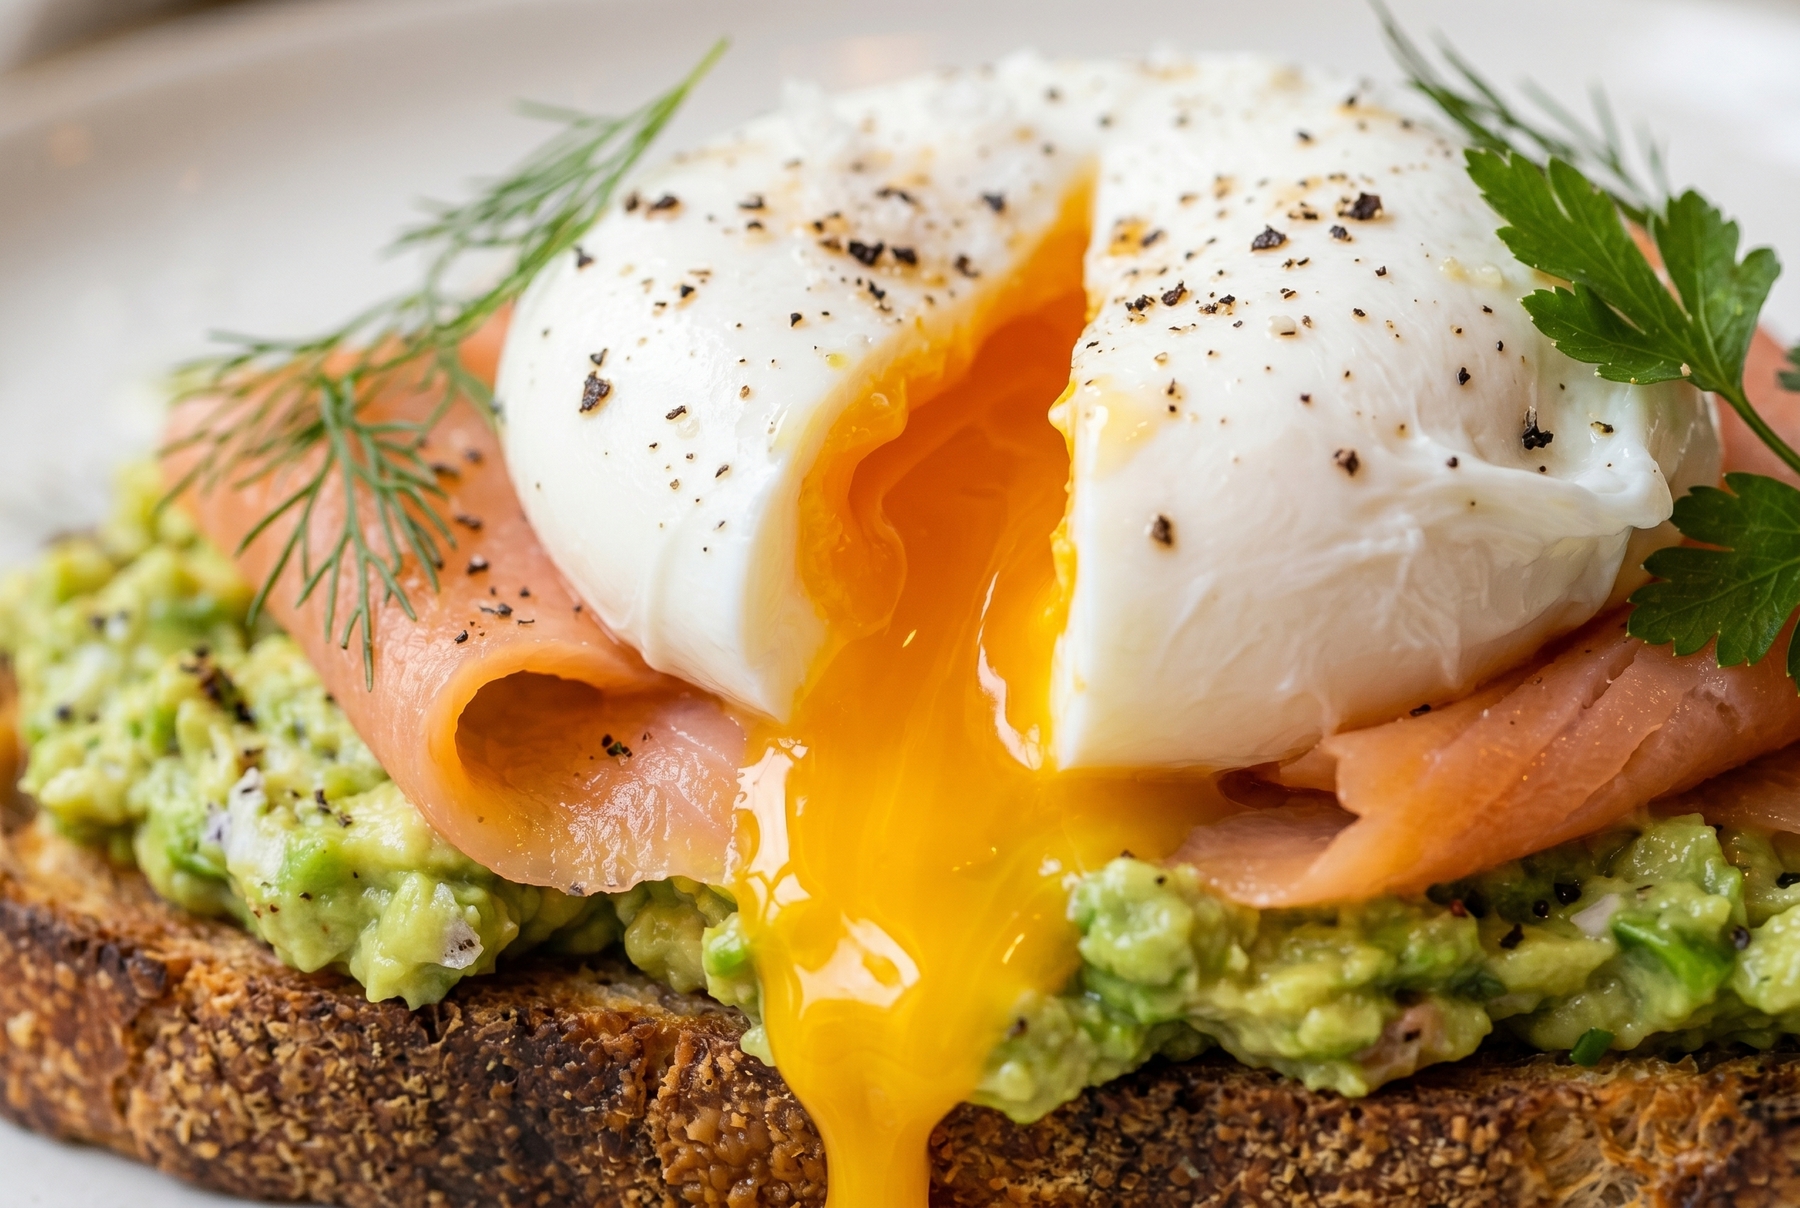
A properly cooked poached egg should feature a delicate white and a runny yolk, serving as the perfect rich sauce for toast.
Table of Contents
- Why Egg Whites Disintegrate in Water
- The Classic Method: Dropping the Egg Directly Into Water
- How to Poach an Egg Using a Fine-Mesh Sieve to Remove Watery Whites
- Poaching Eggs in Plastic Wrap or a Bag: Smoother Shape, Different Texture
- Poaching Eggs in a Ladle: Greater Control Without Plastic Wrap
- How to Poach Multiple Eggs Simultaneously
- When to Choose a Sieve, Plastic Wrap, or Ladle
- Exploring the Myriad Ways to Poach an Egg
- Troubleshooting Your Poached Egg Failures
- How to Serve a Poached Egg Without Ruining the Toast
- The Final Word on Achieving Poached Perfection
Why Egg Whites Disintegrate in Water
Poaching cooks the egg without its shell, relying entirely on the egg white for structure. A fresh egg features a noticeably firmer white. Cracking a fresh egg into a small bowl reveals a yolk resting on a tight albumen, surrounded by a thick, transparent layer that resists spreading into a thin puddle. An older egg presents a more watery white that quickly spreads, forming a liquid edge resembling slightly cloudy water.
This outer liquid albumen eventually transforms into those dreaded wispy threads. The firm section stays near the yolk, while the runny portion unravels in the water.
Freshness Matters More Than Vinegar
Recipes frequently start with vinegar. A spoonful or two supposedly coagulates the egg white, but this falls short. Vinegar slightly accelerates the setting process, particularly on the surface, but it cannot miraculously transform an egg with a watery white into a fresh one. The white still scatters across the pot even with vinegar.
Selecting the carton with the freshest date yields the best poached eggs. Seeking out farm-fresh eggs is optional, but prioritizing freshness minimizes egg white threads in the pot. Cracking the egg into a cup at home provides an immediate visual check of whether the white holds its shape or flattens into a thin circle.
Water Needs to Be Hot, Not Boiling
A rolling boil agitates the egg excessively. Bubbles strike from below, tossing the egg from all sides before the white has a chance to set, causing the edges to fray into a fringe.
Barely hot water leaves the white liquid for too long, allowing it to spread out completely before it begins to hold its shape.
Visual cues indicate the ideal temperature: tiny bubbles form on the bottom, the water emits steam, yet the surface remains mostly flat. The water shimmers slightly but refrains from bubbling. A thermometer reading around 80–90 °C (175–195 °F) marks the sweet spot. Without a thermometer, look for small bubbles at the base and gentle movement without large, popping bubbles.
Reducing the heat to low after reaching the desired temperature ensures a gentle environment.
The Role of the Water Vortex, Vinegar, and Salt
Creating a vortex assists when poaching a single egg. A gentle circular water motion gathers the white toward the center, producing a more compact egg. Swirling the water too vigorously creates a deep whirlpool, dragging the egg into the center, pulling the white into a long tail, and displacing the yolk. A single, soft circular stir with a spoon is perfectly sufficient.
A vortex becomes problematic when poaching multiple eggs. The eggs swirl, collide, and latch onto each other’s whites. Using a wide pan, calm water, and maintaining distance between the eggs proves much more effective.
Adding vinegar remains an option: a teaspoon or tablespoon per liter (about 1 quart) of water works well. A mild acidification provides a safety net when eggs are slightly older or when extra insurance is needed. However, the water should never smell like a kettle undergoing a deep clean. A sharp vinegar aroma has no place in the kitchen here.
Adding salt to the water fails to preserve the egg’s shape. Seasoning the egg directly on the plate, once it rests dry on a slice of toast or a bowl of porridge, delivers better flavor. This method keeps the salt on the egg white rather than washing it down the drain.
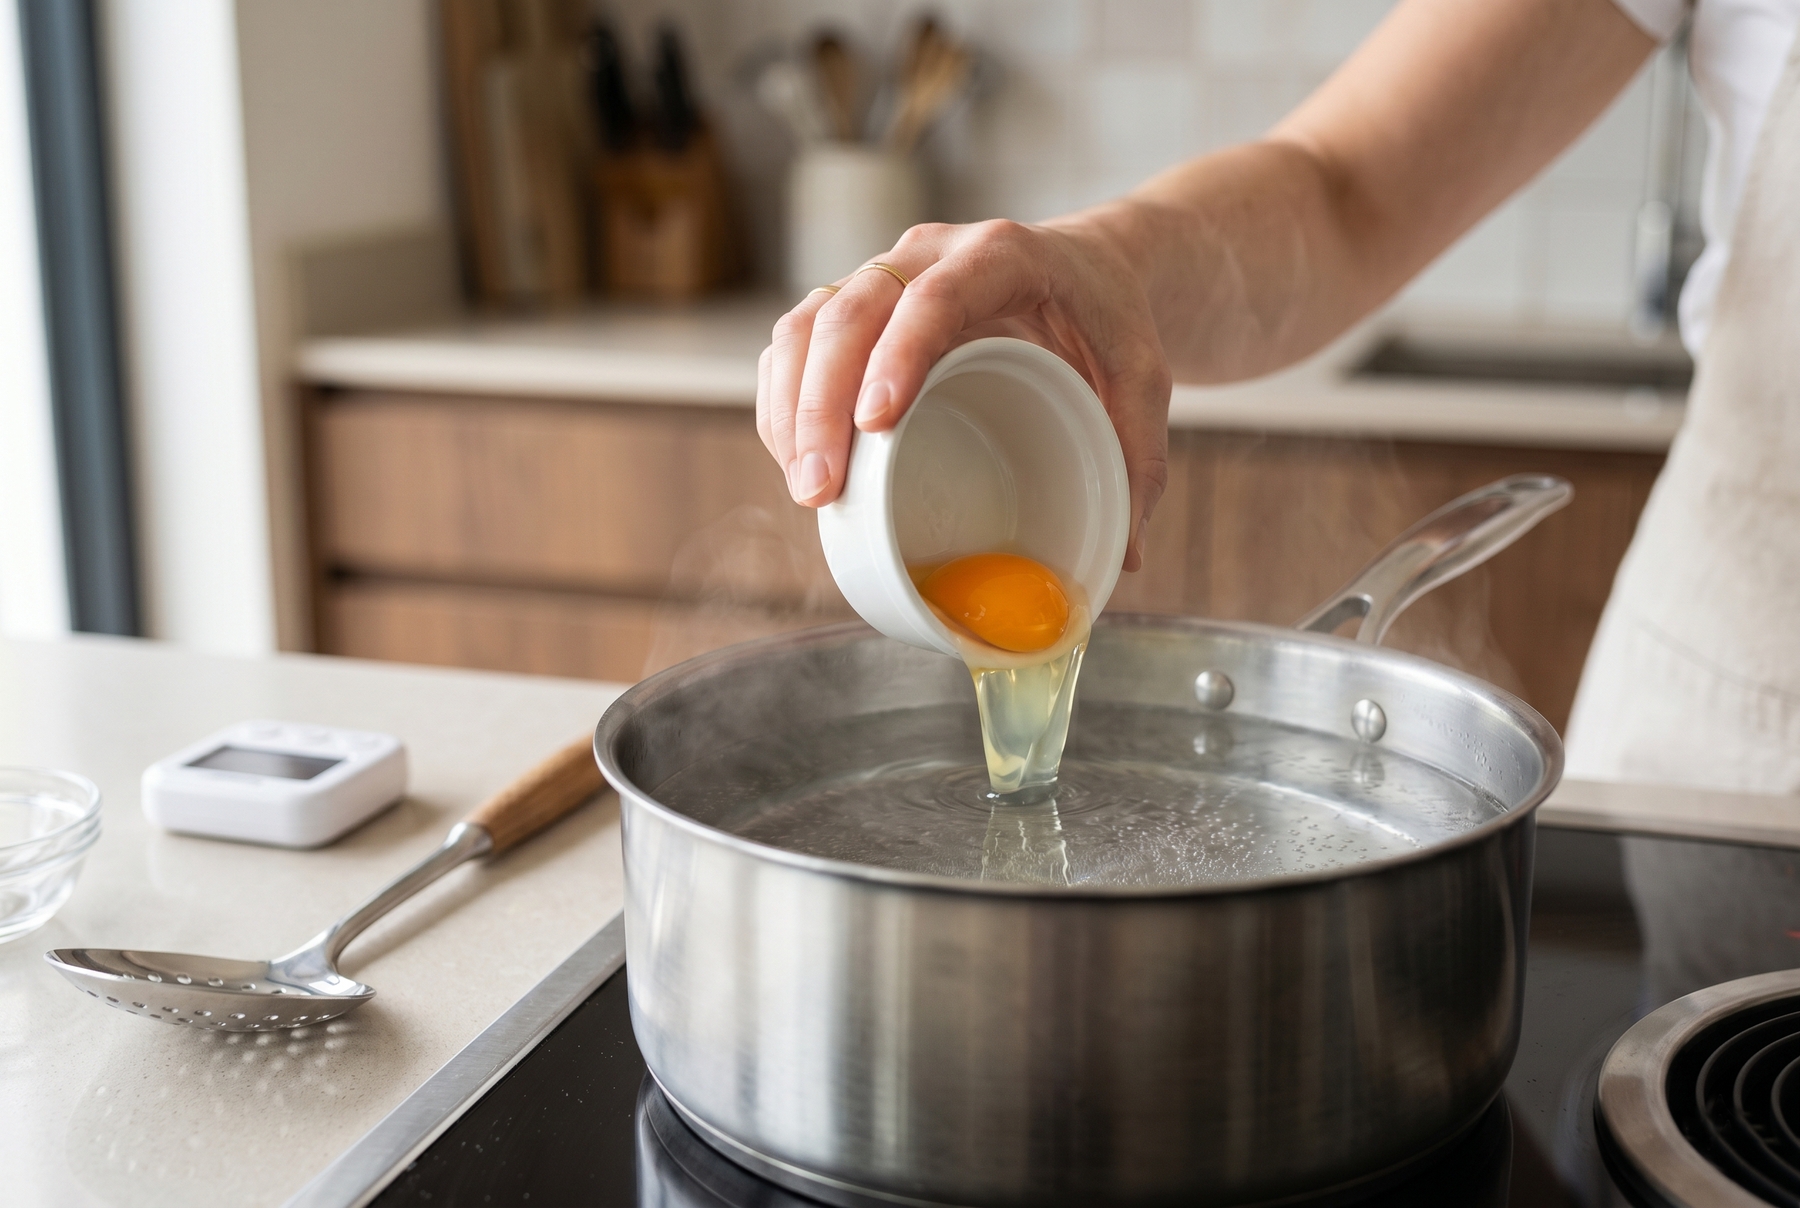
To prevent the egg white from tearing into shreds, lower the egg into the water incredibly smoothly, holding the cup right at the surface.
The Classic Method: Dropping the Egg Directly Into Water
The classic approach involves bringing the cup close to the water rather than dropping the egg from high above. Mastering this technique makes other methods more intuitive, as it builds an understanding of how the egg white behaves.
What to Place Near the Stove
Arranging all tools nearby before heating the water ensures a smooth process. A wide pot or a sauté pan with low sides works best. A deep, narrow pot forces the egg to travel too far down, complicating a gentle release. The setup requires fresh eggs, a small bowl or cup, a slotted spoon, and a plate lined with a paper towel.
Cracking the egg directly into the pot invites disaster. An awkward crack easily breaks the yolk, sends shell fragments to the bottom, and leaves the cook fishing through scalding water. Cracking the egg into a cup first prevents these issues.
How to Gently Release the Egg Into Water
Filling the sauté pan with at least 6–8 cm (2.5–3 inches) of water provides ample depth. Bring the water to a bare simmer, then lower the heat. The surface requires absolute calm. A splash of vinegar goes in now, if using.
Cracking the egg into a cup allows for a quick inspection. A watery egg white signals the need for a fine-mesh sieve—a technique detailed in a dedicated section below.
Poaching a single egg benefits from a gentle swirl of the water with a spoon. The water circulates softly, avoiding a deep whirlpool. Lowering the cup almost to the water’s surface and tilting it allows the egg to slide smoothly into the bath. A minimal drop height guarantees a neater shape.
The water clouds slightly at first, followed by the egg white turning opaque: the edges draw toward the center, forming an irregular white parcel around the yolk. Resisting the urge to prod it constantly with a spoon yields better results. The egg white needs time to set undisturbed.
Achieving a runny yolk generally takes 3 to 3.5 minutes for a cold, medium-sized egg. A large egg often requires closer to 4 minutes. A firmer yolk develops after about 5 minutes. Relying on visual cues alongside the timer guarantees perfection.
Extracting the egg with a slotted spoon is the next step. Allowing the water to drain before transferring the egg to a paper towel is crucial. A soggy poached egg quickly ruins toast, especially if the bread lacks density.
How to Tell When the Poached Egg Is Done
A fully cooked poached egg features zero transparent spots in the white. The albumen appears matte white and completely envelops the yolk. Resting on the slotted spoon, it holds its shape without oozing through the holes. The yolk inside remains liquid: a gentle nudge with a spoon reveals a springy texture, like a thin film stretched over warm custard.
Spotting translucent areas indicates the egg needs another 20 to 30 seconds. A firm white with a yolk that lacks any springiness means the center has practically hard-boiled. While suitable for dishes like salads, this texture defeats the purpose of a gooey center over toast.
Variables like egg size, temperature, pot width, and water volume all influence cooking time. Treating the first batch as a calibration exercise sets the stage for success. The initial egg demonstrates exactly how the stove performs.
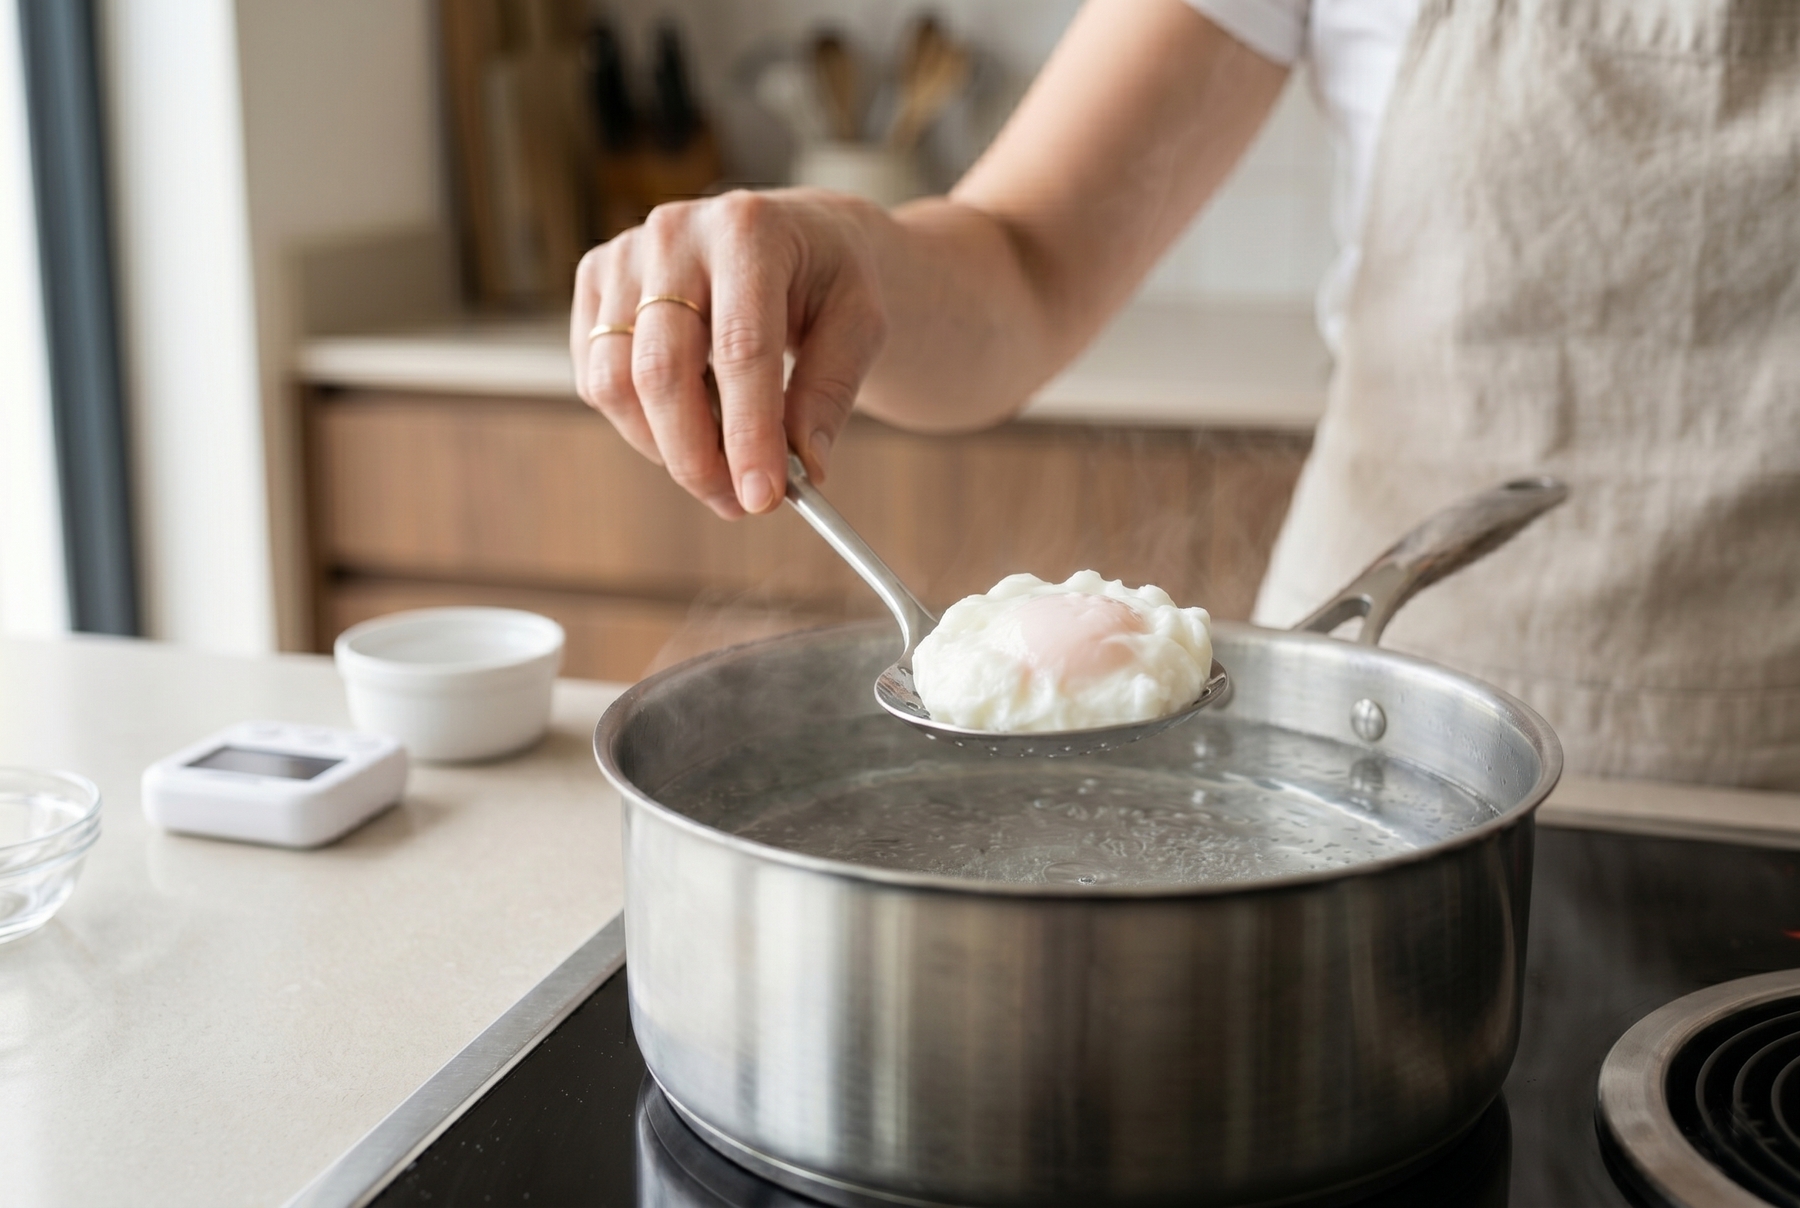
Always allow excess water to drain from the slotted spoon before plating; otherwise, the toast quickly turns soggy and loses its crucial crunch.
How to Poach an Egg Using a Fine-Mesh Sieve to Remove Watery Whites
Starting with a fine-mesh sieve is highly recommended as it filters out the watery albumen. The runny portion drips into a bowl, ensuring only the tight, thick egg white surrounding the yolk enters the poaching water.
Cracking the egg into a fine-mesh strainer positioned over a bowl starts the process. Within seconds, the loose liquid drains away. The sieve retains the yolk encased in the dense white, which appears thicker, stretches slightly, and resists flowing like water. Transferring this tight parcel to a small cup prepares it for the hot water bath.
This technique proves incredibly useful for standard grocery store eggs. They often meet expiration dates but lack the peak freshness required for a flawless classic poach. The sieve bridges the gap between farm-fresh and everyday supermarket eggs. It provides a phenomenal starting point for beginners: fewer white threads, cleaner poaching water, and a beautifully controlled shape.
This method saves the morning when hosting guests or preparing breakfast for a crowd.
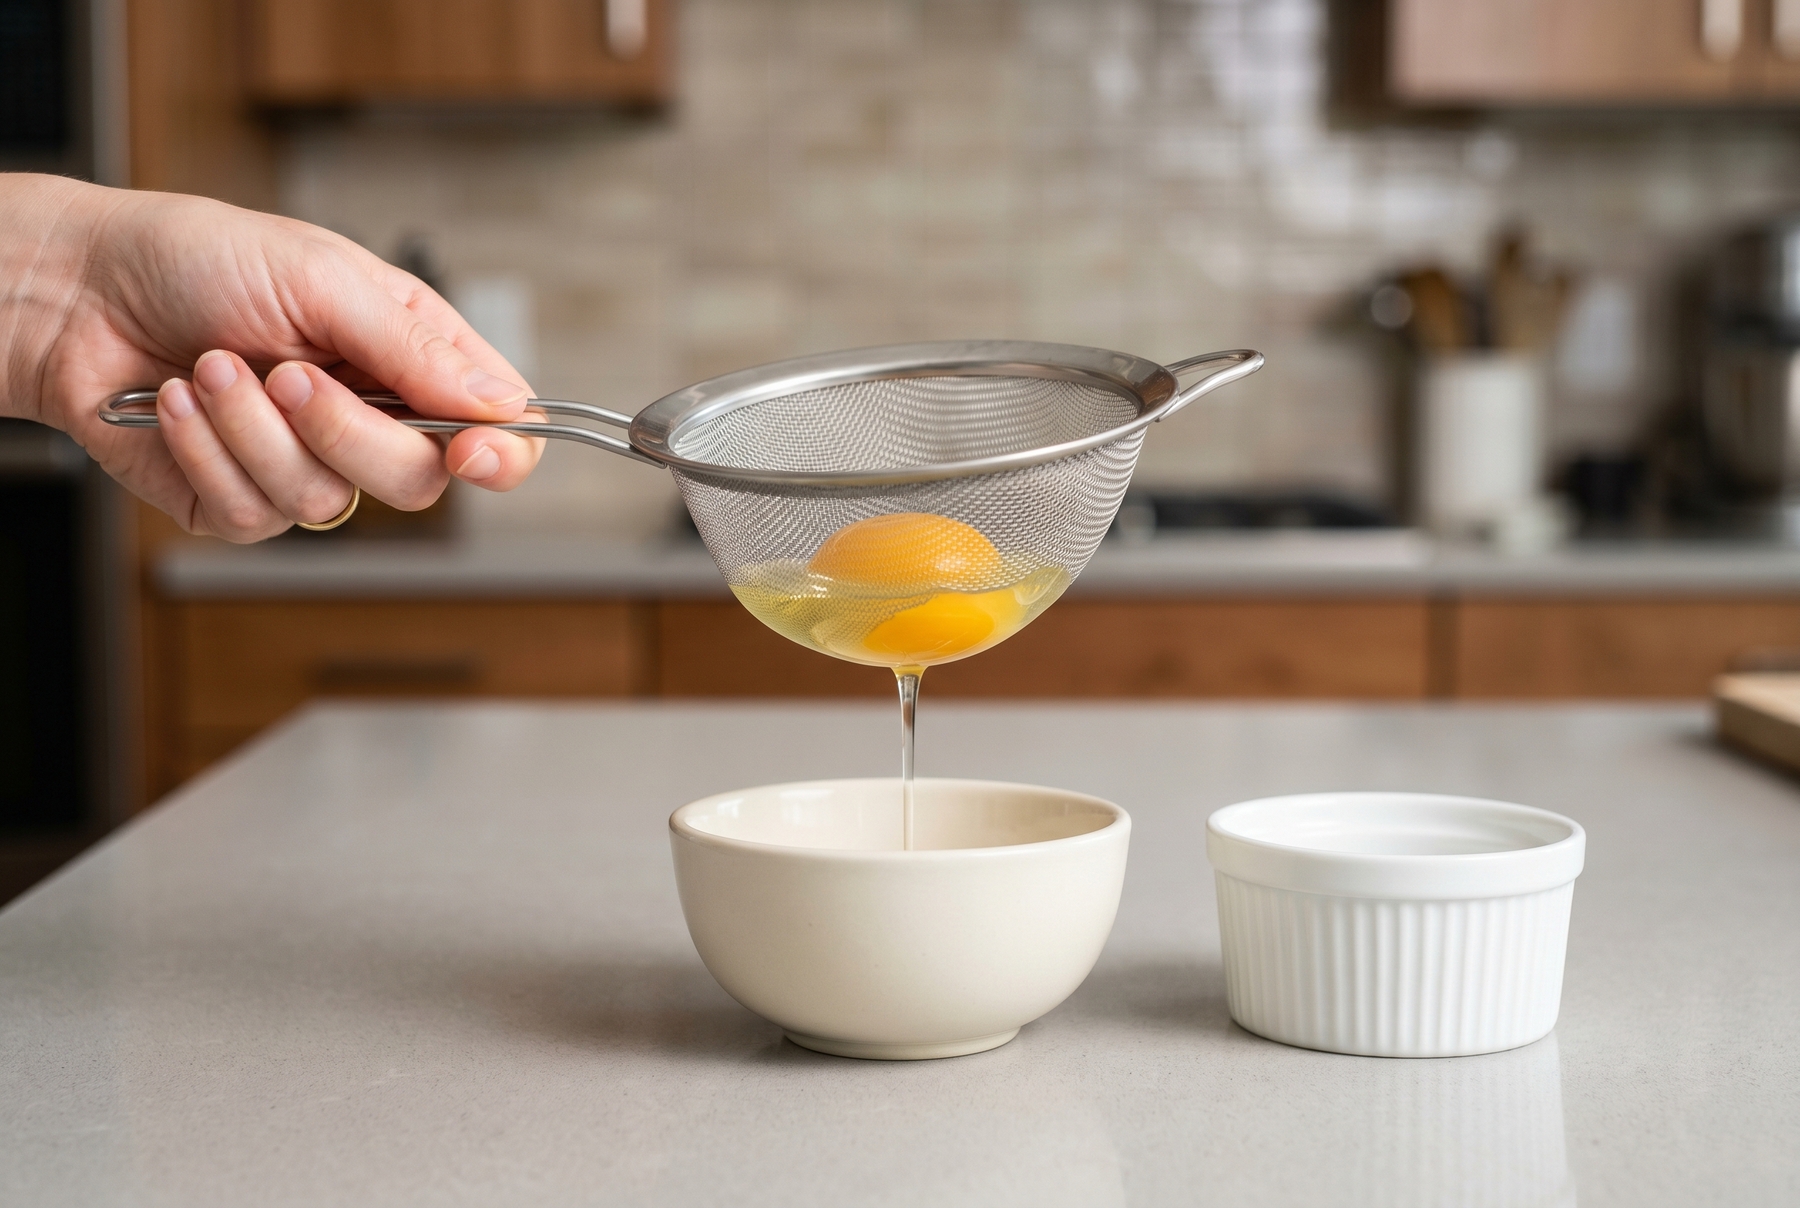
The fine-mesh sieve method offers the ultimate rescue for older eggs, effectively draining away the watery albumen before poaching begins.
A fine-mesh sieve works best, provided the mesh isn’t overly restrictive. Leaving the egg in the sieve for a full minute is unnecessary. A few seconds suffice; otherwise, the firmer white eventually seeps through as well.
Poaching Eggs in Plastic Wrap or a Bag: Smoother Shape, Different Texture
Using plastic wrap guarantees a remarkably predictable shape. Lining a cup with a sheet of plastic wrap, brushing it lightly with oil, and cracking the egg inside sets up the method. Gathering the edges forms a small pouch, which gets tied or secured with kitchen twine. This neat bundle then plunges directly into the hot water.
The shape remains exceptionally stable. The egg white stays put, the yolk rests securely inside, and the poaching water stays pristine. This approach offers a stress-free entry point for novices, virtually eliminating the risk of egg drop soup.
However, the final product differs slightly from a classic poach. The egg white emerges much smoother, occasionally bearing subtle creases from the plastic, and takes on the shape of a perfectly round orb. While the flavor remains identical, the texture shifts, feeling sleeker and less delicate than a traditional free-poached egg.
Guessing with plastic wrap and hot water poses risks. Utilizing only plastic wraps or bags explicitly labeled as safe for boiling or hot food contact ensures safety. Standard thin cling film, designed merely to cover a salad bowl in the fridge, melts in a simmering pot. Checking the packaging labels proves non-negotiable.
Fiddling with tiny knots presents another drawback. Oily fingers, self-clinging plastic, a slippery egg inside, and edges attempting to dip into the water add complexity. It hardly spells disaster, but it introduces extra fuss. On the upside, preparing multiple pouches in advance allows for bulk cooking without the whites merging in the pot.
Timing mirrors the traditional method at roughly 3.5 to 4.5 minutes for a runny yolk, though the plastic slightly alters heat transfer. Checking the first egg by removing and unwrapping it provides a good baseline. A white that remains too soft indicates the subsequent pouches require more time in the bath.
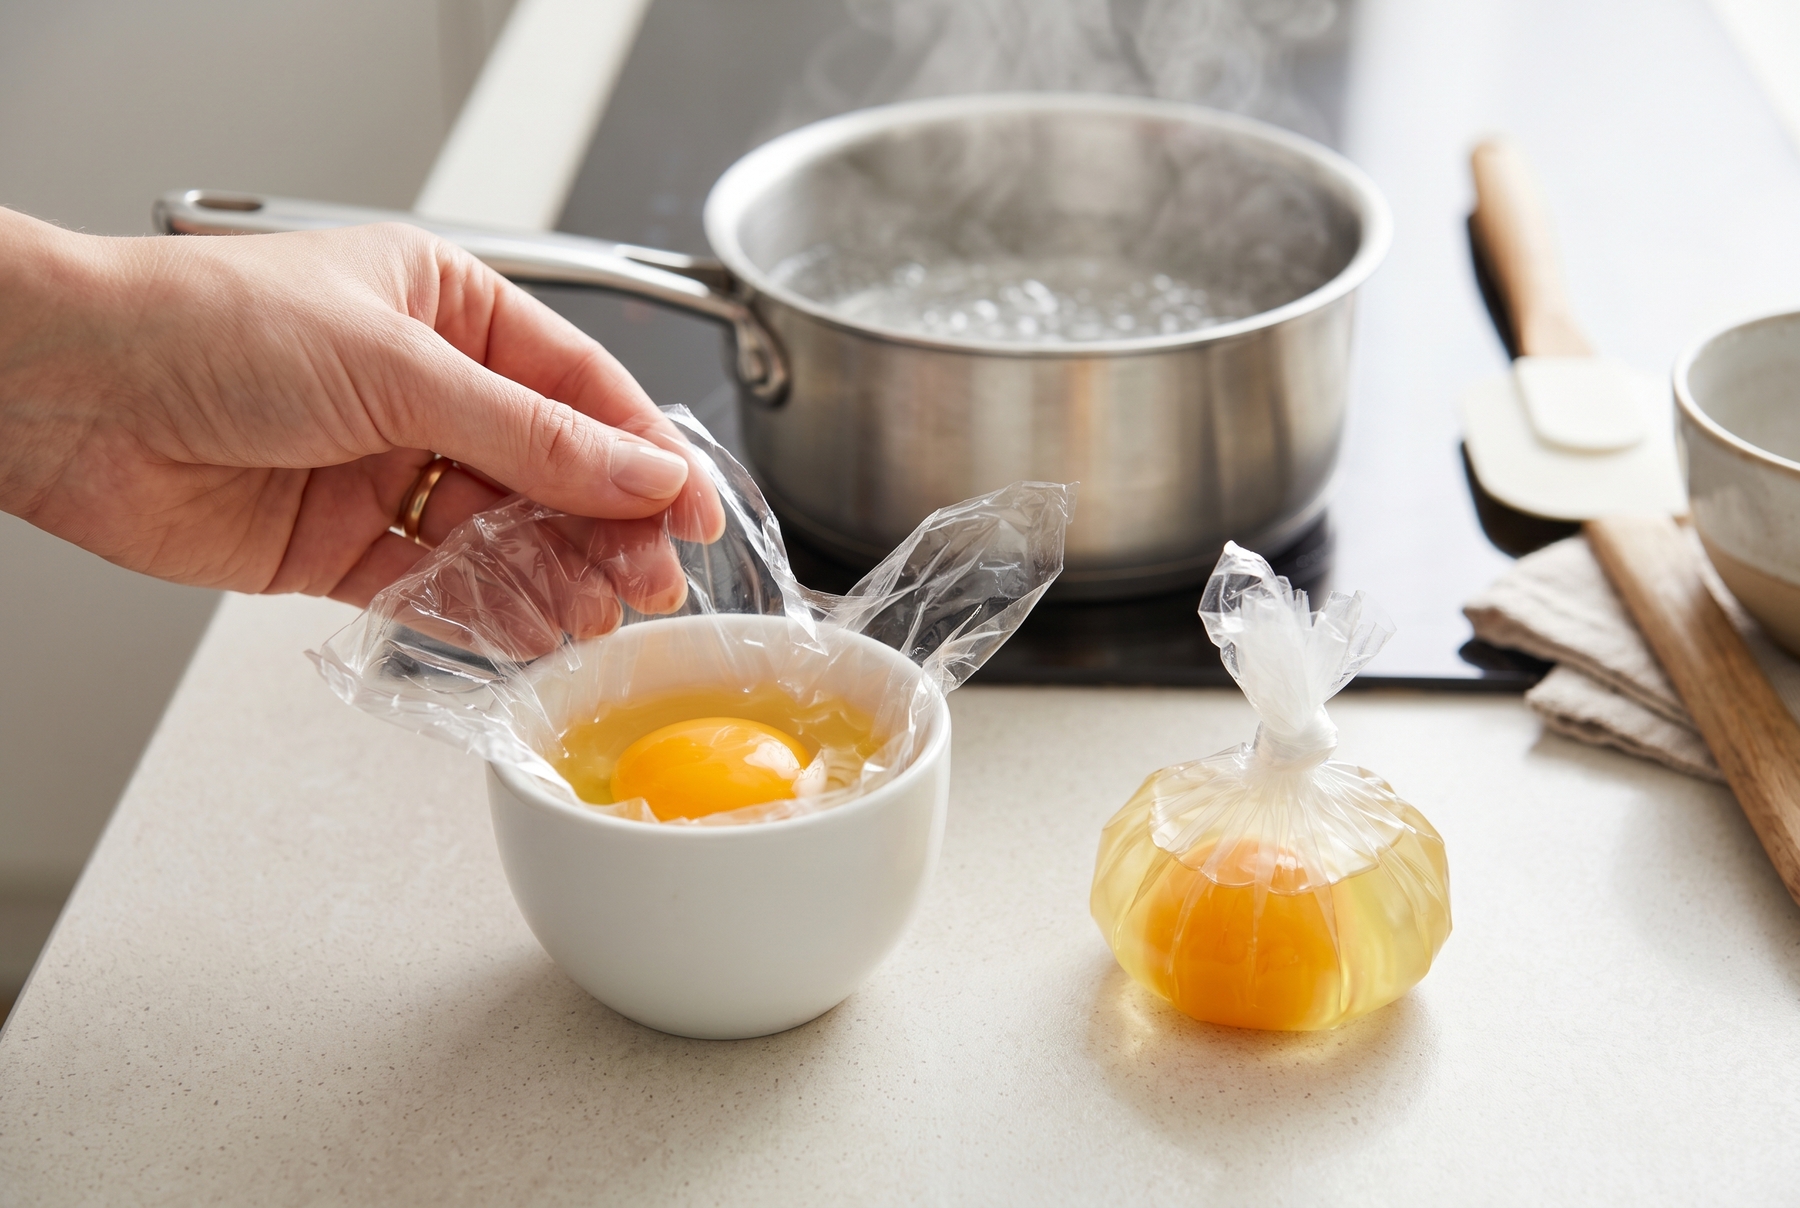
Utilizing heat-safe plastic wrap guarantees an incredibly uniform shape and allows for hassle-free bulk preparation.
Poaching Eggs in a Ladle: Greater Control Without Plastic Wrap
A brilliant middle-ground technique involves using a soup ladle or a small cup. It makes retaining the shape easier while still allowing the egg to cook directly in the water, free from plastic. The result perfectly mimics a classic poach, with merely the initial cooking phase taking place inside the ladle.
Coating the ladle with a thin layer of oil prevents sticking. Lowering it into the hot water allows some liquid to enter while keeping the ladle stable. Cracking the egg into a cup and then gently transferring it into the ladle initiates the process. The egg white begins to set against the hot metal, securing its shape. Tilting the ladle softly after a minute or so allows the egg to slide out and finish cooking freely in the water.
Forcefully shaking the egg out ruins the delicate structure. Tapping the ladle against the edge of the pot spells disaster. Tilting the ladle slowly guarantees the fragile membrane of the cooked egg white remains intact.
Potential pitfalls include overheating the metal ladle, causing the egg white to cement itself to the hot surface. Leaving the egg in the ladle too long results in a rubbery base and a raw top. A sudden tilt easily tears the delicate outer layer. Adjusting the technique solves everything: lower the heat, ensure enough water surrounds the ladle, and maintain a steady hand.
How to Poach Multiple Eggs Simultaneously
A water vortex serves brilliantly for a single egg but creates chaos for three. Eggs caught in a circular current follow the same trajectory, inevitably crashing into one another and locking their whites together. Instead of three flawless poached eggs, the pot yields a tangled mess in cloudy water.
Poaching multiple eggs demands a wide, shallow vessel. A wide sauté pan or a deep skillet outperforms a tall stockpot every time. The water depth needs to prevent the eggs from immediately hitting the bottom, yet remain shallow enough to avoid a long descent. Cracking each egg into its own small cup provides ultimate control. This isn’t about creating extra dishes; it allows an instant quality check on every egg and enables a smooth, sequential release into the water.
The water must remain practically motionless. Adding a splash of vinegar is fine, but moderation is key. Lowering the eggs into distinct zones prevents crowding: the first near the back edge, the second to the side, and the third on the opposite end. Ample space between them is vital. After a minute, the whites firm up, and the eggs tolerate their neighbors much better.
When entertaining, poaching eggs ahead of time and plunging them briefly into an ice bath stops the cooking process perfectly. A quick 30 to 60-second dip in hot water right before serving revives them. For a casual home breakfast, preparing this batch on the same morning and storing the eggs in the refrigerator in a clean container of cold water makes sense. Hoarding precooked poached eggs for days destroys their delicate texture; the whites become waterlogged, turning a vibrant breakfast into a sad compromise.
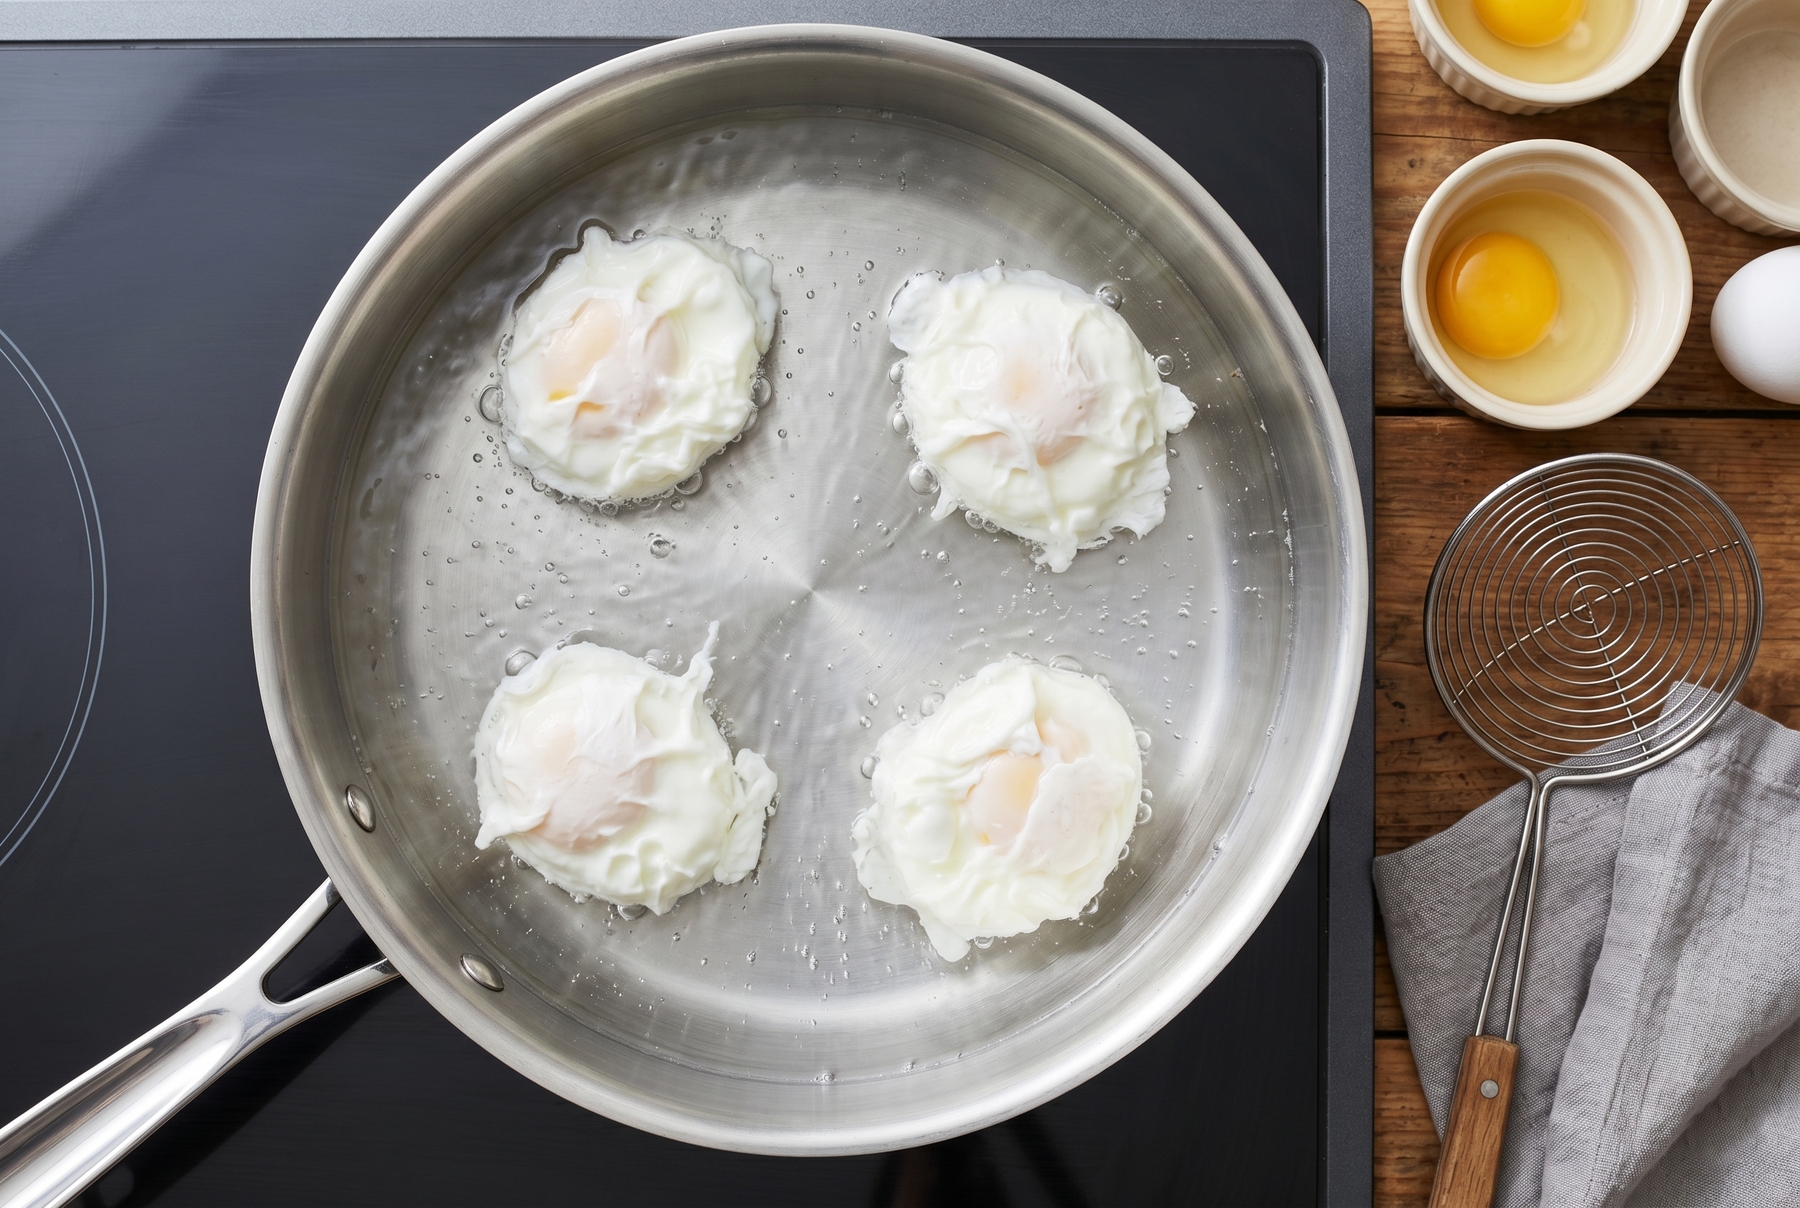
When poaching multiple eggs simultaneously, choose a wide, shallow pan and maintain a gentle shimmer rather than a rolling boil.
The difference on the plate is striking. An egg that is freshly reheated and dried looks vibrant and appetizing. An egg abandoned in water for half a day appears pale and fatigued, resembling a crumpled napkin after a long banquet.
When to Choose a Sieve, Plastic Wrap, or Ladle
Poaching an egg never restricts a cook to a single, unyielding method. Professional kitchens adapt their techniques to the specific task, and home cooks benefit enormously from the same flexibility.
A sieve or a ladle provides the best starting point for beginners. The sieve eliminates the problematic watery egg white, while the ladle offers a comforting sense of control. A solo breakfast calls for the classic method with a gentle water swirl: it operates quickly, cleanly, and builds essential muscle memory. Hosting guests demands the reliability of a sieve combined with a wide pan and perfectly still water. Prepping the eggs in individual cups ensures a seamless, stress-free service.
Older eggs make the fine-mesh sieve absolutely mandatory. When flawless predictability and perfect symmetry outweigh traditional texture, plastic wrap or a heat-safe poaching bag delivers every time. Capturing a stunning photograph relies on combining a sieve with impeccably fresh eggs: the shape forms naturally without artificial creases, and the white drapes over the yolk smoothly, resembling fine white silk.
The classic method builds unparalleled culinary intuition, forging a deep understanding of the ingredient itself. The sieve strikes the ultimate balance between simplicity and a stunning outcome. Plastic wrap acts as an infallible safety net for novices. The ladle trains the hand to work comfortably near boiling water. A wide pan with calm water rescues weekend brunches when serving a crowd.
Exploring the Myriad Ways to Poach an Egg
Culinary innovators have devised far more than four ways to poach an egg—dozens, in fact. The internet abounds with silicone poaching pods that float in the pot, producing a neat shape akin to the plastic wrap method. Specialized poaching pans feature non-stick cups suspended over simmering water; this steam-cooking method alters how the white sets, creating a softer texture while leaving the yolk exposed on top. Some cooks submerge a fine-mesh sieve partially into the water, using the mesh to cradle the egg until it sets. Microwave techniques also exist—a cup of water, a cracked egg, a lid, and a few seconds on high. While it functions, calling it a true poached egg stretches the culinary definition.
Each of these tools claims a devoted following. Choosing a method ultimately boils down to personal preference and comfort. The techniques detailed here focus on building fundamental ingredient awareness: observing how the egg white behaves, understanding the crucial role of water temperature, and mastering shape formation. The rest is entirely up to the chef.
Troubleshooting Your Poached Egg Failures
Diagnosing a ruined poached egg takes mere seconds. The culprit almost always falls into one of four distinct categories.
The Water Boiled Too Aggressively
A vigorous boil violently tears the fragile egg white apart. Large bubbles surge from the bottom, pummeling the egg while it remains liquid. The albumen stretches into messy threads, the edges turn ragged, and the yolk often ends up completely exposed.
The fix requires zero effort: lower the heat, wait for the surface to settle completely, and only then introduce a fresh egg. If the pot already resembles a snow globe of egg white flakes, replacing the water is mandatory. A cloudy bath obscures the cooking process, making it impossible to gauge doneness visually.
The Egg White Was Too Watery
Cracking the egg into a cup tells the whole story. A white that instantly spreads into a massive puddle behaves identically in the pot. The fine-mesh sieve provides the ultimate rescue here. Releasing the egg exceptionally close to the water’s surface also mitigates the damage. However, an older egg simply refuses to yield the pristine shape of a fresh one. This does not mean tossing the carton; these eggs work beautifully for omelets, baking, or pancakes. Poaching simply demands a tighter protein structure.
The Egg Dropped From Too High
Gravity destroys the perfect shape. The heavier yolk plummets, dragging the white behind it, and the impact with the water shreds the delicate edges. The aftermath often resembles a miniature underwater explosion: a naked yolk sitting amidst a chaotic cloud of translucent threads.
Positioning the cup mere millimeters from the water ensures success. A smooth tilt allows the egg to slide gracefully rather than plummet. The gentlest entry occurs when the rim of the cup practically kisses the water’s surface.
The Egg Was Overcooked
Identifying an overcooked poached egg requires no guesswork: the white turns unpleasantly dense, occasionally rubbery at the fringes, and the yolk solidifies into a soft lump instead of flowing freely. While this texture might survive in a hearty grain bowl, it thoroughly ruins an avocado toast that relies on that liquid gold acting as a rich sauce.
Trimming the cooking time by 20 to 30 seconds easily resolves this. Sizing matters immensely: a smaller egg heats rapidly, whereas a jumbo egg straight from the fridge demands slightly more patience. Eggs sitting at room temperature cook noticeably faster than their chilled counterparts. The time difference is minimal, yet the yolk vividly reflects every extra second.
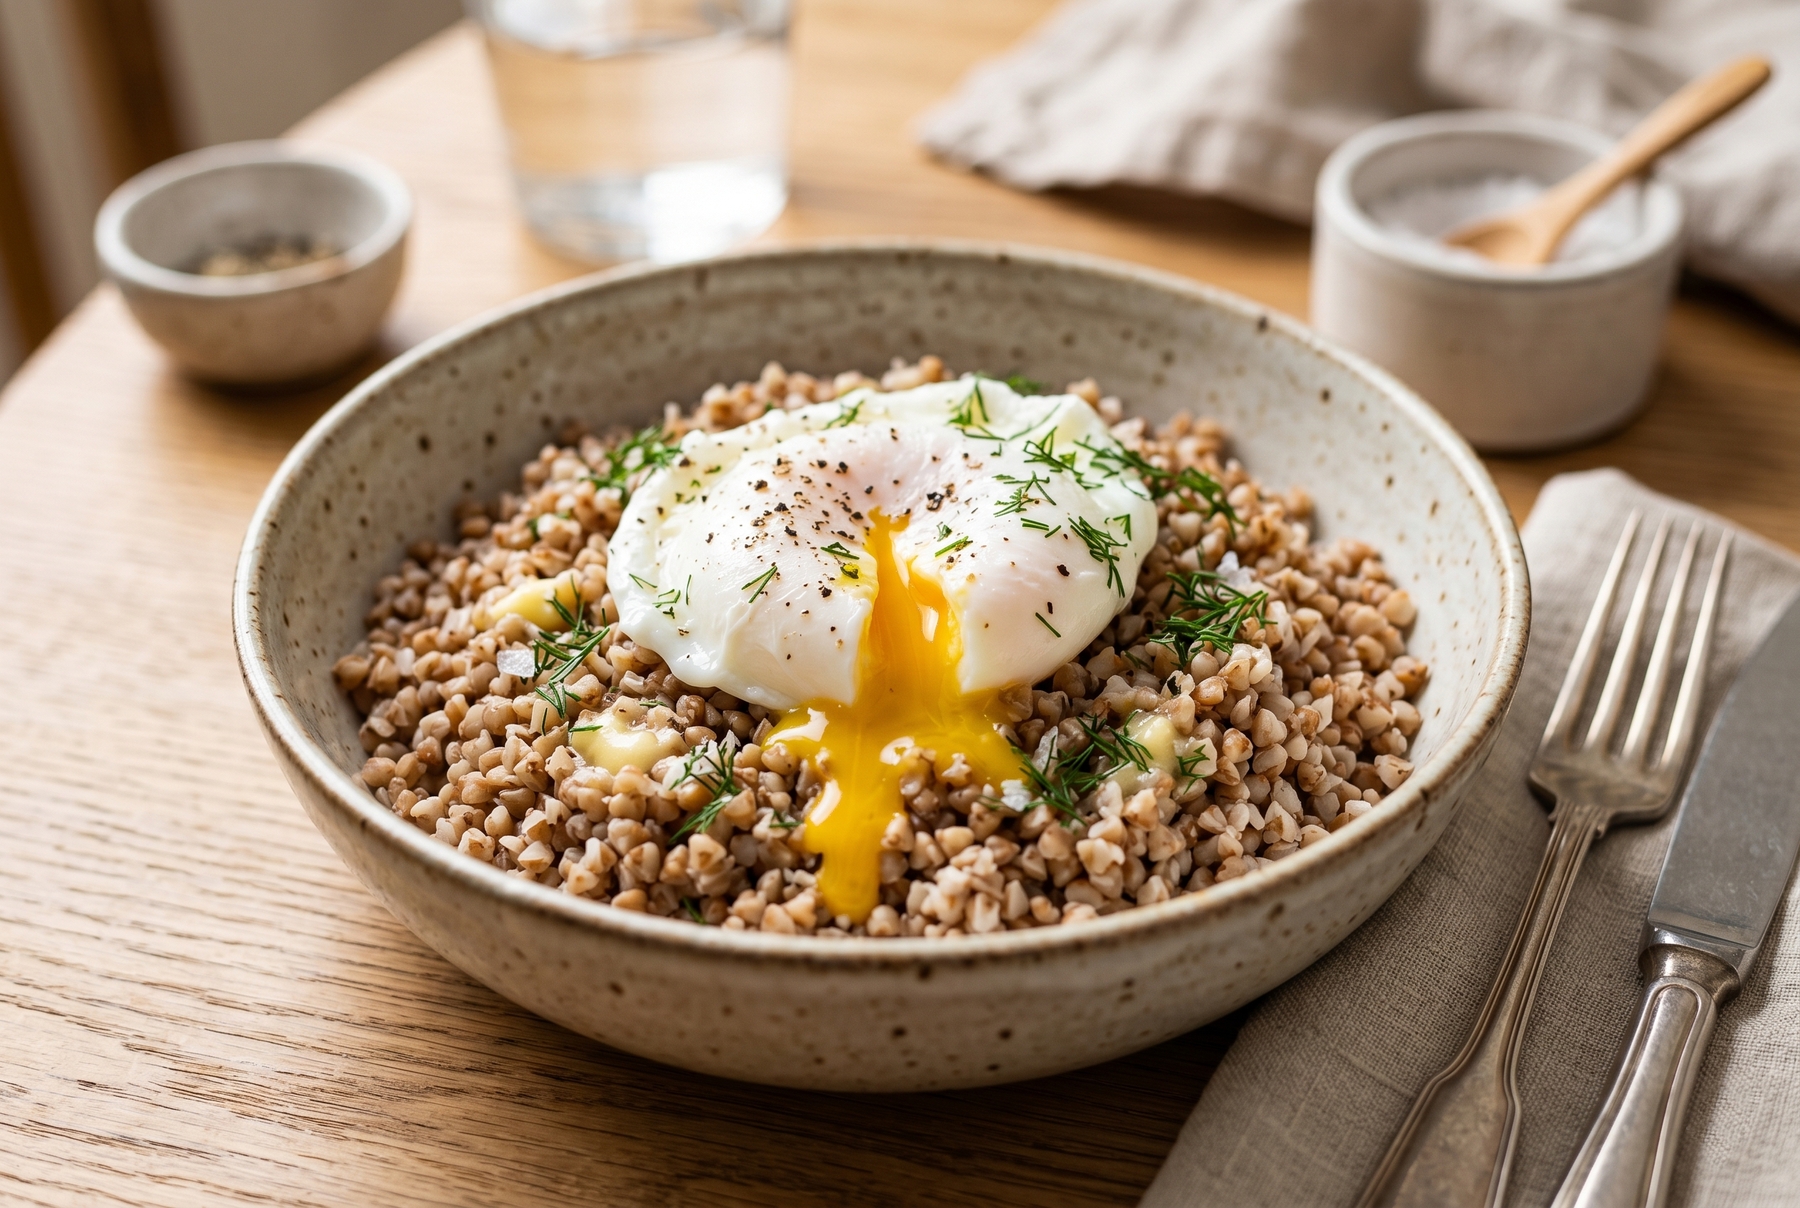
Poached eggs pair beautifully not only with avocado but also with hot grains, bringing a delicate texture and extra nourishment to any breakfast bowl.
How to Serve a Poached Egg Without Ruining the Toast
A poached egg boasts a delightfully delicate nature, requiring a sturdy foundation and bold contrasting flavors to shine. A crisp piece of toast, hearty grains, crispy potato pancakes, vibrant greens, or a sauce boasting sharp acidity or rich fat elevate the dish. When properly paired, the runny yolk acts as a luxurious, warm sauce rather than sitting like a lonely white lump on a bare plate.
The classics endure for a reason: toasted sourdough, good butter, the poached egg, and a generous crack of black pepper and flaky salt. Smashed avocado pairs brilliantly, provided it receives a heavy squeeze of lemon and a pinch of salt; otherwise, the dish leans dangerously toward heavy and bland. Eggs Benedict demands Hollandaise, but home cooks hardly need to face a sauce-making exam every Sunday morning. A zesty yogurt sauce cut with Dijon mustard, rich sour cream spiked with horseradish, or a soft ricotta whipped with lemon zest brings the whole plate together effortlessly.
Placing a poached egg atop a bed of hot, fluffy buckwheat (grechka) remains a personal favorite. Stirring a pat of butter, fresh dill, cracked black pepper, and the rich, runny yolk into the toasted grains transforms a simple bowl into a profoundly satisfying breakfast with minimal effort. Dark rye bread layered with lightly cured salmon, crispy potato pancakes (draniki) dotted with sour cream, or a warm salad of cannellini beans and roasted vegetables all provide excellent bases. A poached egg fundamentally requires a surface robust enough to withstand a little moisture while eagerly soaking up the liquid yolk.
Drying the poached egg before plating represents an absolute necessity. Even the most visually stunning egg, if placed dripping wet onto a slice of toast, creates a sad, soggy puddle within sixty seconds. The workflow demands a slotted spoon, a brief rest on a paper towel, and finally, the plate. Seasoning belongs at the very end: flaky salt crystals melting slightly on the warm egg white deliver precise, punchy flavor instead of dissolving uselessly into the boiling water.
A hit of acidity nearby instantly awakens the rich egg. A few drops of fresh lemon juice, a tangy yogurt drizzle, quick-pickled red onions, lightly cured fish, or even a flawless heirloom tomato during peak season works wonders. Fat plays an equally crucial role: generous butter on the toast, creamy avocado, velvety Hollandaise, or full-fat sour cream. Lacking these contrasting elements, a poached egg risks tasting overly timid and muted.
One frequently neglected detail dramatically alters the experience: the plate must be warm. Chilled ceramic rapidly leaches heat from the food, causing the delicate egg white to stiffen and the glorious liquid yolk to congeal prematurely. Rinsing the plate under hot tap water and quickly drying it solves the problem entirely. This tiny adjustment ensures the breakfast remains piping hot while the cook rummages for the pepper mill.
The Final Word on Achieving Poached Perfection
A stellar poached egg relies on a symphony of subtle techniques rather than a single magic trick. A fresh, dense egg white, gentle hot water, a low drop from a cup, and a few minutes of undivided attention form the core foundation. Tools like fine-mesh sieves, soup ladles, heat-safe plastic wrap, and wide sauté pans simply offer specialized assistance for varying scenarios.
The inaugural egg often emerges slightly misshapen. The second attempt usually yields a calmer, tighter shape. By the third try, understanding exactly how close to hold the cup and recognizing the precise moment the albumen turns beautifully opaque becomes second nature. And then, a perfect piece of toast arrives on the table, liquid gold slowly meanders down the crisp, buttery crust, and somewhere in the back of the mind, the idea of finally mastering Hollandaise sauce begins to take root.
0 comments