
Great oven-baked pork ribs require no smoker, no specialized wood chips, and no 24-hour soaking in a cola and vinegar marinade. Excellent results emerge right from a standard oven. Temperature and patience dictate the final outcome.
High temperatures only damage the ribs. Cranking the oven to 200 °C (390 °F) for the sake of speed creates a deceivingly beautiful dark crust on the outside, but inside, the meat tightens into dry fibers that you must tear from the bone with your teeth. The result resembles shoe leather.
Collagen (the tough connective tissue) is responsible for tenderness. Under slow, gentle heat, it unravels and transforms into gelatin. This gelatin requires time within a specific temperature range, and aggressive heat merely disrupts this delicate process.
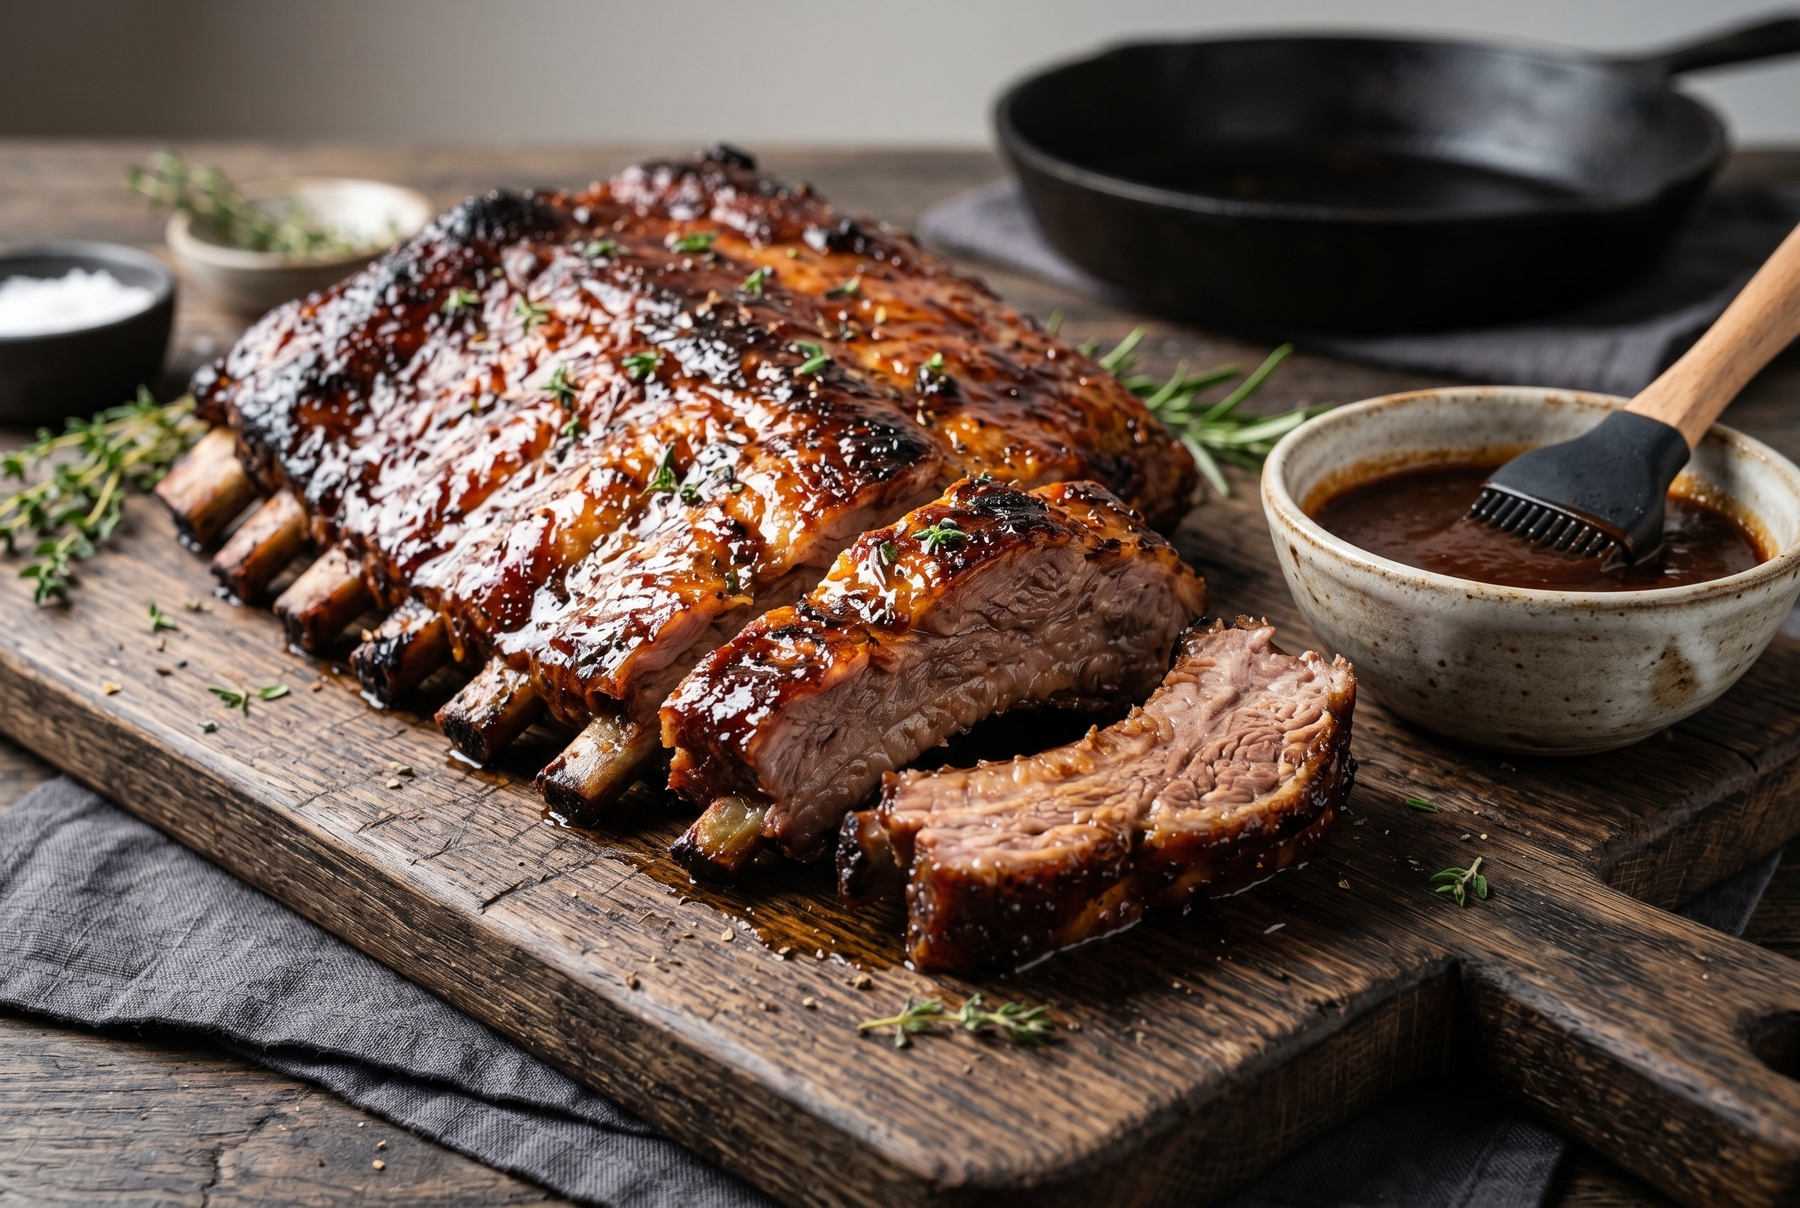
Properly cooked ribs boast remarkable juiciness and an appetizing caramelized crust.
Table of Contents
Rib Anatomy: What Actually Lies on the Cutting Board
A pork rib is more complex than it appears on the cutting board. Dense intercostal meat hides between the bones, topped by a layer of flesh marbled with fat, and threads of connective tissue run through it all. Additionally, a layer of fat melts under proper heating, basting the fibers from the inside out.
The main character here is collagen. In its raw form, it feels as tough as a thin rubber band, holding the muscle fibers together and preventing the meat from falling apart. Applying rapid, intense heat causes it to behave like a coiled spring, contracting sharply and squeezing moisture out of the meat. This guarantees that dreaded shoe-leather texture. Applying heat slowly allows the collagen to begin converting into gelatin around 70 °C (160 °F). The process continues as the temperature climbs toward 90–95 °C (195–205 °F). The duration spent in this temperature window matters far more than the exact number on the thermometer. Gelatin behaves differently, retaining moisture and coating the muscle fibers, which ensures the meat remains silky even after several hours in the oven.
One mandatory ritual remains before cooking begins. A thin, shiny film (the subpleural membrane) stretches across the inner side of the ribs. It never softens, regardless of the cooking time, remaining rubbery and blocking salt and spices from penetrating the meat. Removing it is straightforward. Slipping a knife under the edge near the last bone allows you to lift it with your fingers. Grabbing the slippery membrane with a dry paper towel makes it possible to pull it off in one swift motion as a single sheet.
Why Vinegar and Kiwi Ruin Good Ribs
The myth of the acidic marinade stems from a misunderstanding. Acid does tenderize meat, but not in the way most people assume. Vinegar, lemon juice, and enzymes from kiwi or pineapple act aggressively on the surface. They break down proteins in the top 2–3 millimeters (0.1 inches), turning them into a mushy, pâté-like paste, while failing to penetrate deeply. The outside becomes slimy, while the inside remains tough connective tissue. This is far from the desired result.
Therefore, a dry rub proves much more effective. Salt draws moisture out of the meat, dissolving some of the proteins, and this salty brine is subsequently reabsorbed, seasoning the meat deeply and helping it retain water better. Brown sugar contributes to the color and creates a caramelized crust, while spices provide the aromatic profile.
A basic ratio, easily assembled from any supermarket, includes the following:
- 2 tbsp brown sugar
- 1 tbsp coarse salt
- 1 tbsp smoked paprika
- 2 tsp coarsely ground black pepper
- 1 tsp garlic powder
- 1 tsp ground coriander
- A pinch of cayenne pepper
This yields enough rub for one to two full racks of ribs. Rubbing the mixture generously on all sides and pressing slightly with your palm helps it adhere. The rest is a matter of time. The salt begins its work after just 40 minutes at room temperature. Leaving the rubbed ribs uncovered in the refrigerator overnight allows the surface to dry out, which promises a superior crust later. A 24-hour soak in an acidic bath is entirely unnecessary.
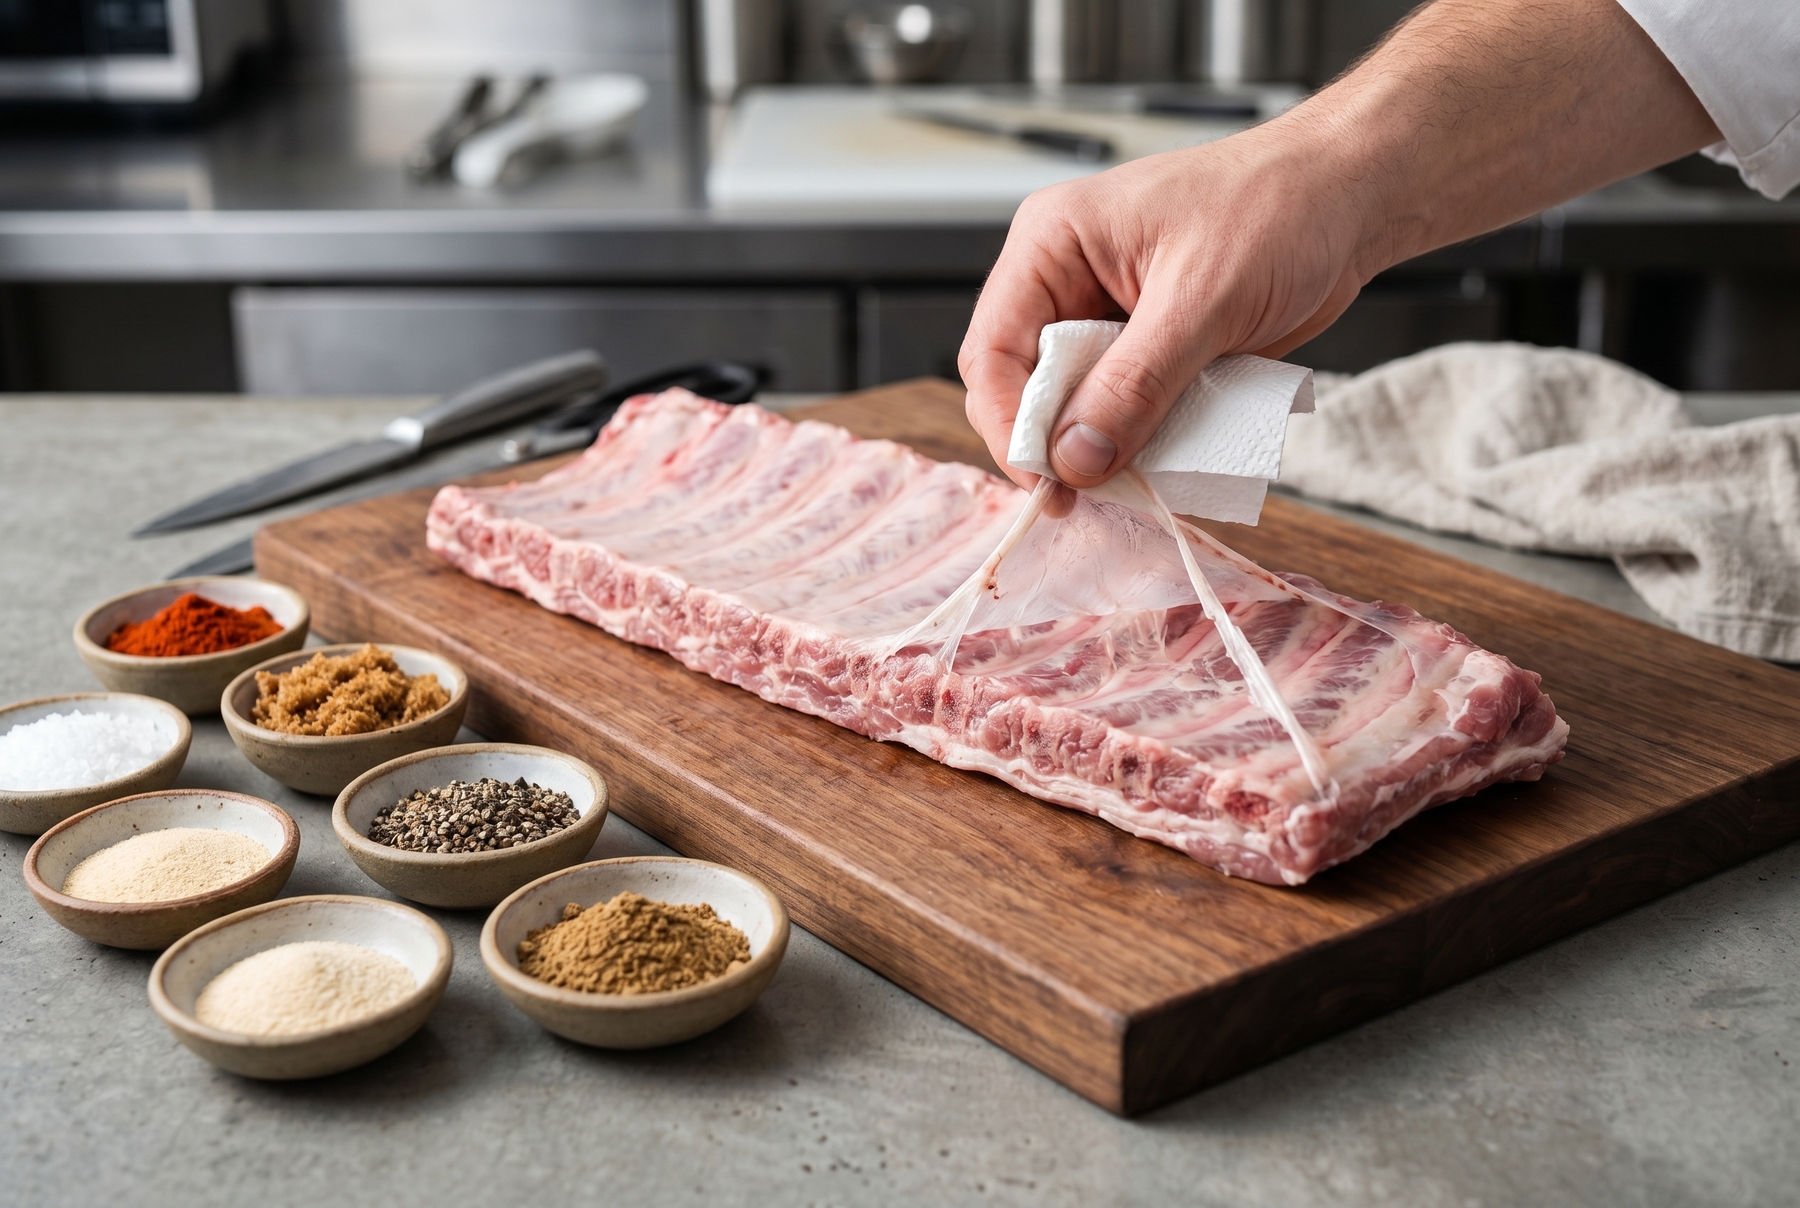
Removing the subpleural membrane is a crucial step that allows spices and salt to penetrate the meat fibers freely.
The 3-2-1 Method for Pork Ribs in a Standard Oven
The cooking process itself relies entirely on low temperature, ensuring the fat melts gently and the collagen has ample time to turn into gelatin without shrinking from sudden heat. The optimal working range for oven-baked pork ribs sits between 110–130 °C (230–265 °F). Exceeding this introduces a rush that ultimately ruins the meat.
The 3-2-1 method has long been a staple in barbecue circles: 3 hours uncovered, 2 hours wrapped in foil, and 1 hour glazed with sauce. This translates perfectly to a standard oven, provided you remember that the heat alone does the work, without the influence of smoke.
- The Uncovered Stage. Placing the ribs on a wire rack with a baking sheet underneath initiates the process. Maintaining 110–120 °C (230–250 °F) for 2.5 to 3 hours dries the surface and bakes the rub into a dark, flavorful crust known as the bark. The meat will not become tender during this phase, which is perfectly normal; this stage focuses entirely on building exterior texture and aroma.
- Foil and Moisture. Wrapping the ribs tightly in a double layer of aluminum foil with a splash of liquid—apple juice, a pat of butter, or a dash of bourbon—creates a steam bath. Inside this parcel, the collagen reaches its ideal state. Full-sized racks require 1.5 to 2 hours here. Thinner ribs spend less time in the foil, about an hour, to prevent the meat from disintegrating into mush and losing its structural integrity.
- The Finish. Unwrapping the foil, draining the excess juices, and returning the ribs to the oven uncovered marks the final phase. This is where the glaze comes into play.
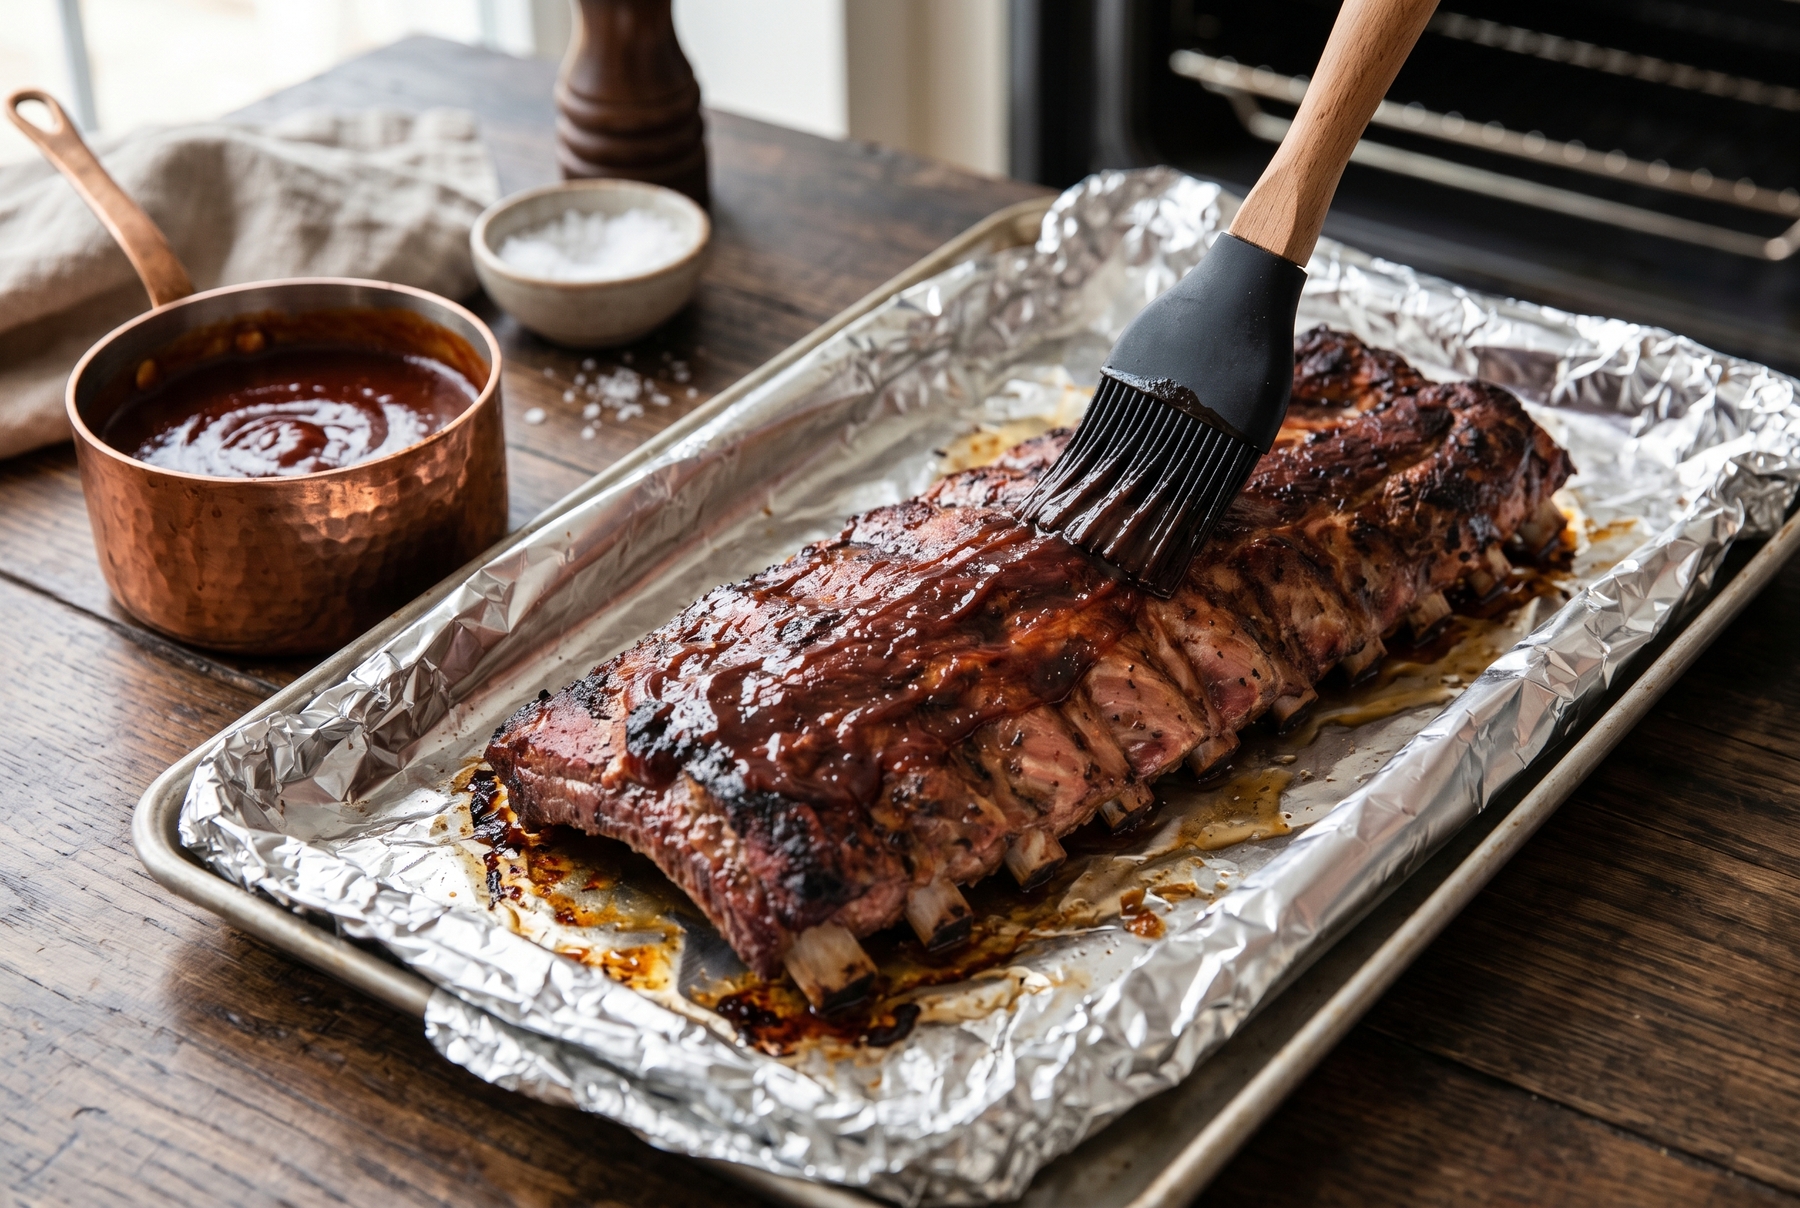
Applying the sauce 15 to 20 minutes before the end of cooking allows the sugar to caramelize perfectly without burning.
Rib Sauce: Sweetness, Acidity, and a Touch of Smoke
A proper rib sauce should complement rather than overpower the meat and the rub. Its role is straightforward: delivering sweetness, a bright acidity, salt, and a sticky surface that transforms into a glossy lacquer. Acidity balances the profile, preventing the sugar from rendering the flavor flat and cloying, rather than acting as a tenderizer.
A basic ratio for one to two racks looks like this:
- 4 tbsp ketchup or thick tomato passata
- 1 tbsp brown sugar or honey
- 1 tbsp apple cider vinegar
- 1 tsp mustard
- 1 tsp soy sauce or Worcestershire sauce
- 1/2 tsp smoked paprika
- A pinch of black or cayenne pepper
- A small pat of butter to finish
Combining everything except the butter in a small saucepan and warming it over low heat for 5 to 7 minutes thickens the sauce until it falls lazily from a spoon. Stirring in the butter at the very end rounds out the flavor profile and imparts a smoother, even gloss.
The essential secret lies in avoiding a watery consistency. A thin glaze drips straight onto the foil and baking sheet instead of clinging to the meat. Conversely, an overly thick sauce goes on in clumps and burns quickly. The ideal texture mimics warm honey: a basting brush leaves a distinct trail, yet the sauce spreads effortlessly across the surface.
A heavy hand with garlic, onion, and dried herbs often leads to bitterness under prolonged heat, particularly under a broiler. For a more complex flavor profile, adding a dash of smoked paprika, a splash of bourbon, or a pinch of ground coriander provides a safer route, supporting the meat without overwhelming it.
The Lacquered Crust: Achieving the Perfect Gloss
The coveted glossy finish occurs as the sweet glaze dries, thickens, and caramelizes. The sugar on the surface darkens, sets into a firm film, and creates a brilliant sheen with a delightfully slight bitterness around the edges. While the Maillard reaction occurs on the meat itself, the gloss stems entirely from the caramelized sugar on the surface of the glaze.
Timing is the most common pitfall here. Applying the sauce too early guarantees that the sugar will simply burn over several hours in the oven, leaving a blackened crust and an acrid, bitter aftertaste. The glaze belongs exclusively in the final 15 to 20 minutes. Brushing it on in a thin layer over two or three applications, while raising the temperature to 160–180 °C (320–355 °F) or engaging the broiler, yields the best results. Watching the edges closely is crucial; the sauce should bubble and darken slightly without turning to ash. When using the broiler, staying near the oven is mandatory, as sugar scorches in moments.
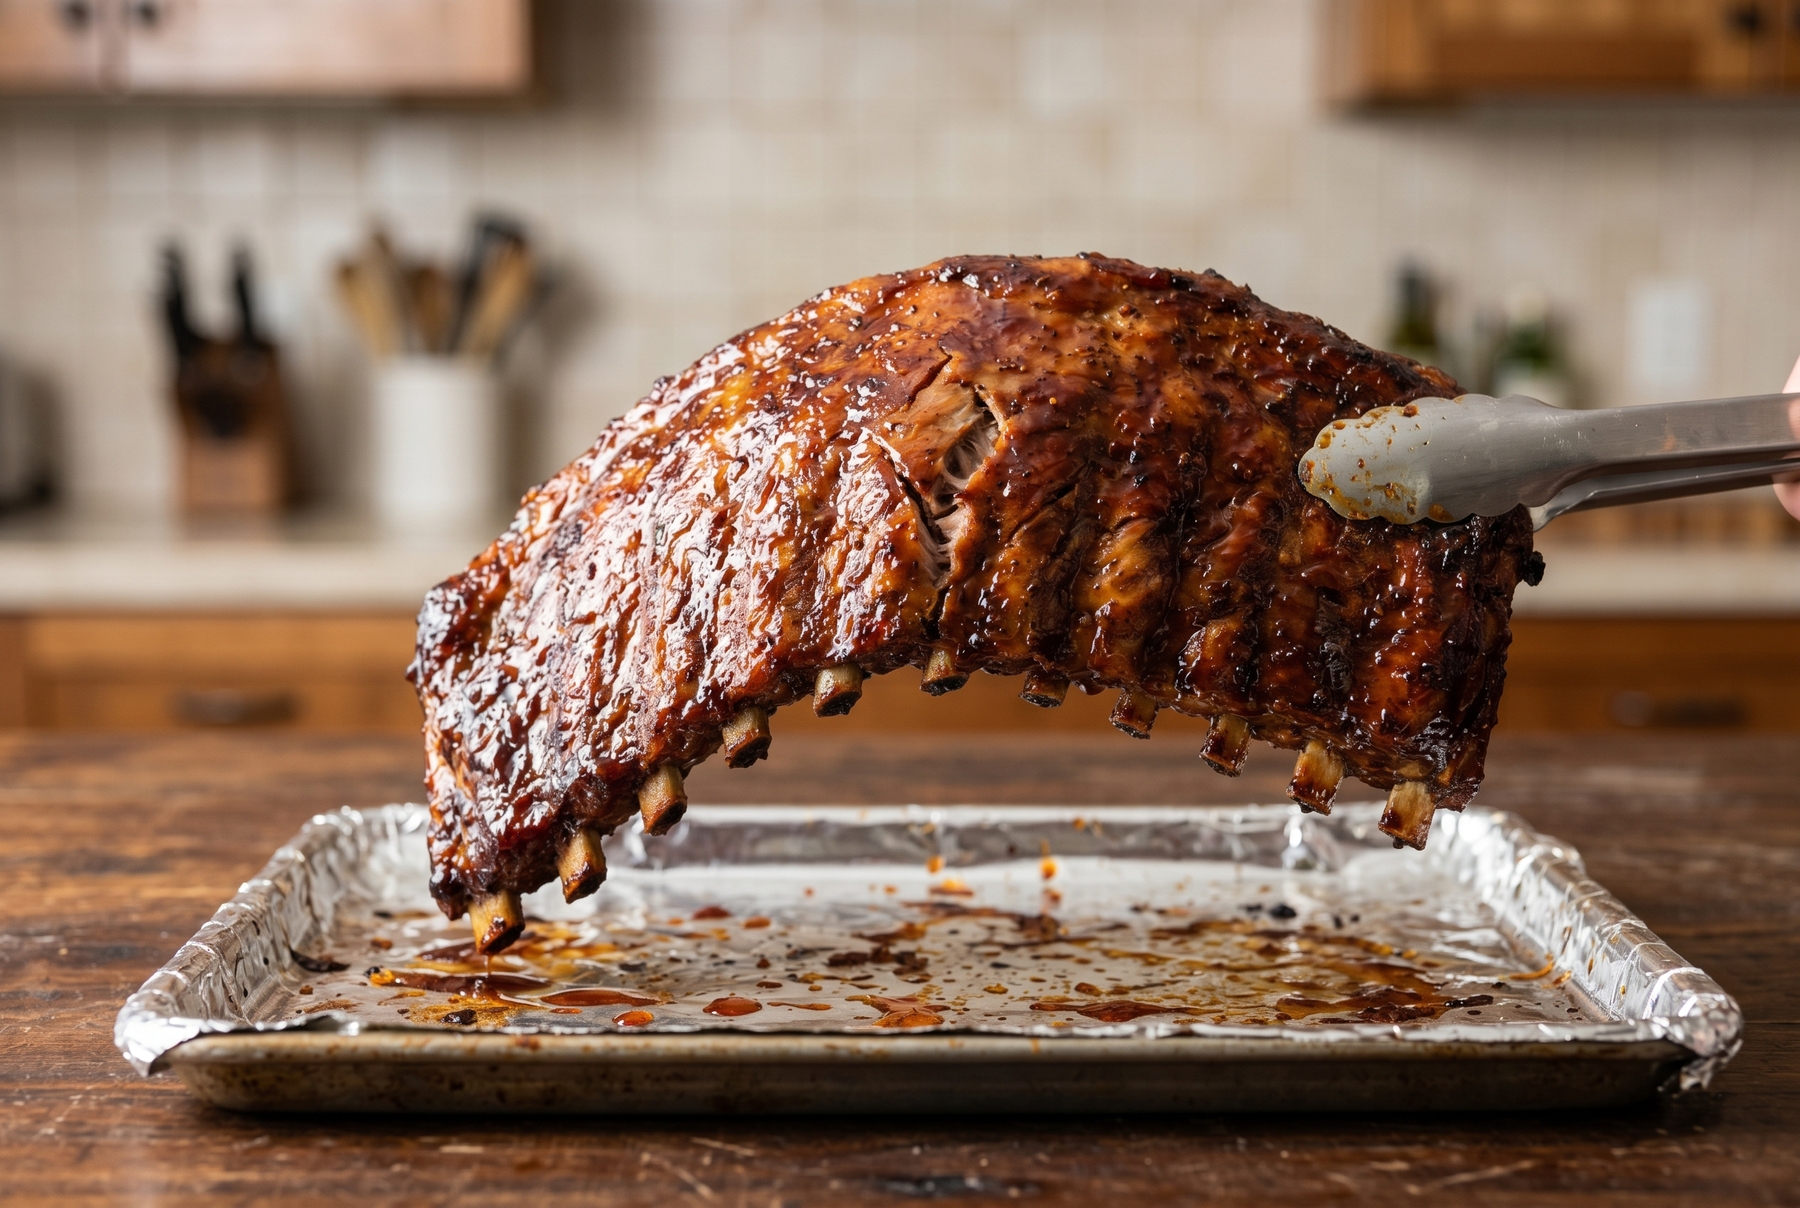
The bend test: lifting the rack causes it to bow and crack slightly, indicating the meat has reached ideal tenderness.
Doneness Without a Thermometer: Trusting Your Hands and Eyes
A thermometer inserted between the bones will read around 90–95 °C (195–205 °F), but hands and eyes offer more reliable cues when it comes to ribs.
- The Bend Test. Lifting the rack by one end with a pair of tongs provides an excellent indicator. Perfectly cooked ribs bow nicely, and the surface meat between the bones begins to crack slightly. If the rack remains stiff, it needs more time. If it breaks apart completely in the tongs, the meat is overcooked.
- Meat Shrinkage. Properly cooked ribs show the meat pulling back from the ends of the bones by about 5 to 10 millimeters (0.2 to 0.4 inches), exposing the tips.
- The Toothpick Test. Inserting a toothpick into the meat between the bones should feel like piercing softened butter, yielding no resistance.
Resting the finished pork ribs for 10 minutes under a loose tent of foil is highly recommended before cutting. This allows the internal juices to redistribute, ensuring they stay within the meat rather than flooding the cutting board. A knife then glides between the bones effortlessly, leaving a thin strip of dark, tea-colored juice on the freshly cut surface.
0 comments