
Welcome to the heart of Russian comfort food! Pelmeni are more than just dumplings; they are a cherished tradition, often made during long winter evenings with the whole family gathered around the table. These little parcels of joy, filled with juicy, savory meat and wrapped in a tender dough, are a staple in every household. This recipe will guide you through creating authentic homemade pelmeni from scratch. Forget the store-bought versions—once you taste these, you'll understand why making them is a tradition worth preserving. Let's get shaping!
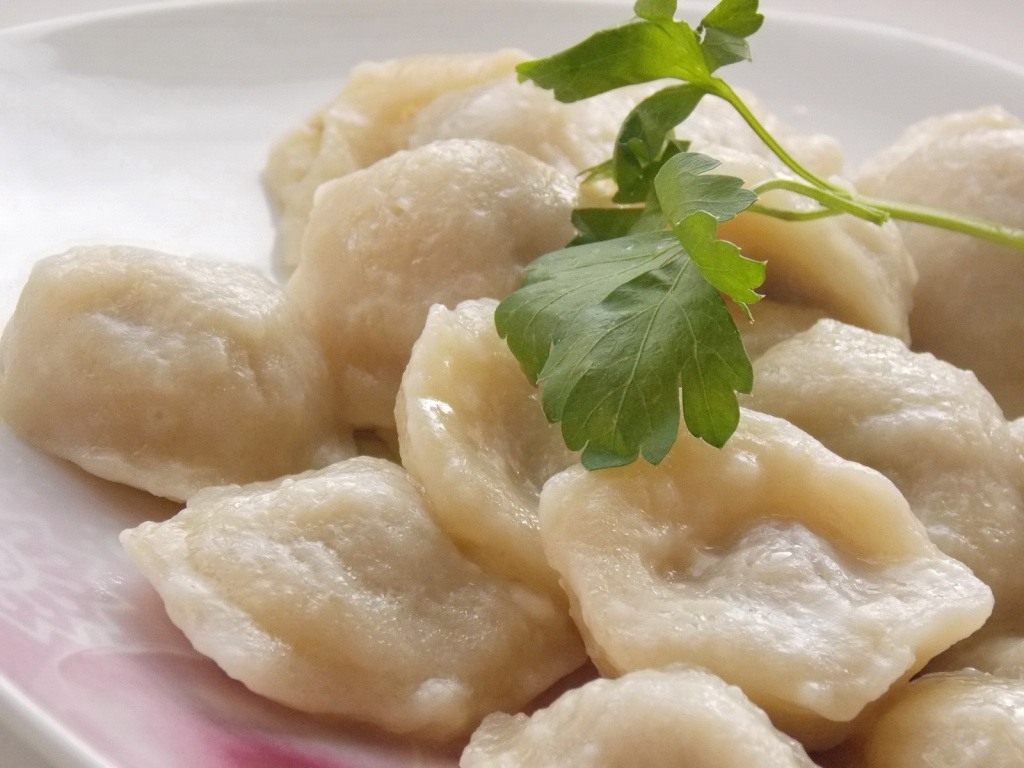
Homemade pelmeni
Ingredients for Homemade Pelmeni Dough
- 2 cups all-purpose flour
- 1 cup boiling water
- A pinch of salt
- Optional: 1 tbsp sunflower oil (or other neutral vegetable oil) for extra elasticity
Ingredients for Homemade Pelmeni Filling
- 300-400g ground meat (pork, beef, chicken, or a mix)
- 1 onion, finely chopped
- 2-3 tbsp water, milk, or broth (adjust based on the consistency of the meat)
- Salt and freshly ground black pepper to taste
How to Make Homemade Pelmeni
Preparing the Filling
First, let’s make the filling. If you bought a piece of meat, run it through a meat grinder. Beef, pork, or chicken work well. If the meat is lean, you can add a small piece of salo (cured pork fat) for extra richness.
You can use store-bought ground meat as is or run it through the grinder again for a finer texture.
Season the ground meat with salt and pepper, and mix it with finely chopped onion. To make the filling juicy, add a little water, milk, or broth. For even more juiciness, you can add a raw potato or some cabbage, passed through a meat grinder, or some finely chopped herbs to the filling.
Preparing the Dough
We’ll be making a scalded dough for the pelmeni. It’s simple and pleasant to work with: it kneads easily, rolls out thinly, and the finished dumplings are tender and soft, not tough or hard.
Pour the flour into a bowl, add salt, pour in the boiling water, and immediately start mixing: first with a spoon, and then with your hands once it’s cool enough to handle. Knead the dough until it’s smooth, place it in a flour-dusted bowl, and cover it with a towel to prevent it from drying out.
Shaping the Pelmeni
There are two ways to shape homemade pelmeni: by hand or with a pelmennitsa (a special pelmeni mold).
1. Making Homemade Pelmeni with a Pelmennitsa
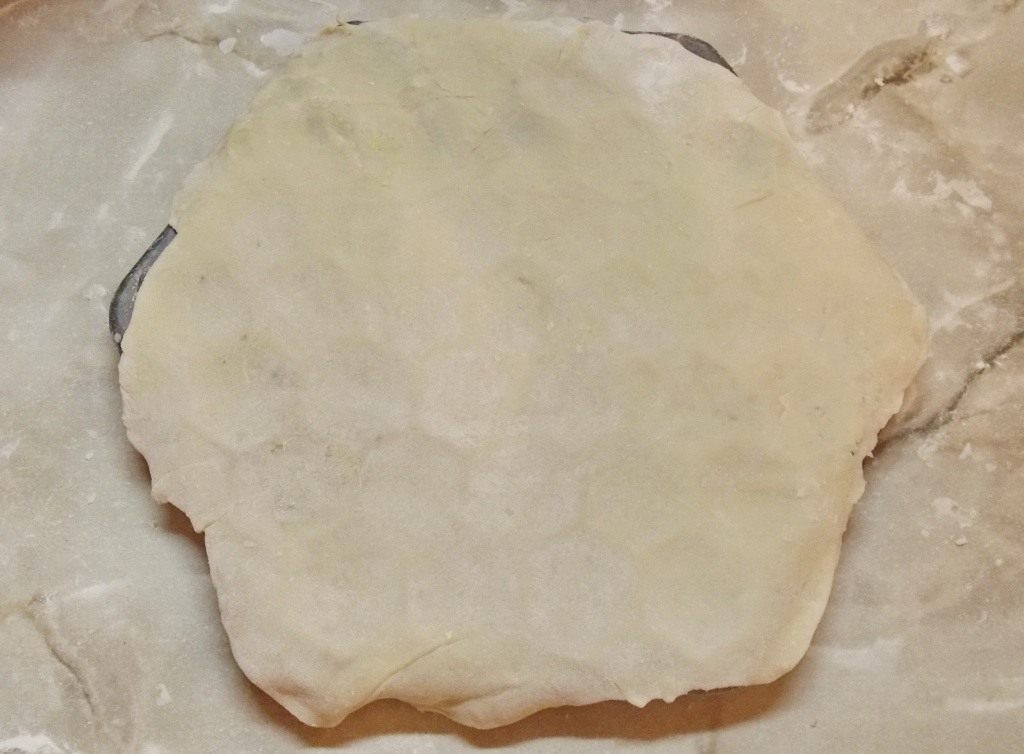
Placing the rolled dough on the pelmennitsa
If you have this gadget in your kitchen, you can make over three dozen pelmeni in one go!
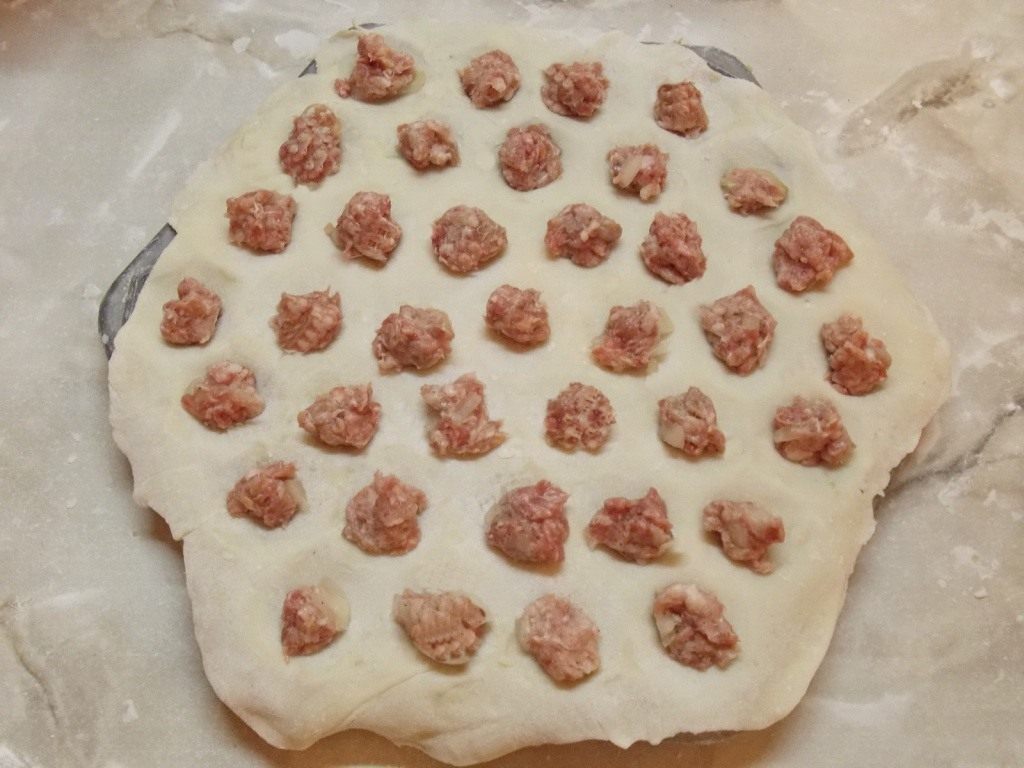
Placing the filling onto the dough
Dust your work surface with flour, take a portion of the dough, and roll it into a circle slightly larger than your pelmennitsa, about 1-2 mm thick. The thinner the dough, the tastier the pelmeni, but be careful—dough that’s too thin can tear.
A handy trick is to roll it a bit, flip the dough over, and roll again until you reach the desired size.
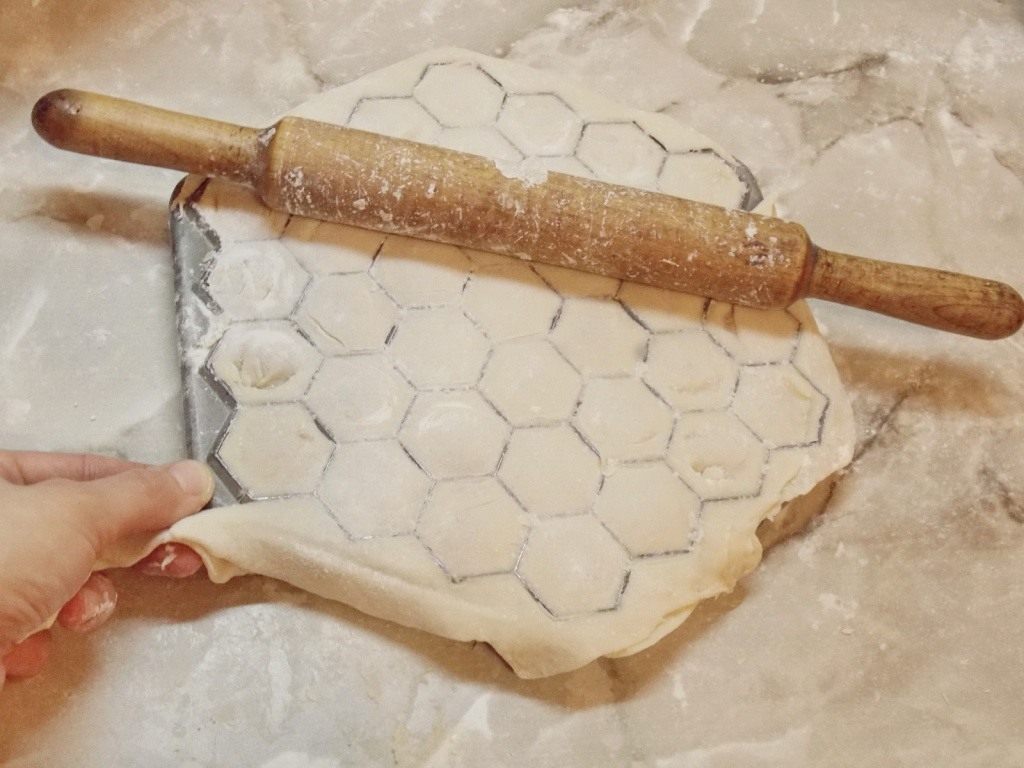
Covering with a second layer of dough and rolling with a rolling pin
Place the circle of dough on the pelmennitsa, pressing down lightly with your hand to see the indentations, and place a bit of filling in each one. Then, roll out a second circle of dough of the same size, cover the pelmennitsa with it, and roll over it with a rolling pin: first with light pressure (see how the pelmeni shapes appear?), and then pressing firmly to separate the dumplings from each other. Finally, flip the pelmennitsa over and shake out the pelmeni onto a floured board.
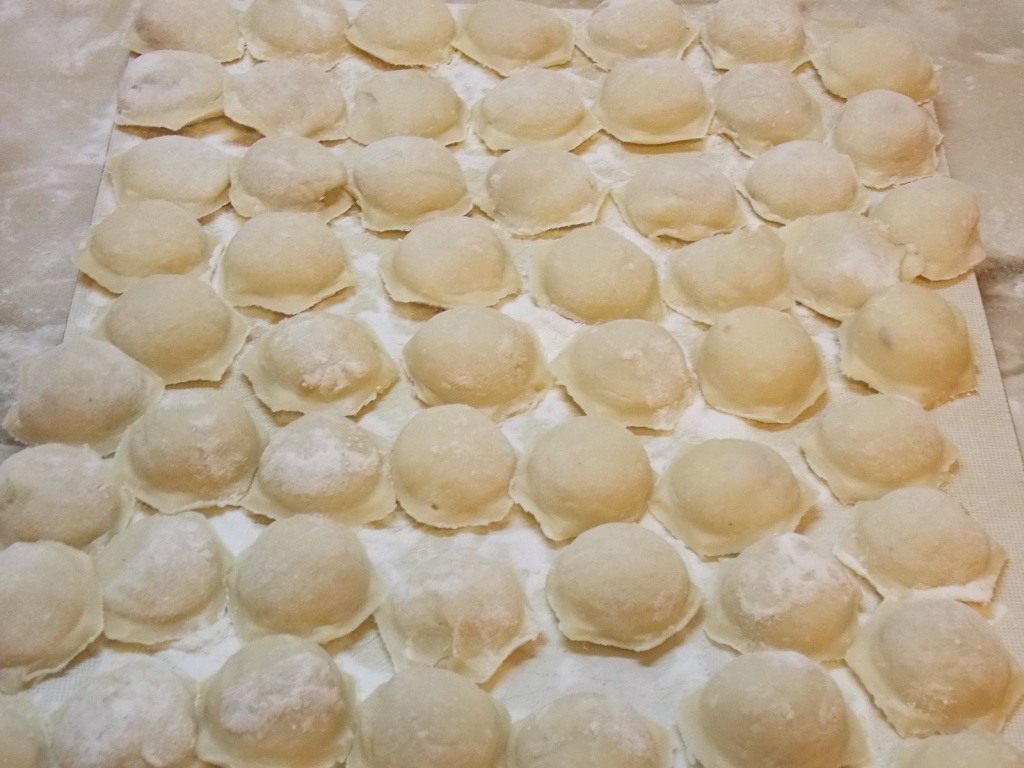
Pelmeni made with a pelmennitsa turn out uniform
2. Shaping Homemade Pelmeni by Hand
Using a pelmennitsa is the fast way, but hand-shaped pelmeni are much more beautiful (and larger!). To make ‘handmade pelmeni’, roll the dough into a log about the diameter of a sausage. Cut the log into 1.5 cm thick slices. Roll each slice into a small circle and place the filling in the center. Then, quickly seal them before the dough has a chance to dry out and is still easy to work with.
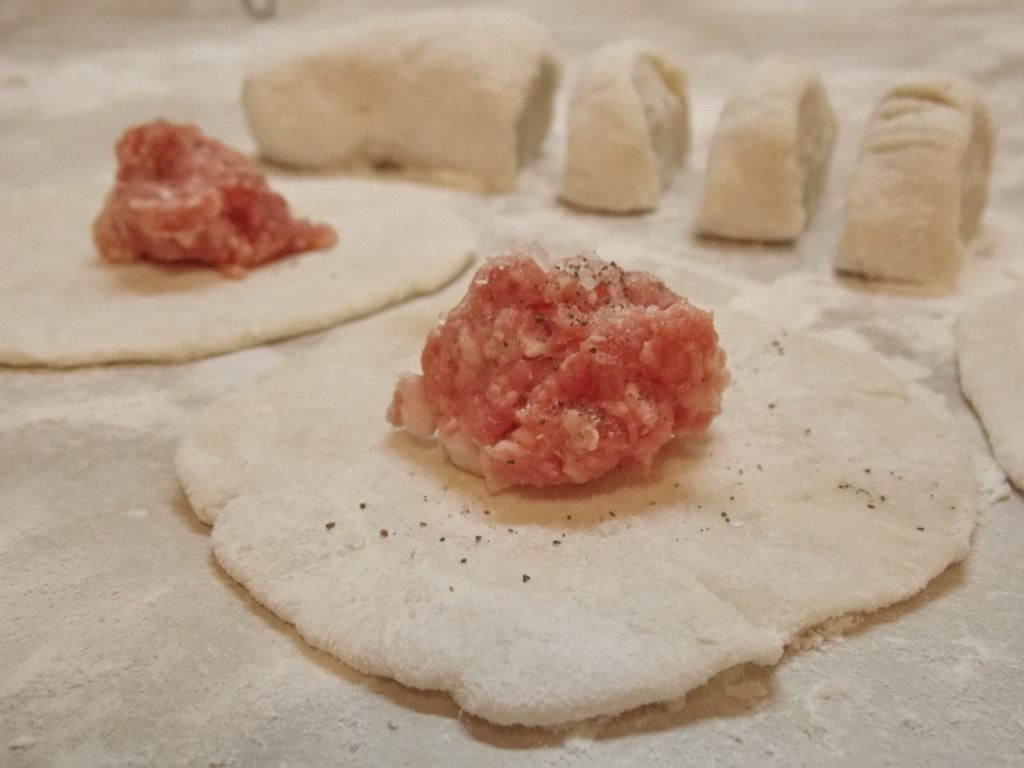
Roll out a piece of dough and place the filling on it
First, fold the circle in half and pinch the edges together, like a varenik (a half-moon shaped dumpling, similar to pierogi). Then, bring the two ‘ears’ together and pinch them to form the classic pelmeni shape!
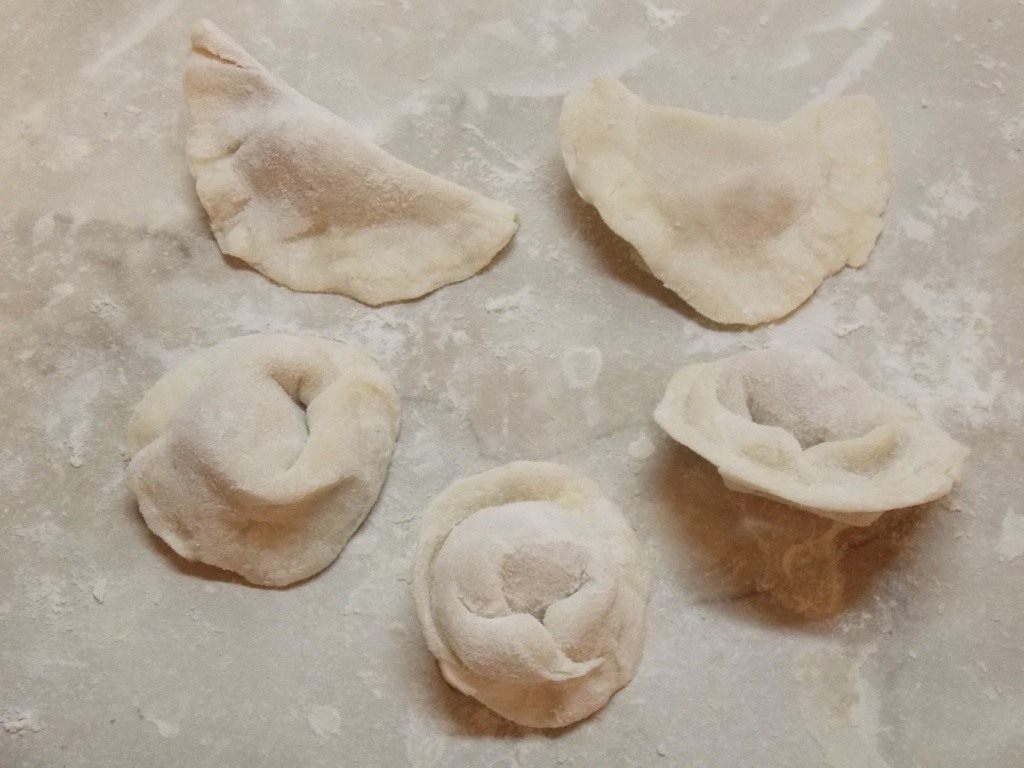
Folding the pelmeni and sealing the edges
Arrange the pelmeni in rows on a floured board. You can freeze them for later or cook them right away!
Dishes with Homemade Pelmeni
Now that you have a solid supply of homemade pelmeni, it’s time to learn the different ways to cook them. You can do more than just boil them and serve with butter and smetana (an Eastern European sour cream); you can also bake them in the oven with egg and cheese, cook them in pots, or make a pelmeni soup!
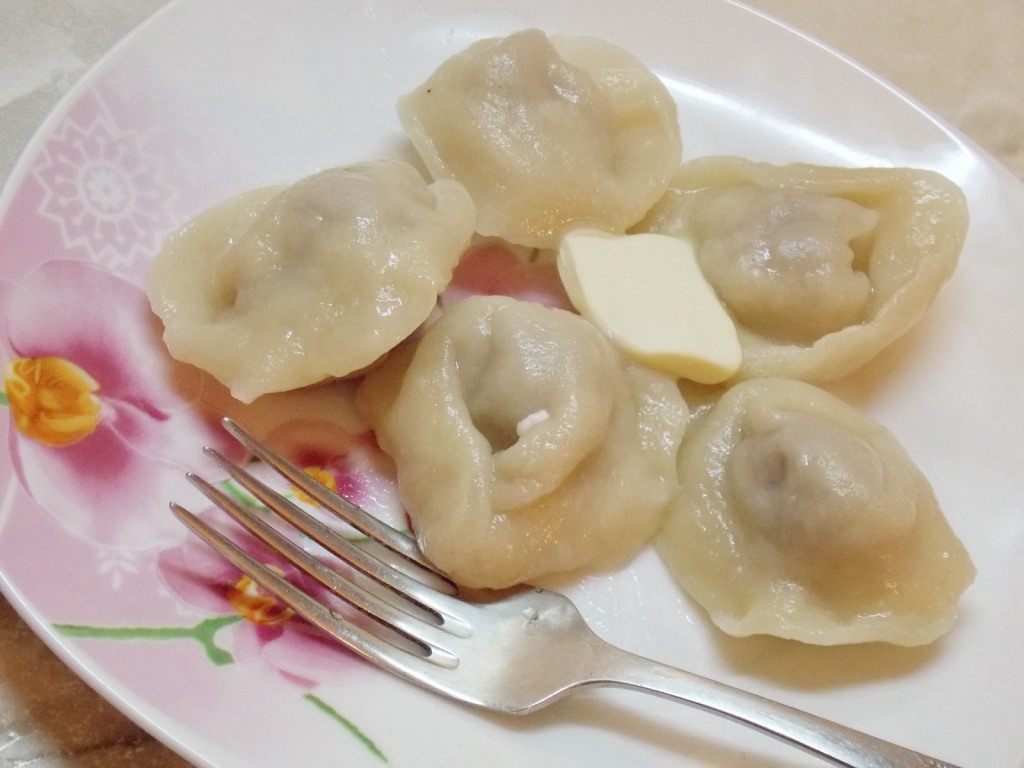
Handmade homemade pelmeni
The Classic Way: Boiling Pelmeni
Drop the pelmeni into boiling salted water (about 1 tbsp of salt per 2.5-3 liters of water). Cook over medium heat until they float to the surface, and then for another 5 minutes at a gentle boil.
Next, use a slotted spoon to transfer the pelmeni to a bowl or plates. Be sure to add a pat of butter to prevent them from sticking together. And if you’re a culinary virtuoso, you can try tossing the pelmeni in the bowl with a flick of the wrist! Just be careful not to send your dinner flying across the kitchen!
Homemade Pelmeni Casserole
500g pelmeni; 2 cups smetana (or sour cream); 2 onions; 30g butter and 1 tbsp vegetable oil; 100g hard cheese; herbs, spices.
This is a convenient way to cook pelmeni without boiling—a real lifesaver if your water is shut off. The dish is delicious and original.
Arrange the pelmeni in a single layer in a greased baking dish. Pour over the smetana mixed with spices and sautéed onions (sautéed in butter). Sprinkle with grated cheese and bake for 30 minutes at 200°C (400°F).
Soup with Homemade Pelmeni
For 2-2.5 liters: 3 potatoes; 1 carrot; 1 onion; 200g pelmeni; 1-2 bay leaves, salt, pepper, fresh herbs.
Boil diced potatoes and sliced carrots for about 15 minutes. Then, add the pelmeni and chopped onion to the pot, and salt the soup to taste. Once the pelmeni float to the surface, wait a couple of minutes and add the bay leaf and chopped dill or parsley. After another 2 minutes, the soup is ready. When serving, add a spoonful of smetana (sour cream) and a small piece of butter to each bowl.
And there you have it—a plate full of delicious, homemade pelmeni! The beauty of this dish lies not only in its comforting taste but also in the memories created while making them. Serve them the classic way, tossed in butter and topped with a generous dollop of smetana (sour cream), or try a splash of vinegar for a tangy kick. Don't forget that your freezer is now stocked with a quick, wholesome meal for a busy day. We hope you enjoy this taste of tradition and share it with your loved ones!
0 comments