
The most common piece of cooking advice in the comments section is always the same: salt meat at the very end, or it will draw out all the juices. Testing this theory is easy enough. Sprinkling a steak with salt, leaving it on a cutting board, and returning 20 minutes later reveals droplets on the surface, a damp board, and darkened meat. The evidence looks convincing.
Yet one major fact contradicts this advice. Professional kitchens salt their steaks a full day before service. Chefs season roast chickens the night before and leave them uncovered on a wire rack in the walk-in cooler. The resulting meat consistently turns out juicier than a cut salted one minute before hitting the pan.
Both observations are entirely accurate, though the first one stops halfway through the process. Salt certainly draws out moisture initially. After a few hours, however, that liquid reabsorbs back into the meat, carrying the dissolved salt with it. Next, the salt goes to work on the proteins, which is the entire point of the technique.
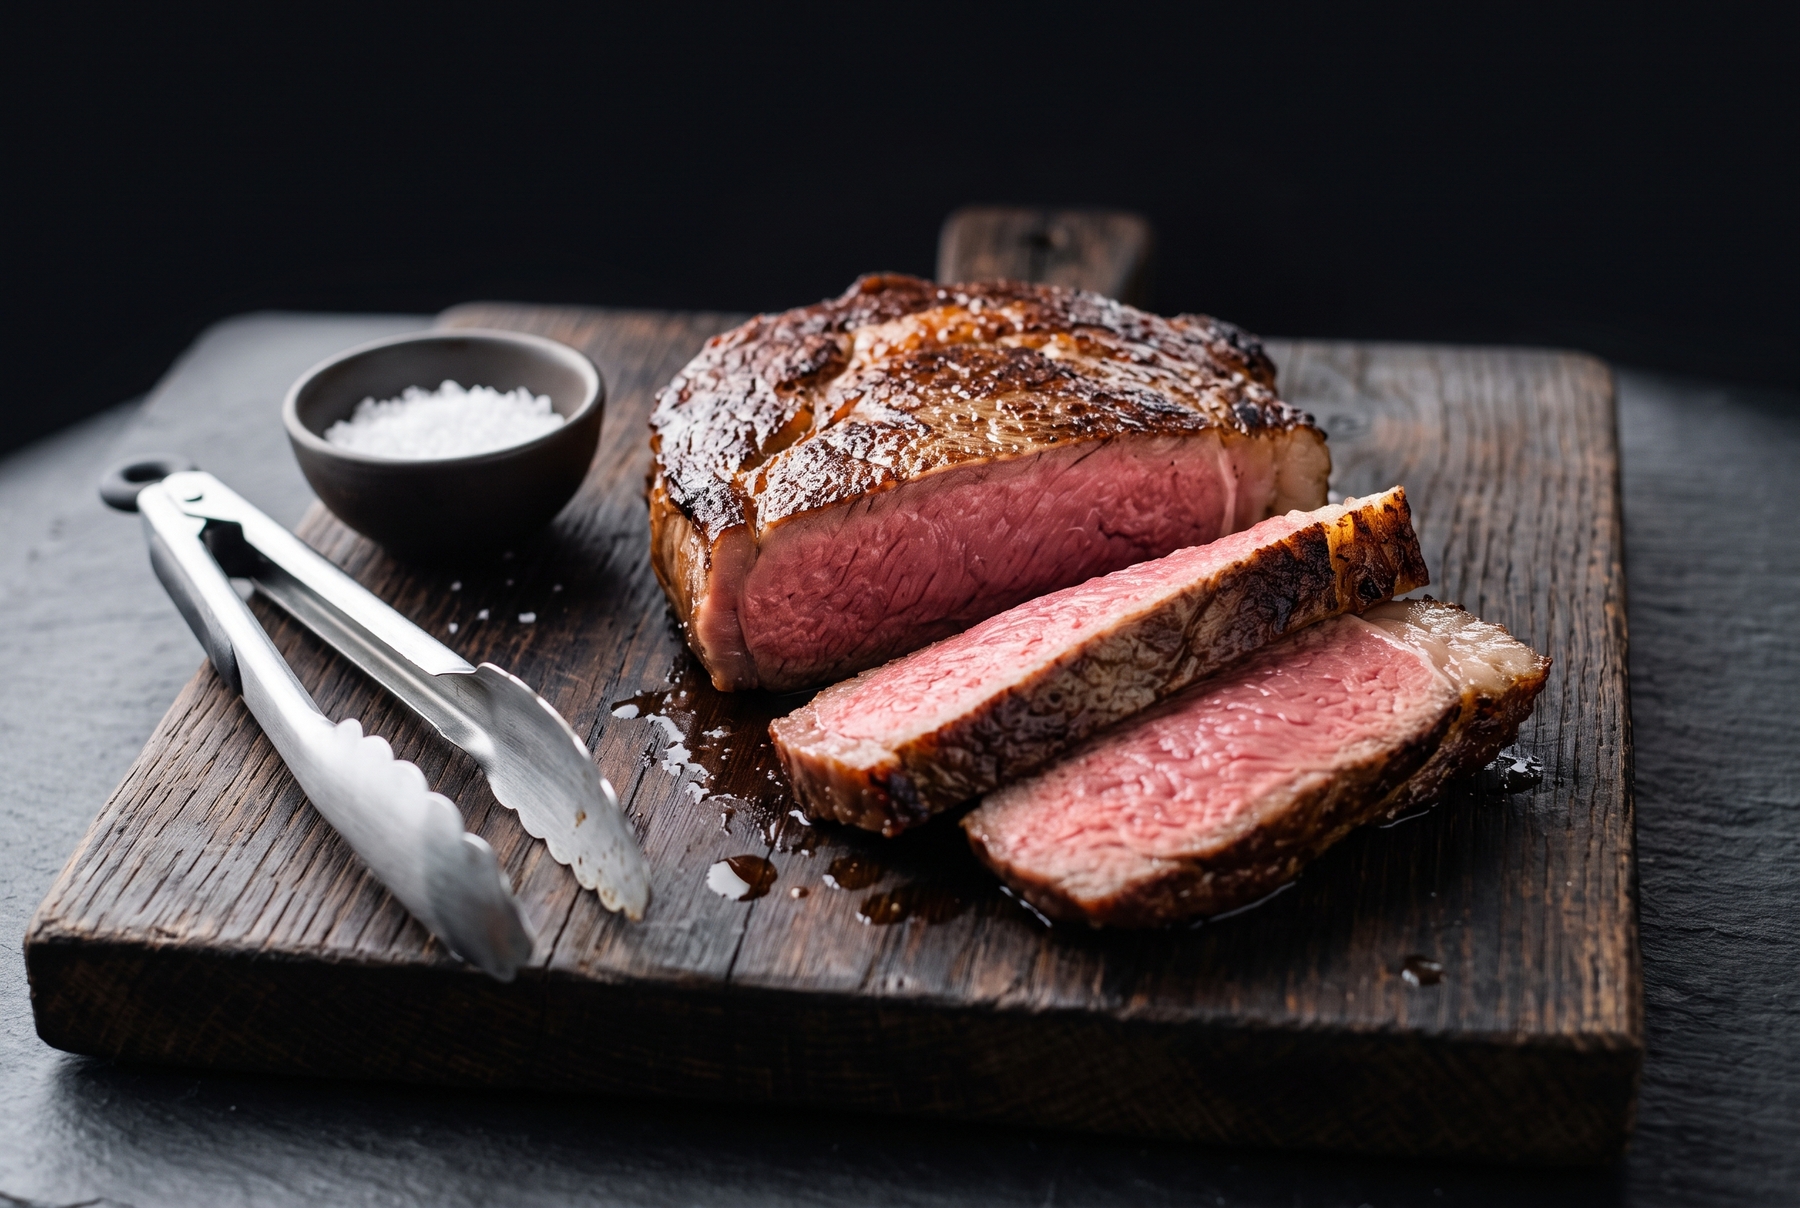
A properly seared steak after dry brining: the juices stay locked inside the meat fibers instead of pooling on the cutting board.
Table of Contents
- What Dry Brining Is and Why It Works Better
- When Dry Brining Beats a Marinade
- How Much Salt to Use for Dry Brining
- Dry Brining Time Chart for Meat, Poultry, and Fish
- How to Dry Brine Properly: A 10-Step Guide
- 5 Real-World Examples to Try Tonight
- 8 Mistakes That Ruin a Dry Brine
- Spices and Aromatics: What to Add Early vs. Late
- 6 Restaurant Tricks Worth Stealing for Your Home Kitchen
- Why Dry Brining Never Dries Out Meat
What Dry Brining Is and Why It Works Better
Four Salting Methods Cooks Constantly Confuse
Mentioning “dry brining” often prompts a simple question: does that just mean salting the meat? Not quite. Four distinct techniques exist, and home cooks mix them up all the time.
Salting right before cooking leaves the seasoning strictly on the exterior. Two minutes is not enough time for salt to penetrate the interior, resulting in a layered flavor profile: a salty crust surrounding a bland center. For a thin escalope or a delicate fish fillet that cooks in three minutes, this surface treatment suffices.
Dry brining operates on a completely different timeline. Applying salt well in advance—usually several hours or a full day before cooking, sometimes accompanied by spices or a pinch of sugar—allows the uncovered protein to rest in the refrigerator for anywhere from 30 minutes to two days, depending on its size. The salt initially pulls moisture to the surface, dissolves into a concentrated brine, and then travels back inside the meat. Nothing goes to waste, and the weight remains virtually unchanged.
Wet brining submerges the protein in a saltwater solution, typically at a 5–8% concentration. The meat absorbs extra water, gains weight, and loses less moisture during cooking. On the downside, this added water dilutes the natural meaty flavor, and poultry skin refuses to dry out properly after a bath, leading to pale, rubbery results. Professional kitchens have largely replaced wet brines with dry brines, save for specific exceptions like ultra-lean heritage turkeys.
Marinating solves an entirely different culinary problem. Acid, oil, and aromatics work almost exclusively on the surface, penetrating only a couple of millimeters even after hours of soaking. A marinade delivers the flavor of its liquid mixture. It barely alters the internal structure of the meat, and an overly acidic bath actually turns the outer layer mushy and dry once exposed to heat.
What Happens Inside the Meat During a Dry Brine
The first stage is visible to the naked eye. Salt on the exterior creates a zone of high concentration, pulling water out from the upper muscle layers via osmosis. Within 15 to 25 minutes, a steak develops a wet sheen, and a few drops of liquid gather beneath a chicken on a wire rack. Many cooks panic at this exact moment and pat the meat dry with paper towels, which is a mistake.
The second stage begins around the 40-minute mark. The drawn-out moisture dissolves the salt crystals to form a highly concentrated brine, which then reabsorbs into the meat. By this point, the surface looks nearly dry again, feeling only slightly tacky to the touch.
The third stage takes the longest. Salt diffuses deep into the muscle fibers and alters the behavior of the proteins: they partially unwind (denature), contract much less aggressively when heated, and trap significantly more water. The practical result is straightforward. A cut salted 24 hours in advance loses far less juice in the pan and slices open to reveal an edge-to-edge pink interior, completely free of that dreaded half-centimeter (0.2 in) gray band of overcooked meat.
Another crucial effect happens simultaneously. Resting uncovered in the cold fridge air dries out the exterior. Because water requires immense energy to evaporate, a dry surface heats up much faster in the pan, building a denser, deeper brown crust a full minute sooner. After 24 hours in the refrigerator, raw chicken skin feels like thin, taut parchment paper.
The goal of this technique is not to make food taste saltier. The true purpose is structural transformation, ensuring the seasoning seasons the very center of the cut rather than sitting on top.
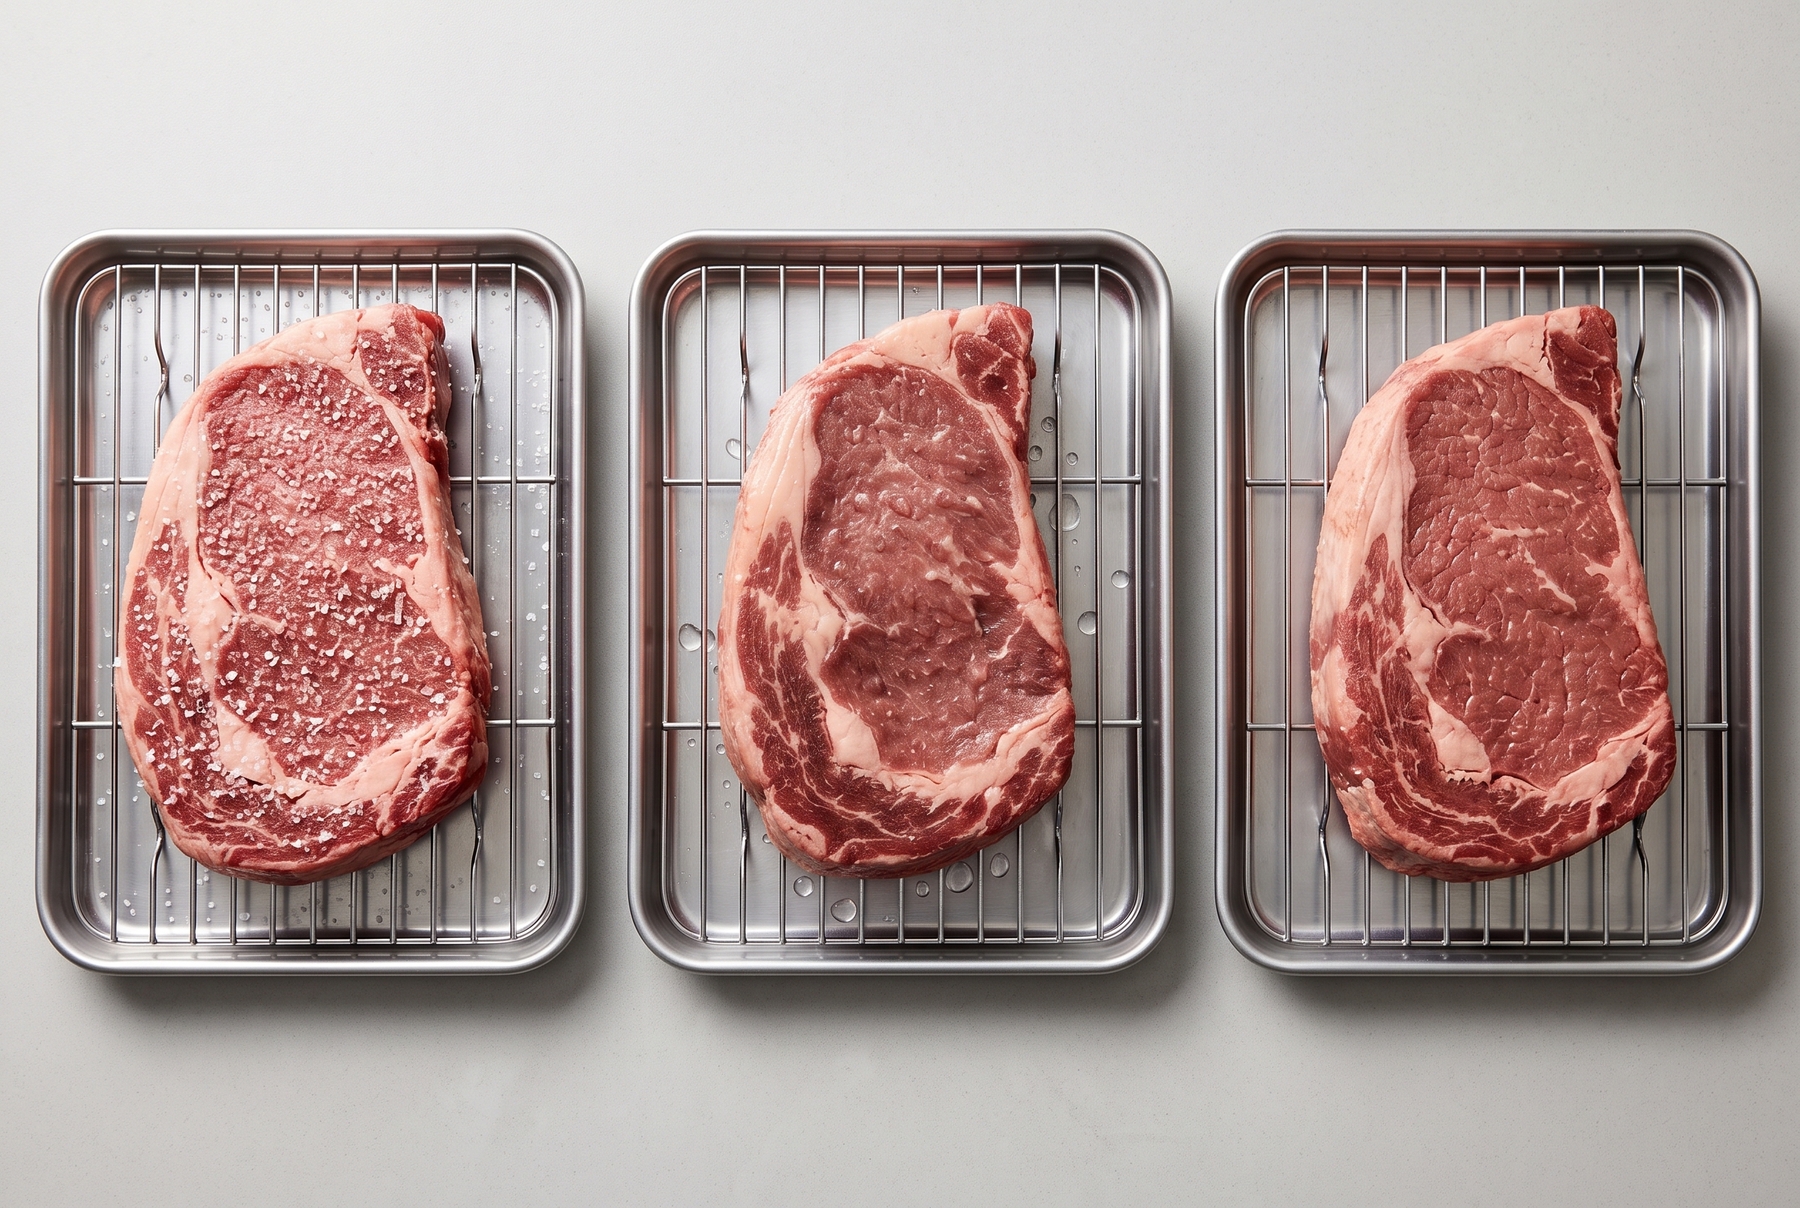
The dry brining timeline: from initial salt application and moisture draw to full brine reabsorption and surface drying.
When Dry Brining Beats a Marinade
The thicker the cut, the more dramatic the difference. On a 4 cm (1.5 in) steak, the contrast between a dry-brined cut and one salted in the skillet is immediately obvious after slicing: the former keeps its juices locked inside the fibers, while the latter leaves a puddle across the cutting board.
Dry brining is the ideal choice for steaks 2.5 cm (1 in) or thicker, roast beef, pork loin, pork shoulder (Boston butt), whole chickens, turkeys, ducks, salmon and trout fillets, and thick fish steaks. Cod and pike-perch (zander, a firm, lean freshwater fish similar to walleye) also benefit from this method, though they require their own strict timeline (more on that below).
Skipping the dry brine makes sense in a few specific scenarios. Razor-thin cuts either won’t have time to benefit from diffusion or will end up tasting overly salty on the surface. Delicate white fish left salted for too long develops a dense, cured texture reminiscent of ham. Finally, dishes defined by a bold marinade—like ginger-soy chicken, yogurt-marinated shashlik (skewered grilled meat), or sticky barbecue ribs—rely on wet mixtures for their signature character.
That said, the two techniques can easily work together. Seasoning pork for the grill with salt 24 hours in advance and applying a dry spice rub an hour before lighting the charcoal offers the best of both worlds: the salt handles moisture retention, while the spices deliver fresh aromatics.
| Cut / Dish | Best Method | Why It Works |
|---|---|---|
| Steak, 3–5 cm (1.2–2 in) | Dry brine, 12–24 hrs | Even seasoning throughout, sears into a crust in a minute |
| Whole roast chicken | Dry brine, 12–24 hrs | Skin dries out completely and blisters in the oven |
| Whole turkey, 5 kg (11 lb) | Dry brine, 24–48 hrs | Deeply seasoned meat without waterlogged texture |
| Chicken wings, shashlik (skewers) | Salt plus marinade | Requires the complex flavor of a sauce, not just salt |
| Thin escalope, minute steak | Salt right before cooking | Too thin to require time for salt diffusion |
| Salmon fillet | Short dry brine, 40–60 mins | Firmer texture, prevents white albumin curds on the surface |
| Cod, pike-perch (zander) | Short dry brine, 15–20 mins | Longer curing turns delicate white fish rubbery |
| Pork for the grill | Salt early, spices later | Sugars and paprika burn quickly over hot coals |
How Much Salt to Use for Dry Brining
More recipes fail at this stage than any other. “Season to taste” is useless advice for dry brining, because tasting happens 24 hours later, long after any mistakes can be fixed.
Calculating Salt by Weight: 0.8%, 1%, and 1.2%
Calculating salt as a percentage of the raw protein’s weight removes all guesswork. One percent of 1 kg (2.2 lb) is simply 10 g (0.35 oz).
0.8% works best for fish and dishes paired with salty sauces or aged cheeses. The meat turns out delicately seasoned, with the salt playing a quiet supporting role.
1% serves as the universal baseline for beef and poultry. This ratio is the most predictable, nearly impossible to mess up, and the best place to start.
1.2% delivers a more pronounced savoriness, ideal when every slice needs a distinct, robust seasoning: think whole holiday turkeys, heavily marbled pork shoulder, or large beef roasts. The size of the cut does not change the percentage; it only changes the resting time. Larger roasts simply need more hours in the fridge for that 1.2% salt to travel to the center, making this higher ratio purely a matter of personal preference.
Most importantly, this measured amount represents the total salt for the entire protein. No extra salt is needed before hitting the pan, and any sauces or side dishes should be seasoned separately.
Salt crystal size presents another common trap. Ten grams (0.35 oz) of fine table salt and ten grams of coarse kosher or rock salt have the exact same salinity, but their volumes differ wildly: a level teaspoon of fine salt weighs about 6 g (0.21 oz), whereas coarse salt weighs roughly 4–5 g (0.14–0.18 oz). A cook accustomed to coarse crystals who suddenly grabs fine salt will accidentally oversalt the dish by about thirty percent.
Measuring Without a Kitchen Scale
The estimates below are calculated by weight percentage and converted into level teaspoons of fine salt. Volume measurements are inherently imprecise, making a digital scale far superior to any measuring spoon.
- 300 g (10.5 oz) steak: 3 g (0.1 oz), about ½ teaspoon
- 200 g (7 oz) chicken breast: 2 g (0.07 oz), about ⅓ teaspoon
- 1.5 kg (3.3 lb) whole chicken: 15 g (0.5 oz), about 2½ teaspoons
- 1.5 kg (3.3 lb) pork shoulder: 15–18 g (0.5–0.6 oz), about 3 teaspoons
- 500 g (1.1 lb) salmon fillet: 4–5 g (0.14–0.18 oz), scant 1 teaspoon
- 5 kg (11 lb) turkey: 50–60 g (1.75–2.1 oz)
Using coarse salt requires increasing the volume by roughly a third. Buying an inexpensive digital kitchen scale costs less than a single good steak and solves this problem forever.
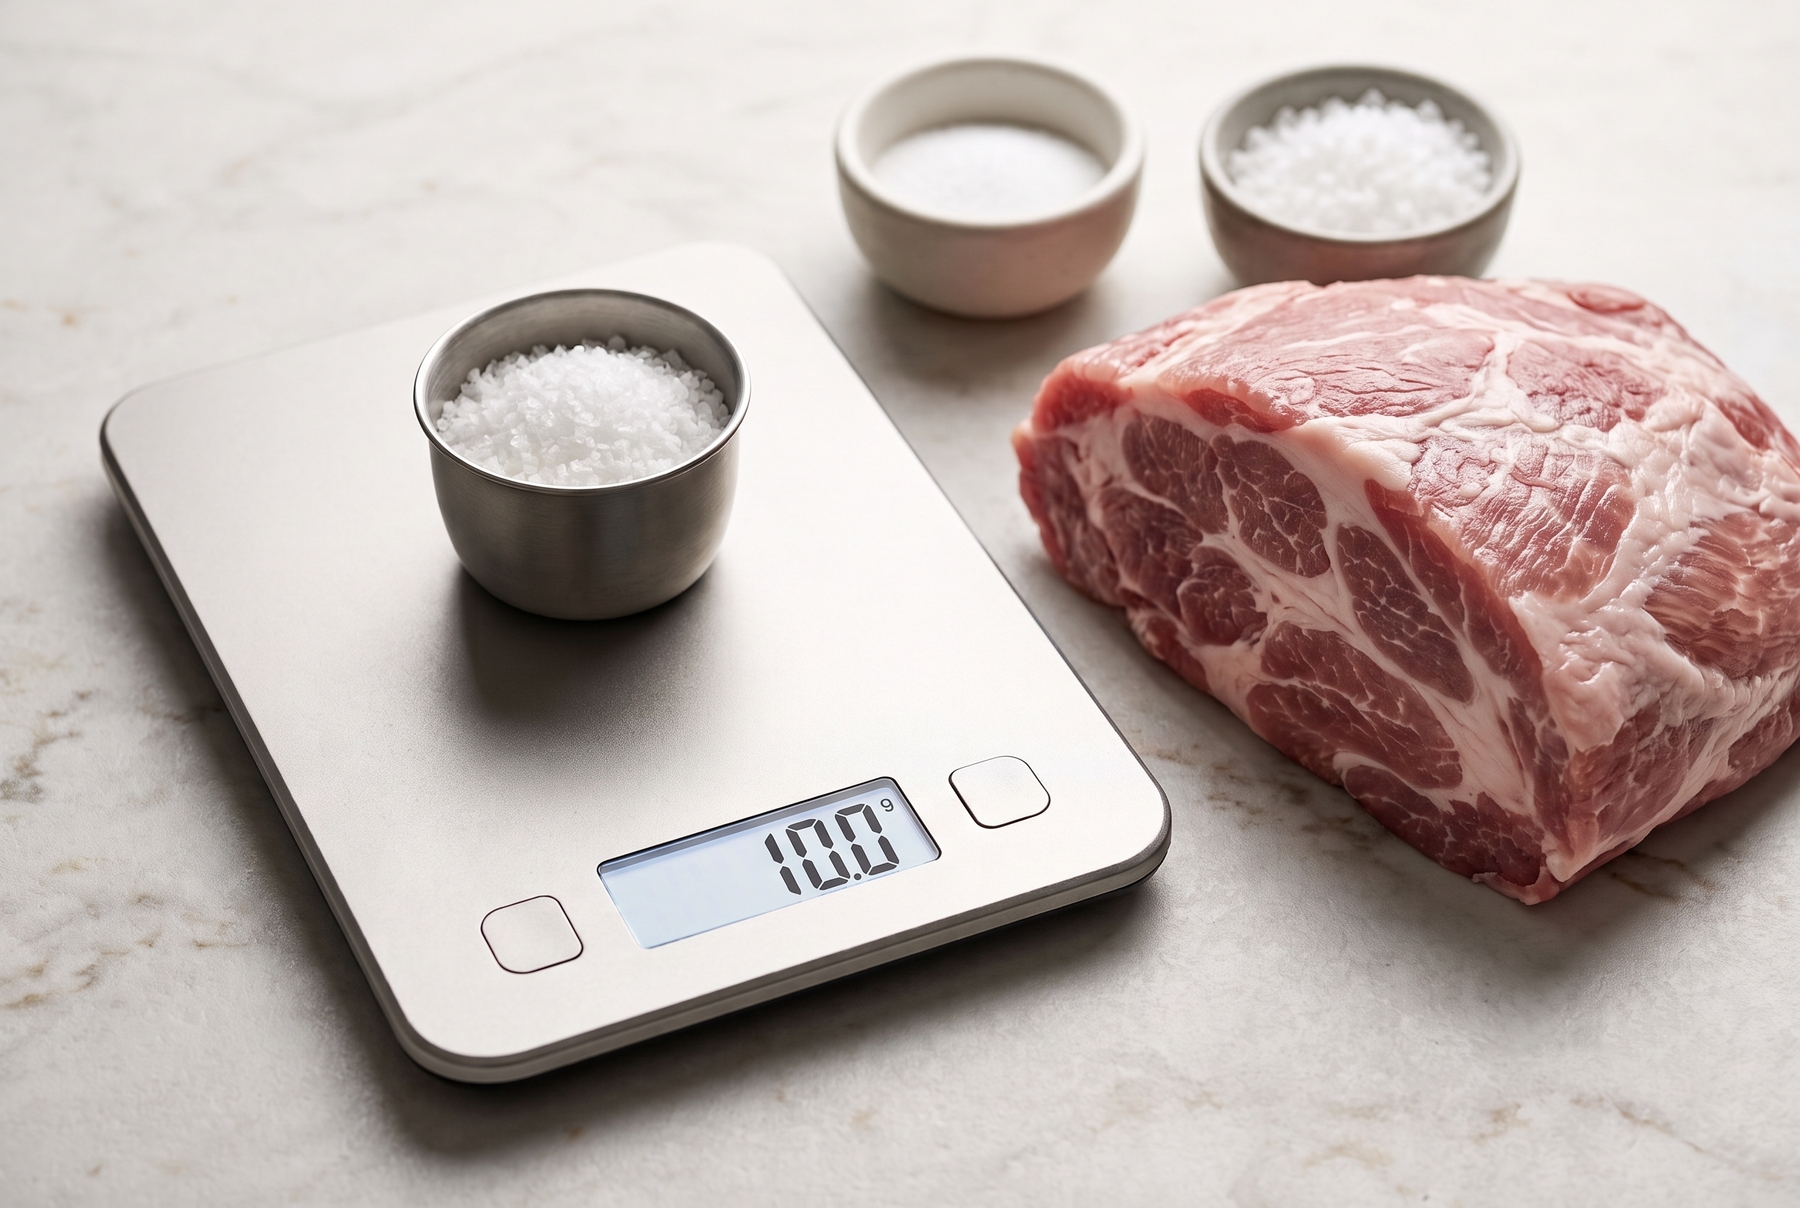
For consistent results, salt is measured strictly as a percentage of the raw protein's weight.
Dry Brining Time Chart for Meat, Poultry, and Fish
This chart compiles data from professional restaurant kitchens and rigorous home testing. The minimum column marks the threshold below which dry brining offers no real benefit. The optimal window represents the sweet spot for everyday cooking. The maximum limit indicates the point where the muscle fibers begin curing into a dense, ham-like texture.
| Protein | Thickness or Weight | Salt % | Minimum | Optimal | Maximum |
|---|---|---|---|---|---|
| Beef steak | 2–3 cm (0.8–1.2 in) | 1% | 45 mins | 4–12 hrs | 24 hrs |
| Thick steak, tomahawk | 4–5 cm (1.5–2 in) | 1% | 2 hrs | 12–24 hrs | 48 hrs |
| Roast beef | 1.5–2.5 kg (3.3–5.5 lb) | 1–1.2% | 6 hrs | 24 hrs | 48 hrs |
| Pork loin | Whole roast | 1% | 4 hrs | 12–24 hrs | 36 hrs |
| Pork shoulder (butt) | 1.5–2 kg (3.3–4.4 lb) | 1–1.2% | 8 hrs | 24 hrs | 48 hrs |
| Chicken breast | 180–250 g (6–9 oz) | 0.8–1% | 30 mins | 2–4 hrs | 12 hrs |
| Chicken thighs, drumsticks | Bone-in | 1% | 1 hr | 4–12 hrs | 24 hrs |
| Whole chicken | 1.3–1.8 kg (2.8–4 lb) | 1% | 4 hrs | 12–24 hrs | 36 hrs |
| Whole turkey | 4–7 kg (9–15 lb) | 1–1.2% | 12 hrs | 24–48 hrs | 72 hrs |
| Whole duck | 2–2.5 kg (4.4–5.5 lb) | 1% | 6 hrs | 12–24 hrs | 48 hrs |
| Salmon or trout fillet | 2–3 cm (0.8–1.2 in) | 0.8–1% | 20 mins | 40–60 mins | 3 hrs |
| Salmon steak | 3–4 cm (1.2–1.5 in) | 1% | 30 mins | 1–2 hrs | 4 hrs |
| Cod | Fillet | 0.8% | 10 mins | 15–20 mins | 30 mins |
| Pike-perch (zander) | Fillet | 0.8% | 10 mins | 15–25 mins | 40 mins |
Every timeline in this chart assumes the food rests uncovered on a wire rack inside a refrigerator set between 0°C and 4°C (32–39°F). That upper temperature limit is a strict food safety rule: raw meat, poultry, and fish must never be stored above 4°C (39°F).
The 10-to-40-minute window deserves a special warning. This timeframe is the absolute worst moment to start cooking: the salt has pulled moisture to the surface, but the meat has not yet reabsorbed it. Dropping a wet steak into a skillet prevents a proper sear, causing the meat to steam in its own juices and turn gray. Seasoning must happen either immediately before hitting the hot pan or at least 45 minutes in advance.
How to Dry Brine Properly: A 10-Step Guide
- Blot the surface dry with paper towels. Vacuum-packed poultry especially holds excess purge (liquid), which will simply dissolve the salt and wash it away onto the tray.
- Weigh the protein on a digital scale. Skipping this step turns the rest of the process into a guessing game.
- Calculate the exact salt weight: 1% for most meats, 0.8% for fish, and 1–1.2% for heavily marbled pork shoulder or large roasts that benefit from bolder seasoning.
- Sprinkle the salt from a height of about 25 cm (10 in) using two fingers to ensure an even coating across the entire surface, including the sides and edges. For whole poultry, season the cavity and gently loosen the skin over the breast to rub a portion of the salt directly onto the meat underneath.
- Set the protein on a wire cooling rack placed inside a rimmed baking sheet or large plate. Air must circulate freely around all sides, including the bottom.
- Place the tray uncovered on the bottom shelf of the refrigerator.
- Leave the meat completely uncovered. Wrapping it in plastic traps moisture, ruins the surface-drying effect, and leaves poultry skin limp instead of taut. If strong-smelling foods are stored nearby, tent the meat very loosely with foil, leaving wide gaps for airflow.
- Never rinse the meat before cooking. The salt has already migrated inside, so rinsing removes zero salinity while reintroducing all the surface moisture the fridge just spent 24 hours evaporating.
- Dab any remaining damp spots with a paper towel right before cooking. A slightly tacky pellicle (a thin film of dissolved proteins) often forms on the exterior; leave it intact, as it browns beautifully in the pan.
- Skip the pre-sear salt. If the finished dish needs a final pop of flavor, scatter flaky sea salt over the sliced meat right on the serving platter.
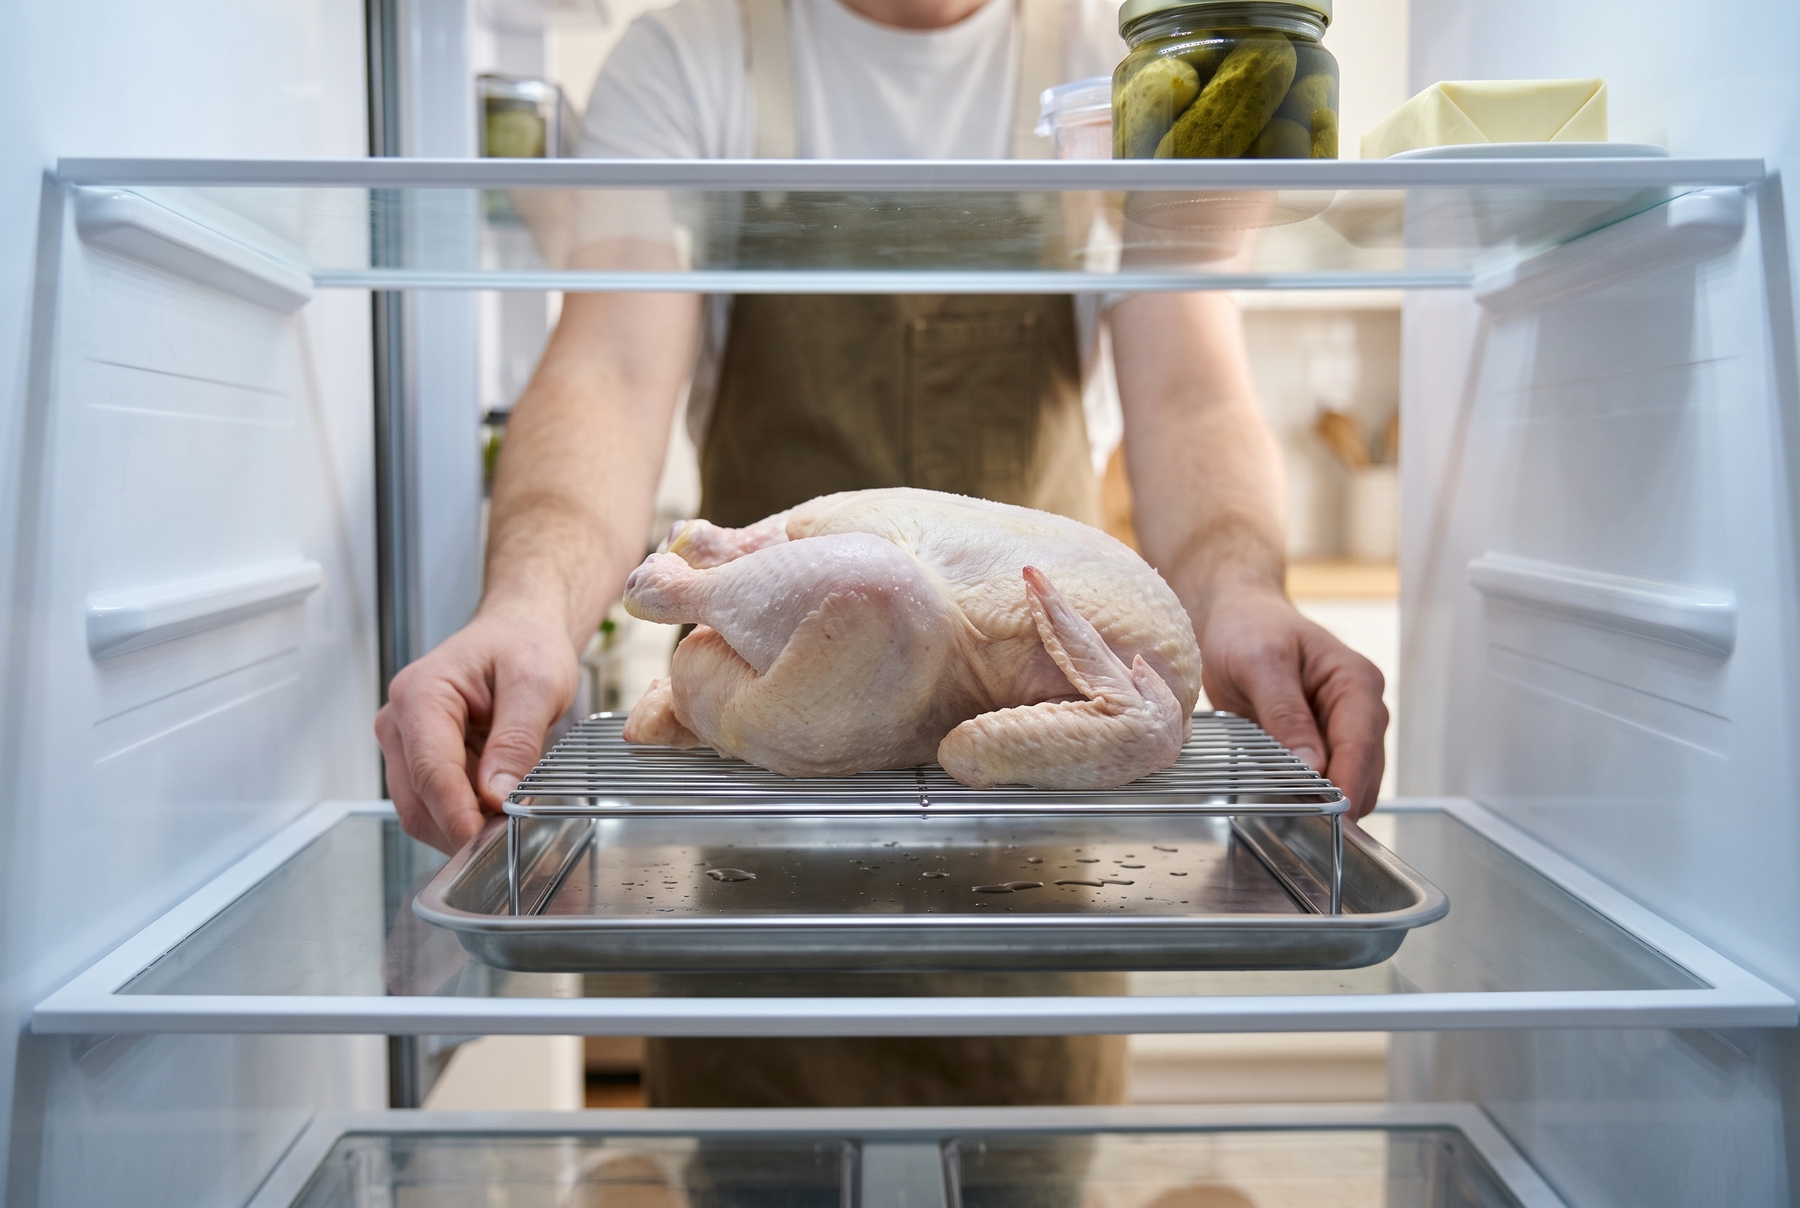
Resting a salted chicken uncovered on a wire rack in the fridge dries out the skin for an ultra-crisp roast.
5 Real-World Examples to Try Tonight
400 g (14 oz) Ribeye Steak
For a 3.5 cm (1.4 in) thick cut, use 4 g (0.14 oz) of salt and rest it on a wire rack for 12 hours. Pull the steak from the fridge 30 minutes before cooking, blot it with a paper towel, and leave the surface completely bare.
Heat a cast-iron skillet until wisps of smoke appear, then add a thin layer of high-smoke-point oil. Laying the steak in the pan should trigger an immediate, aggressive sizzle without a second of hesitation. Sear for 2–3 minutes per side, then toss in butter and fresh thyme, basting the foaming fat over the crust with a spoon. Pull the steak from the heat when an instant-read thermometer hits 50–52°C (122–125°F) in the center; carryover cooking will bring it to a perfect 54–55°C (130°F) medium-rare during an 8-minute rest on a warm plate.
Slicing the steak leaves barely a drop or two of liquid on the board. An unbrined steak cooked the exact same way leaves a small lake.
Whole Roast Chicken
For a 1.5 kg (3.3 lb) bird, measure 15 g (0.5 oz) of salt and let it rest in the fridge for 12 to 24 hours. Slide your fingers under the breast skin to separate it from the meat, rubbing about a third of the salt directly onto the breast, then distribute the rest inside the cavity and all over the exterior skin.
After 24 hours, the skin looks slightly translucent, tight, and completely dry to the touch. Roast at 200°C (400°F) until the thickest part of the thigh registers 74°C (165°F), which usually takes 60 to 75 minutes for a bird of this size. Resist basting for the first 40 minutes, or the liquid will soften the dried skin and ruin the crispness.
Because the fridge air already evaporated the water from the skin, the oven’s heat goes straight into browning and rendering fat. Carving into the finished bird produces an audible, shatteringly crisp snap.
Slow-Roasted Pork Shoulder
A 1.5 kg (3.3 lb) boneless pork shoulder (Boston butt) takes 15–18 g (0.5–0.6 oz) of salt (1–1.2%) and a full 24-hour rest. Rich intramuscular fat mutes the perception of salt, so the 1% ratio yields a milder flavor, while 1.2% makes the seasoning sing in every bite. Because the roast is thick, the salt needs that full day to reach the core.
Roast low and slow at 150°C (300°F). For firm, sliceable roast pork, cook until the internal temperature reaches 72–75°C (160–167°F)—about two and a half hours for this weight—followed by a 20-minute rest. For tender, pull-apart pork that shreds with a fork, push the internal temperature to 90–95°C (195–203°F), budgeting closer to four hours in the oven.
Thanks to the long dry brine, the sliced pork stays remarkably moist even after chilling in the fridge overnight. Eating a cold slice the next day is the ultimate test: if it still tastes juicy straight from the refrigerator, the technique worked flawlessly.
Pan-Seared Salmon Fillet
Season a 500 g (1.1 lb) fillet with 4–5 g (0.14–0.18 oz) of salt and let it rest skin-side down on a rack for 40 to 60 minutes. Avoid leaving it longer than three hours, or the texture will shift toward cured gravlax.
Pat the flesh dry, lay the fillet skin-side down in a hot skillet, and press firmly with a flexible spatula for 10 seconds to prevent the skin from curling. Cook over medium heat for 4–5 minutes until the skin is crisp, then flip for a final minute on the flesh side. Those unsightly white curds of coagulated protein (albumin) that normally ooze from cooked salmon barely appear at all; escaping water pushes albumin to the surface, and the dry brine locks that water inside.
Pulling the salmon at an internal temperature of 48–50°C (118–122°F) yields translucent, buttery flakes that glisten with moisture. For a firmer, fully opaque fillet, cook it to 63°C (145°F).
Thin tail fillets often need just 30 minutes of brining, while multi-hour rests are best reserved for thick, skin-on center-cut steaks.
Cod and Pike-Perch (Zander)
Lean white fish requires the exact opposite approach: a short, strictly timed window. Measure 0.8% salt (just over 3 g / 0.1 oz for a 400 g / 14 oz fillet), let it sit for 15 to 20 minutes at room temperature or in the fridge, and blot thoroughly with paper towels before cooking.
This brief cure firms up the delicate flakes just enough to keep the fillet from falling apart when flipped in the skillet. Leaving the salt on for a full hour, however, permanently turns the fish rubbery. Pike-perch (or walleye) is slightly more forgiving than flaky cod, though not by much.
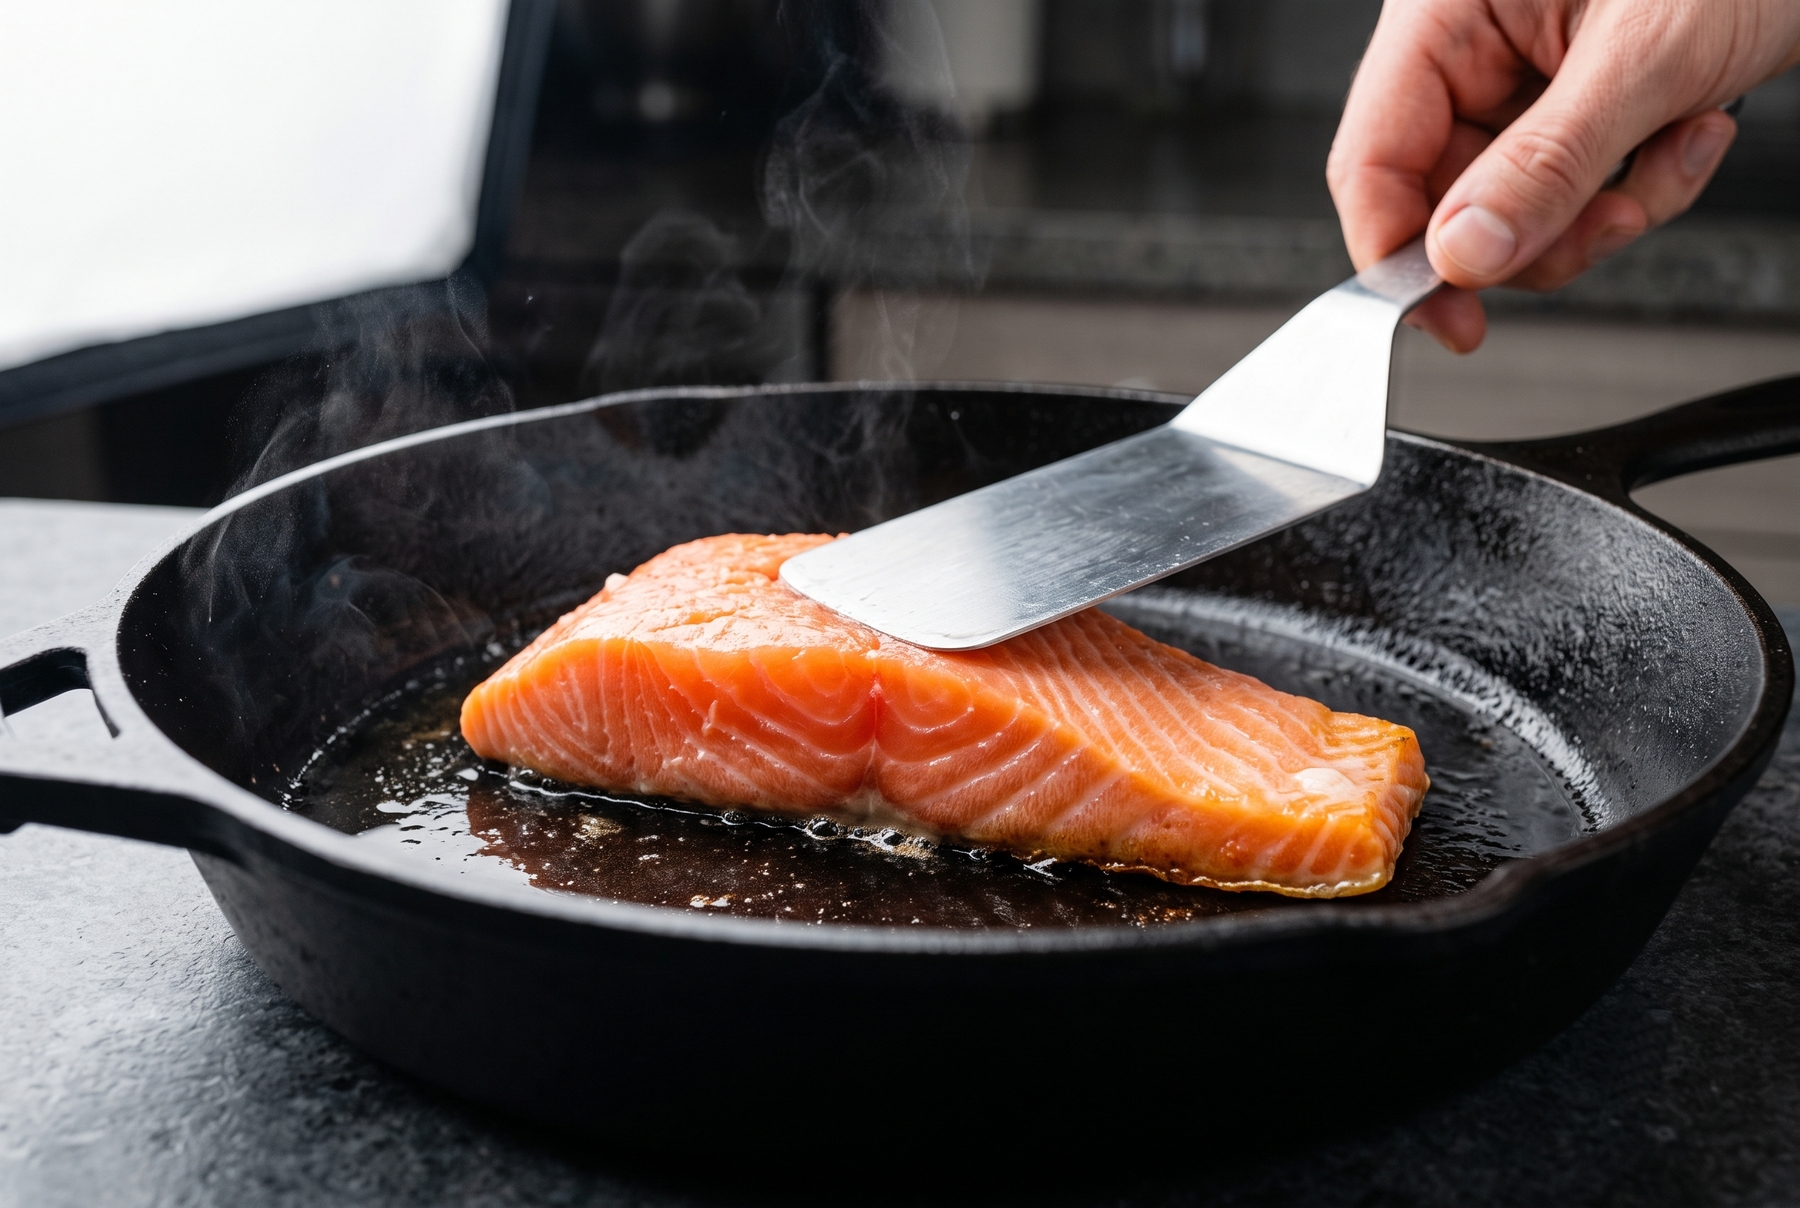
Searing salmon skin-side down: a brief dry brine firms up the flesh and prevents white albumin curds from forming.
8 Mistakes That Ruin a Dry Brine
Exceeding 1.5% salt. An oversalted dry brine cannot be undone because the sodium has already bonded with the internal muscle fibers. Catching the mistake within the first 30 minutes allows you to brush off the excess crystals, give the meat a quick cold rinse, pat it dry, and cook it without any further seasoning. Discovering the error 24 hours later requires damage control on the plate: pair the meat with acidic sides, sour cream, heaps of fresh herbs, or unseasoned mashed potatoes.
Salting 20 minutes before cooking. This falls squarely into the dead zone. The exterior is wet with drawn-out moisture, which drops the skillet’s temperature, prevents browning, and steams the meat gray. Either salt the second before the meat hits the pan, or wait the full 45 minutes.
Habitual double-salting before searing. Muscle memory makes cooks reach for the salt cellar right by the stove, especially when the dry-brined meat looks completely bare. All the necessary salt is already inside; adding more just ruins the balance. When in doubt, slice off a tiny corner, sear it in the pan, and taste it first.
Measuring fine salt with spoons instead of a scale. This classic blunder leads to a 30% oversalt. Fine crystals pack densely into a measuring spoon, weighing significantly more than an equal volume of coarse kosher salt.
Sealing the meat in a bag or covered container. Trapping the protein in an airtight space forces it to stew in its own purged liquid, preventing the surface from drying out and ruining any chance of a crisp crust. Half the magic of dry brining relies on the open air and a wire rack.
Over-brining delicate white fish. An hour in salt turns tender cod into an eraser. The “longer is better” philosophy fails completely here; stick to a tight 15-to-20-minute timer.
Storing meat in a warm refrigerator. Leaving raw poultry uncovered at 5°C (41°F) or higher creates a serious food safety hazard, and shortening the brine time by a few hours does not fix the risk. Placing an inexpensive appliance thermometer on the bottom shelf reveals the fridge’s actual operating temperature.
Panicking over initial surface moisture. This is the most common rookie mistake. Seeing beads of liquid after 30 minutes convinces cooks the meat is drying out, prompting them to wipe or rinse it off. During a proper rest, most of that liquid reabsorbs into the muscle, some evaporates into the fridge air, and a few drops fall onto the tray below. How quickly the exterior dries depends on the cut, fridge temperature, humidity levels, and internal fan circulation. Judge readiness by touch rather than the clock: when it is time to cook, the surface should feel dry and tacky.
Spices and Aromatics: What to Add Early vs. Late
Dry, heat-stable seasonings pair wonderfully with the initial salt rub: granulated garlic, dried thyme, crushed rosemary, ground coriander, and dried citrus zest all work well. Over 24 hours, their fat-soluble compounds hydrate slightly and perfume the outer layer of the meat without burning cleanly away in the oven.
Save fresh garlic for the very end. Left raw on meat in the fridge for a day, minced garlic develops a harsh, metallic funk, and in a blazing-hot skillet, it burns bitter in ten seconds flat. Rubbing a cut clove over a rested steak or tossing crushed cloves into the foaming butter during the final minute of basting delivers vastly better flavor.
Paprika behaves similarly. Its natural sugars scorch and turn acrid over high direct heat, meaning it belongs on a steak only after searing, though it handles a gentle 150°C (300°F) oven roast just fine when applied in advance.
Black pepper requires a split strategy. Searing a steak in a smoking-hot cast-iron pan burns fine black pepper, leaving an acrid bite that scratches the back of the throat; season with pepper after the sear instead. For slow oven roasting at moderate temperatures, applying coarse cracked pepper right alongside the salt works beautifully.
Sugar acts as a browning accelerator and gently rounds out the sharp edges of the salt. Mixing in about a quarter of the salt’s weight in sugar (2–3 g / 0.1 oz of sugar for every 10 g / 0.35 oz of salt) works wonders for chicken, duck, and pork roasts. Skip the sugar entirely on beef steaks meant for a screaming-hot pan, as it will carbonize before a crust can form.
Delicate fresh herbs like parsley, cilantro, and basil have no place in a dry brine; the salt wilts them into black, flavorless shreds. Scatter them fresh over the finished dish right before serving.
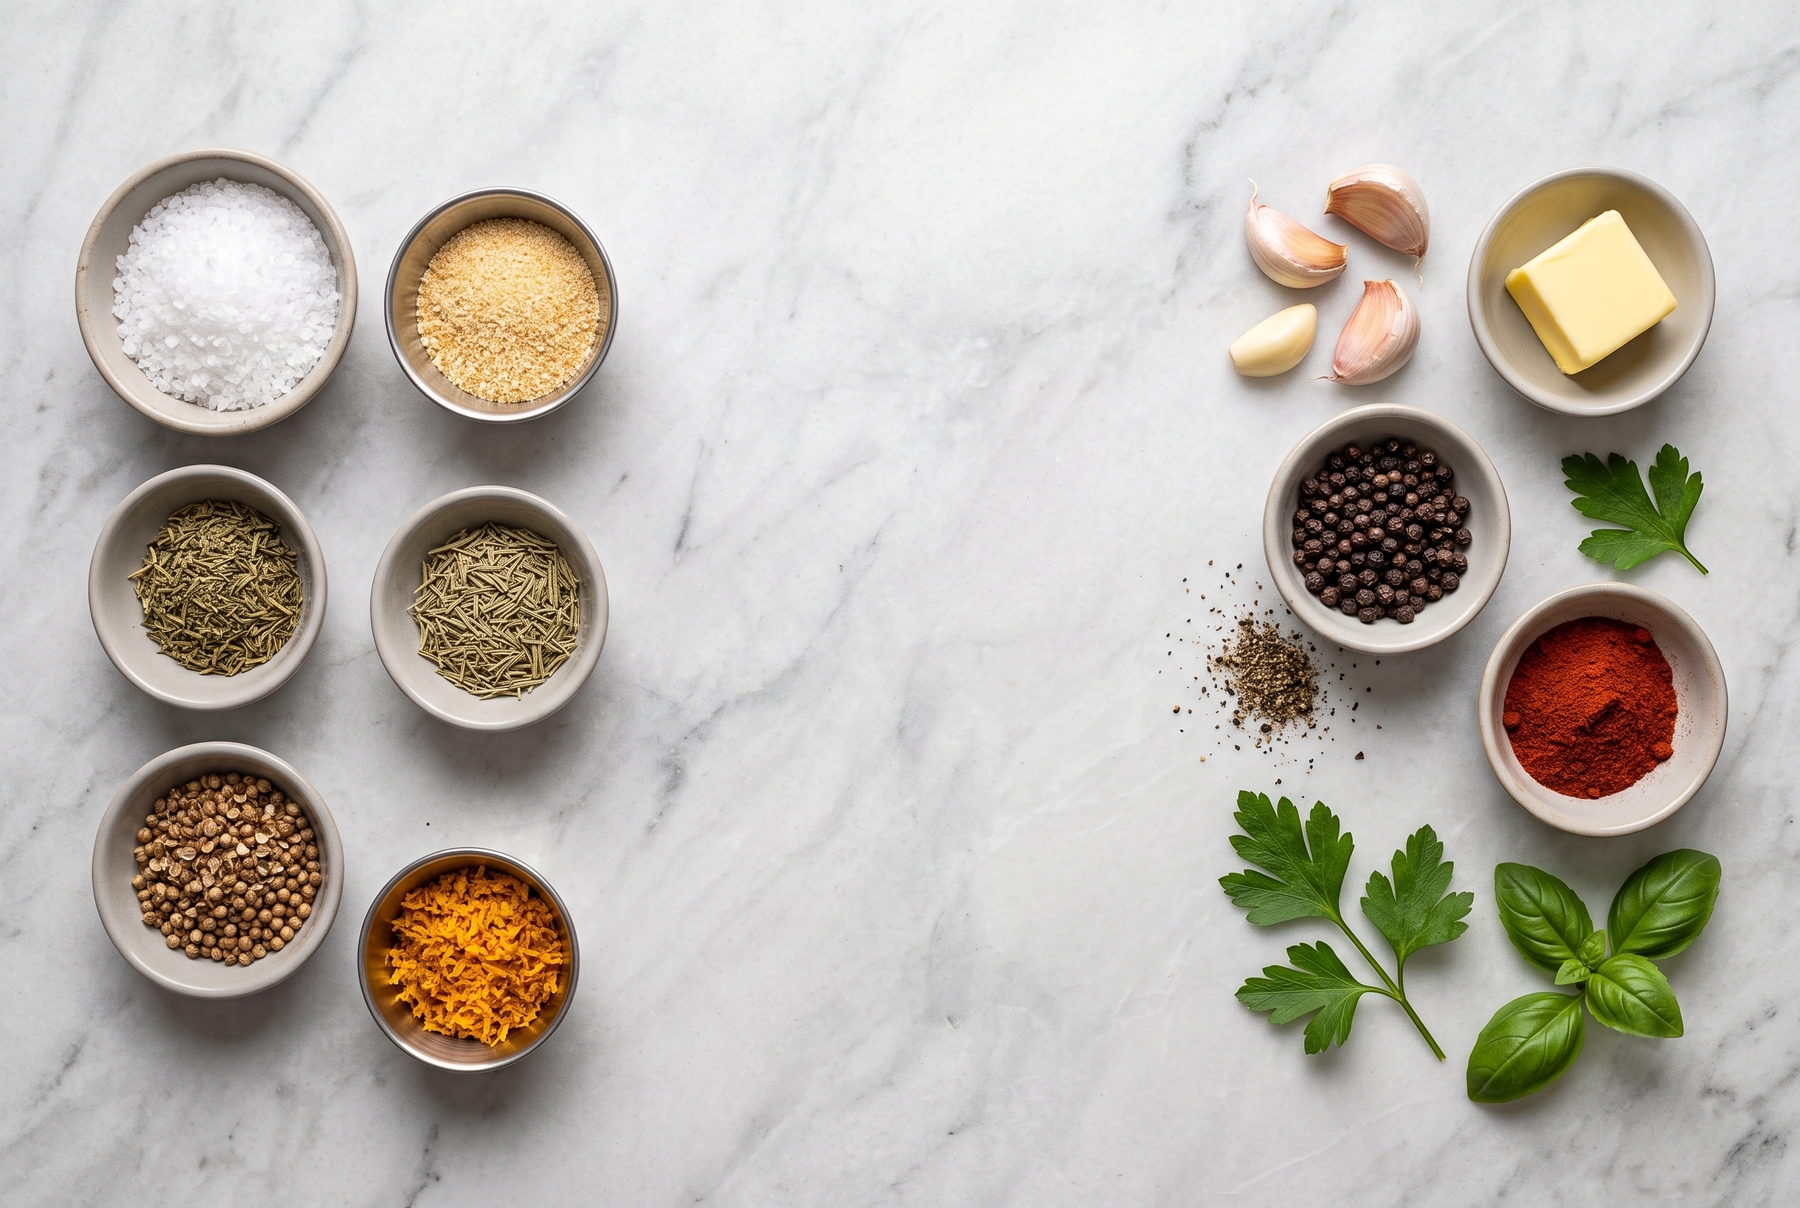
Dry spices can be applied early alongside the salt, while fresh garlic and tender herbs belong at the very end of cooking.
6 Restaurant Tricks Worth Stealing for Your Home Kitchen
Use a wire rack instead of a flat plate. Resting meat directly on a plate traps liquid underneath, leaving the bottom soggy and pale. Elevating the cut on a wire cooling rack allows cold air to circulate 360 degrees, drying the exterior evenly on all sides while the baking sheet below simply catches any stray drips.
Let the fridge fan do the heavy lifting. Modern frost-free refrigerators use internal fans to circulate cold, dry air, essentially functioning as gentle dehydrators. Leaving the meat uncovered takes full advantage of this built-in engineering for free.
Mix a pinch of baking powder into the salt for poultry skin. Raising the pH level creates a mildly alkaline environment that accelerates the Maillard reaction, causing chicken skin to blister into microscopic, shattering bubbles. Keep the ratio conservative: never exceed a quarter of the salt’s weight (roughly 3–4 g of baking powder per 15 g of salt), or a metallic, soapy aftertaste will develop. On chicken wings, this trick produces results rivaling a deep fryer.
Apply oil only right before cooking. Coating raw meat in oil at the start creates a waterproof barrier that stops moisture evaporation dead in its tracks, wasting the entire 24-hour fridge rest. Rubbing a thin layer of oil over the meat just one minute before it hits the heat is the proper sequence.
Season from 25 cm (10 in) above the board. Dropping salt from high up looks theatrical, but the physics are sound: gravity spreads the falling crystals into an even, uniform blanket rather than concentrated clumps. Salting from 5 cm (2 in) away guarantees three overly salty patches surrounded by unseasoned meat.
Start the brine when unpacking groceries, not when starting dinner. Taking a whole chicken out of its grocery store packaging, blotting it dry, salting it, and setting it on a rack in the fridge takes three minutes. By tomorrow evening, dinner is already halfway prepped. Family members might initially ask why a naked bird is sitting uncovered on the bottom shelf, but after tasting the first roast chicken, they will only ask when the next one is happening.
Over a live charcoal grill, the benefits of dry brining shine brightest. A dry exterior doesn’t release a cloud of gray steam over the coals, the crust locks in minutes faster, and the interior retains the precious juices that high, dry grill heat usually steals away.
Why Dry Brining Never Dries Out Meat
Salt unequivocally pulls water out of raw meat—the old culinary myth gets that part right. The myth simply stops observing after the first 20 minutes, jumping to conclusions before the science finishes the job.
No secret restaurant equipment or trendy molecular gastronomy is required here. A box of salt is already sitting in the pantry, and a wire rack is already inside the oven. Without buying a single spice, marinade, or gadget, shifting the exact same step 24 hours earlier transforms the final dish.
A chicken salted last night uses the exact same 15 g (0.5 oz) of salt as a chicken seasoned one minute before roasting. The only difference is when you opened the salt box.
0 comments