
A persistent myth suggests that homemade ice cream without a machine is doomed to become watery ice, and only an expensive ice cream maker can save the day. However, an ice cream maker simply churns the mixture with a paddle while it freezes, breaking up ice crystals and preventing them from merging. The exact same work can easily be done by hand to create perfect, ice-free ice cream, provided one understands exactly what happens inside the bowl as the mixture cools to sub-zero temperatures.
Good ice cream is closer to a dense, cold, fat-based foam than to a frozen liquid. Three structures exist simultaneously inside it: an emulsion (fat dispersed in water), a foam (air bubbles), and a suspension of tiny ice crystals. The main problem here lies in free water that is not bound by sugar and proteins. During freezing, it forms large crystals with sharp edges. The less free water remains, the smaller the crystals and the smoother the texture. Otherwise, the mass freezes into a solid block.
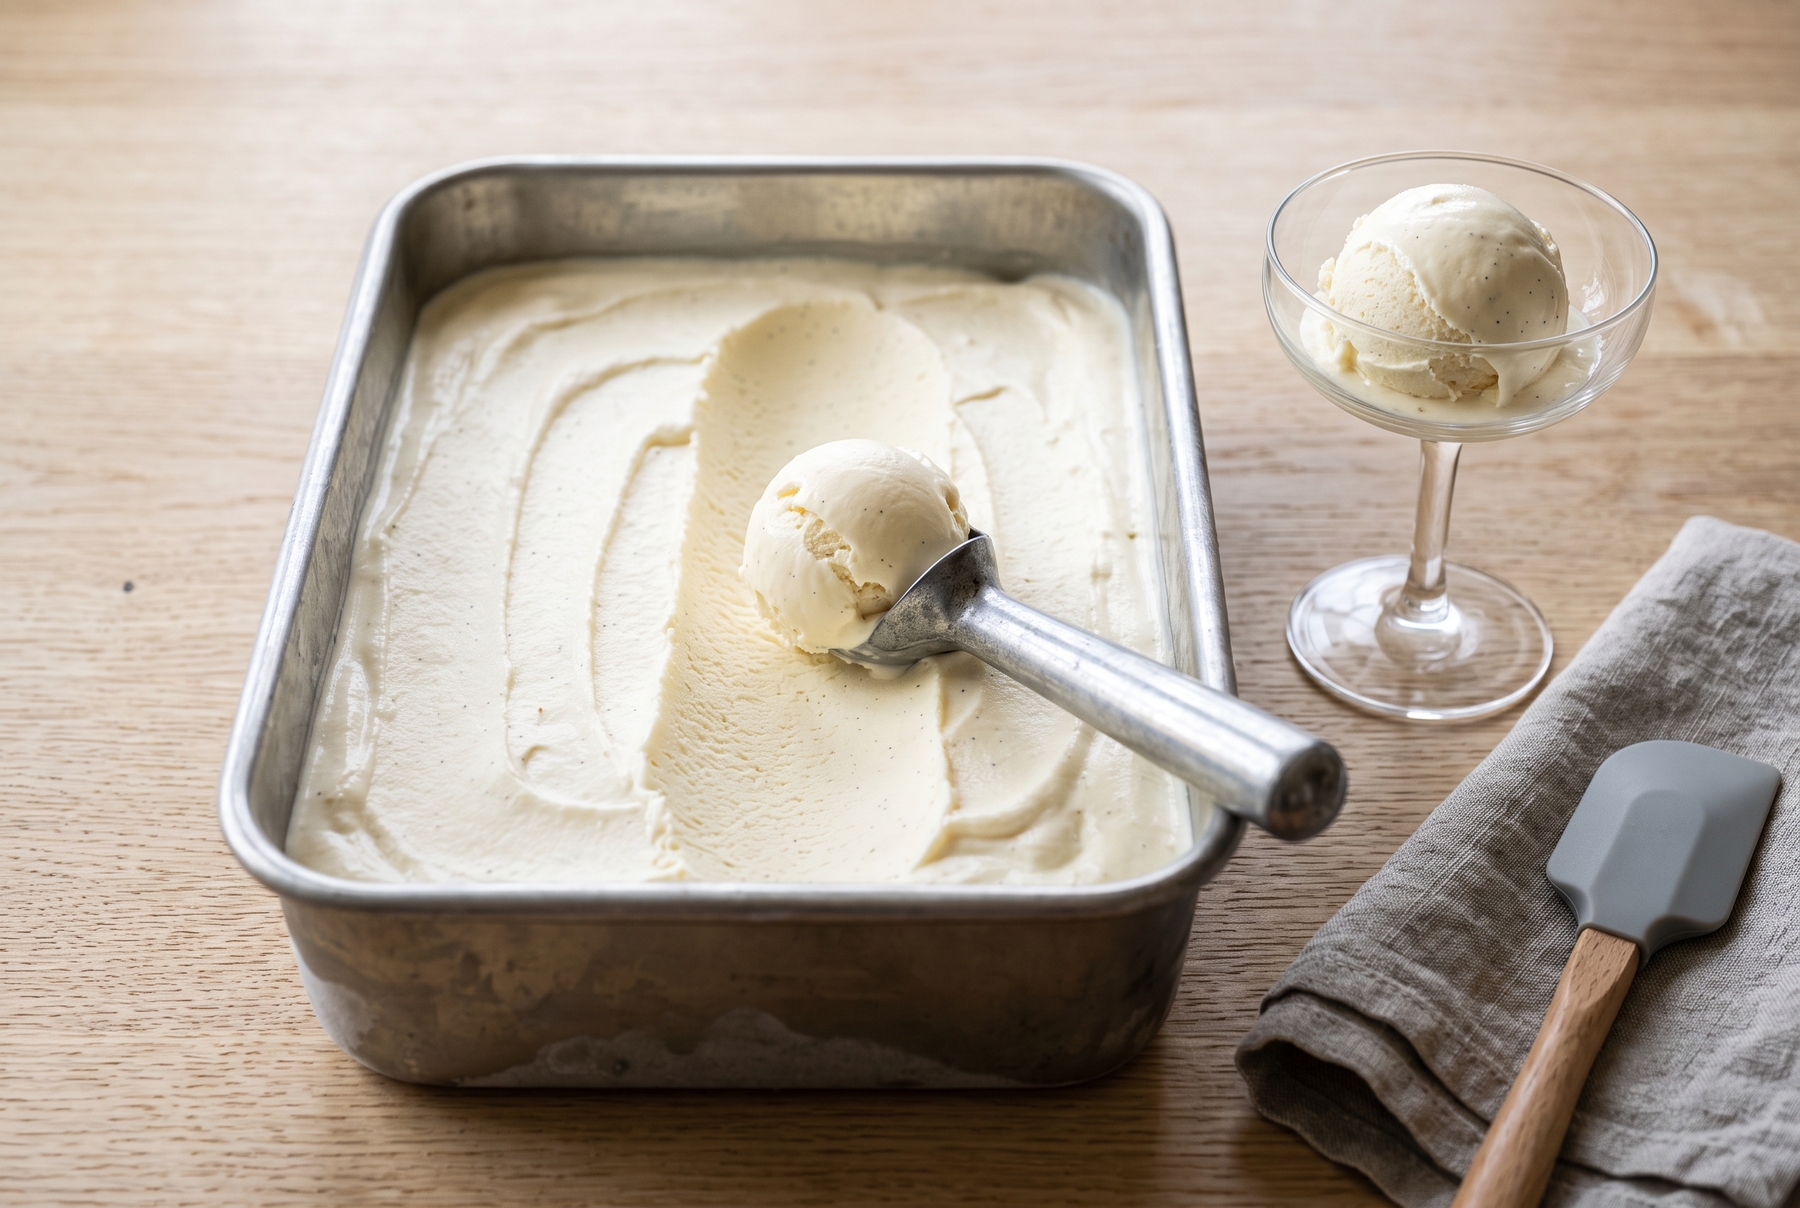
Finished homemade vanilla ice cream with a perfect creamy texture made without an ice cream maker.
Table of Contents
What Happens Inside the Bowl While the Mixture Freezes
Building the Texture: Fat, Sugar, and Air
Cream with a fat content of 33–35% gives ice cream its density and creamy structure. During whipping, fat globules partially break down, coat air bubbles, and help the foam hold its shape. The resulting mass is dense and melts slowly, rather than settling into a watery puddle at the bottom of the bowl. Fat barely affects the amount of unfrozen water. Sugars, milk proteins, and other dissolved dry matter (in industrial production, stabilizers are also added) play a more crucial role here. These components determine whether the mass remains pliable or turns rock-hard. A smooth texture is also achievable with 10% or 20% fat cream. Such a dessert feels lighter and creates a stronger cooling sensation on the tongue. It also melts faster, and the mixture requires more frequent stirring during freezing.
Sugar in ice cream is responsible for more than just sweetness. It lowers the freezing point of water and retains some moisture at a molecular level, preventing the water from freezing all at once. The ice cream remains pliable even at sub-zero temperatures, allowing it to be scooped rather than chipped away with a chisel. Removing sugar entirely from a recipe causes the ice cream to freeze into a solid block, as there are too few dissolved substances left to keep a portion of the water unfrozen.
When the required amount of sugar makes the ice cream too sweet, a portion is often replaced with a syrup possessing different properties. Invert syrup (sucrose broken down into glucose and fructose) lowers the freezing point more effectively than regular sugar and tastes sweeter. Honey mostly consists of these same two sugars, but water makes up about a fifth of its volume. Additionally, honey has a distinct aroma that easily overpowers vanilla. Glucose syrup works differently: it is a mixture of glucose and its polymers of varying lengths. It sweetens less than sugar, and its effect on the freezing point is stronger the shorter the chains are. The proportion of sugar that can be replaced by syrup depends on the specific product, as composition and concentration vary among manufacturers. Starting with 10–15% of the sugar weight provides a good baseline to observe the results.
The final element is air. The degree of aeration, which indicates how much the mass has increased in volume after whipping, is essential. Without air, ice cream becomes heavy and lies on the tongue like cold lead. Commercial ice cream sometimes contains so much incorporated air that the mixture’s volume doubles. This explains why some inexpensive varieties feel particularly light. At home, increasing the mixture’s volume by about 25–30% is sufficient. The ice cream becomes lighter and avoids feeling like a dense, cold lump on the palate. Without specialized equipment, air can be incorporated using whipped cream carefully folded into the base.
The Physics of Crystallization and the Problem of Free Water
Most ice crystals form at temperatures between -1 °C (30 °F) and -5 °C (23 °F). In a stationary container, the mass passes through this range slowly. During this time, individual crystals manage to grow larger and merge. The home cook’s task is simple in theory but tedious in execution: to rush through this dangerous temperature corridor quickly and constantly break the growing lattice while the ice is still fine.
The tongue notices large crystals immediately. As long as the ice grains are smaller than 20–30 microns, the mass feels like a smooth cream. Once the crystals grow to 50 microns or larger, a familiar sandy grittiness appears, resembling the crunch of snow between the teeth. The singular goal is to prevent the crystals from growing; otherwise, the smooth mass turns grainy.
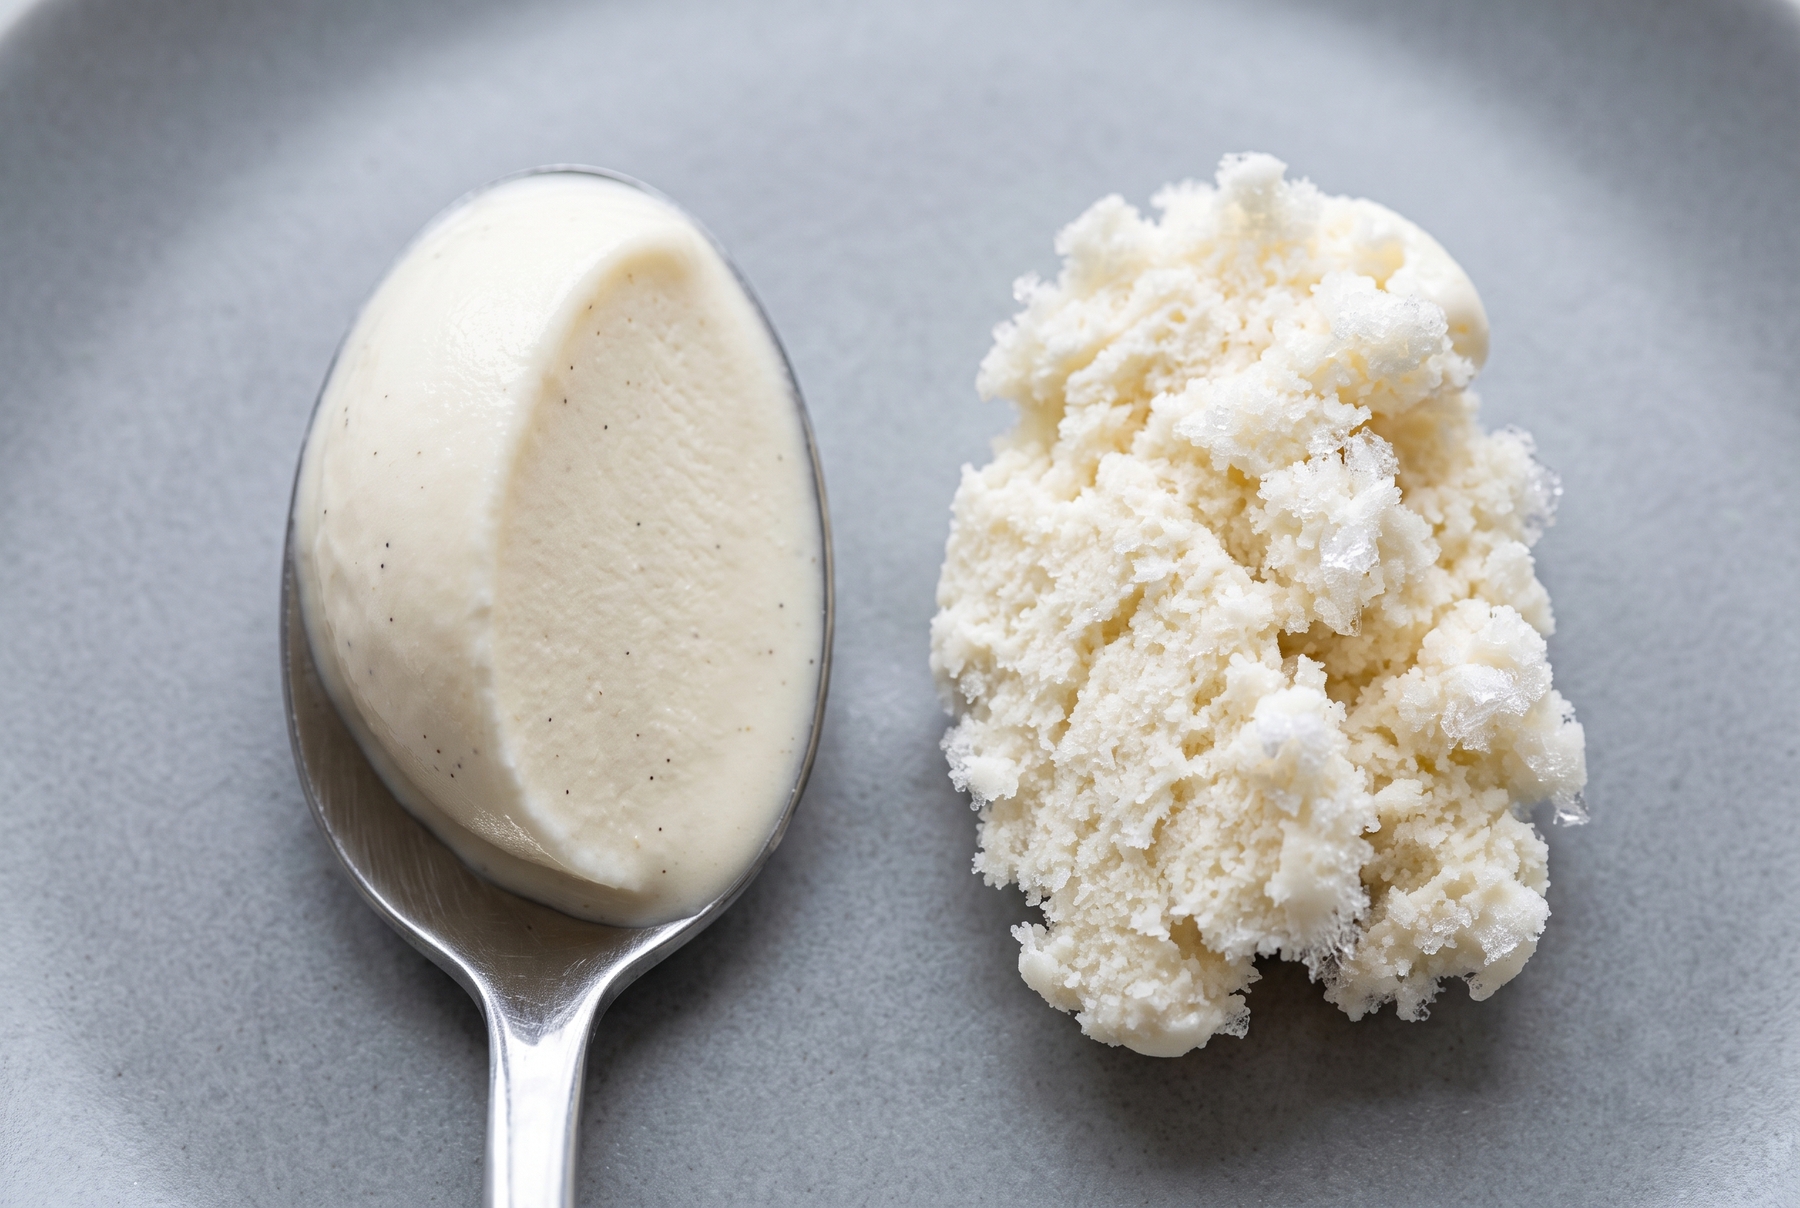
On the right is an icy texture with large crystals, while on the left is a delicate, smooth cream free of ice grains.
What to Prepare in the Kitchen in Advance
Spending 5 minutes on preparation before the first batch is highly recommended to avoid running around the kitchen with a hot saucepan later:
- a wide, flat dish (glass, metal, or enamel) to hold 1–1.5 L (34–50 fl oz), forming a layer no higher than 4 cm (1.5 in)
- a fine-mesh sieve and a clean bowl for straining
- a larger bowl for an ice bath
- an immersion contact thermometer with a probe (infrared models only measure the surface)
- a silicone spatula and a whisk
- an immersion blender or a hand mixer
- plastic wrap
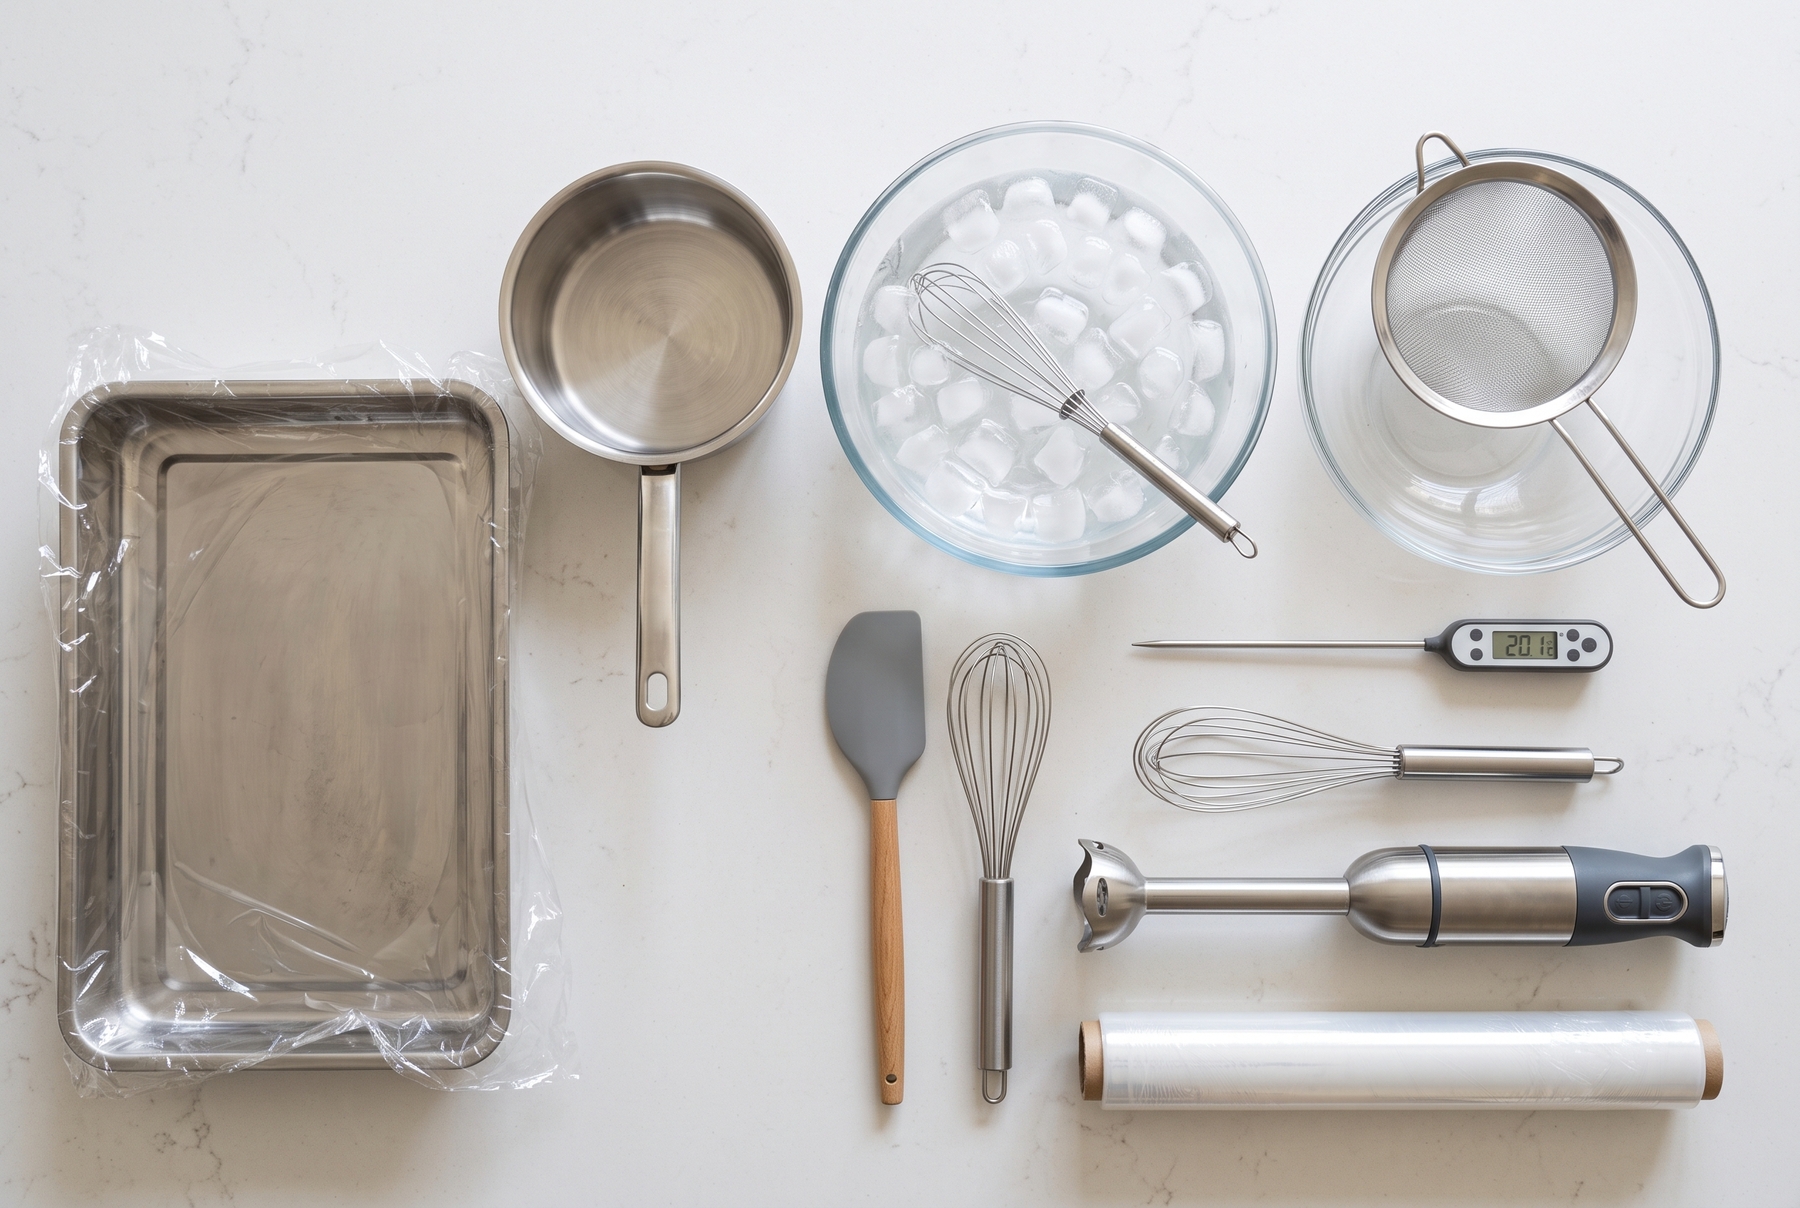
Essential equipment: a metal dish, a saucepan, an ice bath, a culinary thermometer, and a blender.
Three Variations of Homemade Ice Cream Without a Machine
All three variations are frozen while being stirred, but the schedule depends on the composition. An egg yolk-based mass is taken out approximately every 30 minutes, a condensed milk base is stirred less frequently, and a fruit base requires more frequent attention.
1. The Classic: Crème Anglaise
Crème anglaise, or English custard, demands more effort but yields a particularly smooth texture. Egg yolks, milk, cream, and sugar are cooked together until slightly thickened. The lecithin in the yolk prevents the fat and water from separating, resulting in a perfectly smooth finished mass.
Ingredients for 700–750 ml (24–25 fl oz):
- 250 ml (8.5 fl oz) whole milk (3.2% fat)
- 250 ml (8.5 fl oz) heavy cream (33–35% fat)
- 5 large egg yolks
- 120 g (4.2 oz) sugar
- 1 vanilla bean or 1 tsp vanilla extract
- 20 g (0.7 oz) honey or invert syrup (optional)
- a pinch of fine salt
Temperature is the most critical factor during preparation. At 82–84 °C (180–183 °F), the custard thickens and begins to coat the spatula. Heating it above 85 °C (185 °F) causes the proteins to curdle into flakes, turning the custard into sweet scrambled eggs. An immersion thermometer with a probe is necessary, keeping the sensor submerged in the custard without touching the bottom of the saucepan (an infrared thermometer is useless here as it only measures surface temperature). Checking the custard’s readiness is also possible without a thermometer. Restaurants often use the nappe test (coating the back of a spatula). Dipping the spatula into the custard and swiping a finger across it reveals the result: if the trail remains clear and the edges do not run back together, the base is ready.
Preparation:
- Splitting the vanilla bean lengthwise allows the seeds to be scraped out with a knife and added, along with the pod, to the milk and cream. Heating the mixture until the first steam appears, then removing it from the heat and letting it steep covered for 15–20 minutes encourages the vanilla to release its aroma into the fat more willingly than into water.
- Rubbing the egg yolks and sugar together immediately creates a thick, pale-yellow mass. It should fall from the whisk in a wide ribbon. Leaving them together without mixing causes dense lumps to form on the surface.
- Returning the dairy mixture to the stove and removing it once the surface barely quivers and steam rises prepares it for tempering.
- Pouring a third of the hot milk into the yolks in a thin stream while continuously whisking raises the yolks’ temperature gradually, preventing them from curdling. The rest is then poured in.
- Returning the mixture to the saucepan and keeping it over low heat requires continuous stirring in a figure-eight motion with a spatula. Paying special attention to the bottom and corners prevents the custard from overheating there first. The surface foam gradually subsides. The custard becomes denser, and the color slightly richer.
- Removing from heat at 82–84 °C (180–183 °F) is crucial. A finger swiped across the spatula must leave a clean path with edges that do not merge. From 78 °C (172 °F) to 84 °C (183 °F), the custard can heat up in just half a minute, so staying by the stove is essential.
- Straining immediately through a fine-mesh sieve into a clean, cold bowl catches the vanilla pod, chalazae, and any curdled specks.
- Placing the bowl in an ice bath and stirring with a spatula for 2–3 minutes cools the custard until it is just warm. Rapid cooling stops the cooking process.
- Pressing plastic wrap directly against the surface prevents a skin from forming. The mixture is then refrigerated for at least 4 hours, or preferably overnight.
- Pouring the cold base into a pre-chilled flat dish in a 3–4 cm (1–1.5 in) layer and placing it near the back of the freezer begins the freezing process.
- After 30–40 minutes, the dish is taken out for the first time. The edges and bottom will have already started to set. Scraping the frozen mass toward the center and mixing with a whisk ensures smoothness.
- This process is repeated every 30 minutes another 4–5 times. During the third round, when the mass thickens to the consistency of dense sour cream, blending it with an immersion blender for 15–20 seconds lightens the mixture and slightly increases its volume by incorporating air.
- Once the ice cream stops spreading and holds the shape left by the spatula, leveling the surface, covering it tightly with plastic wrap, and freezing it without interference for 3–4 hours finishes the process.
The egg yolk base requires the most aggressive stirring, as it contains more water than a condensed milk base. Without stirring, ice crystals become noticeable by the second hour. However, strictly following the schedule yields a remarkably smooth texture.
The overnight resting step in the refrigerator should not be ignored, as it contributes significantly to the final result. Chilling overnight allows the base to mature: fat partially crystallizes, proteins have time to bind water, and viscosity increases. The difference between a base frozen immediately and one rested for 12 hours is noticeable from the very first spoonful.
Should the custard accidentally overheat and become grainy, it does not need to be discarded. Placing the saucepan in an ice bath (a bowl with cold water and ice), blending the mass with an immersion blender for a couple of seconds, and straining it helps salvage the mixture. The texture becomes smoother, although fixing overheating completely remains impossible.
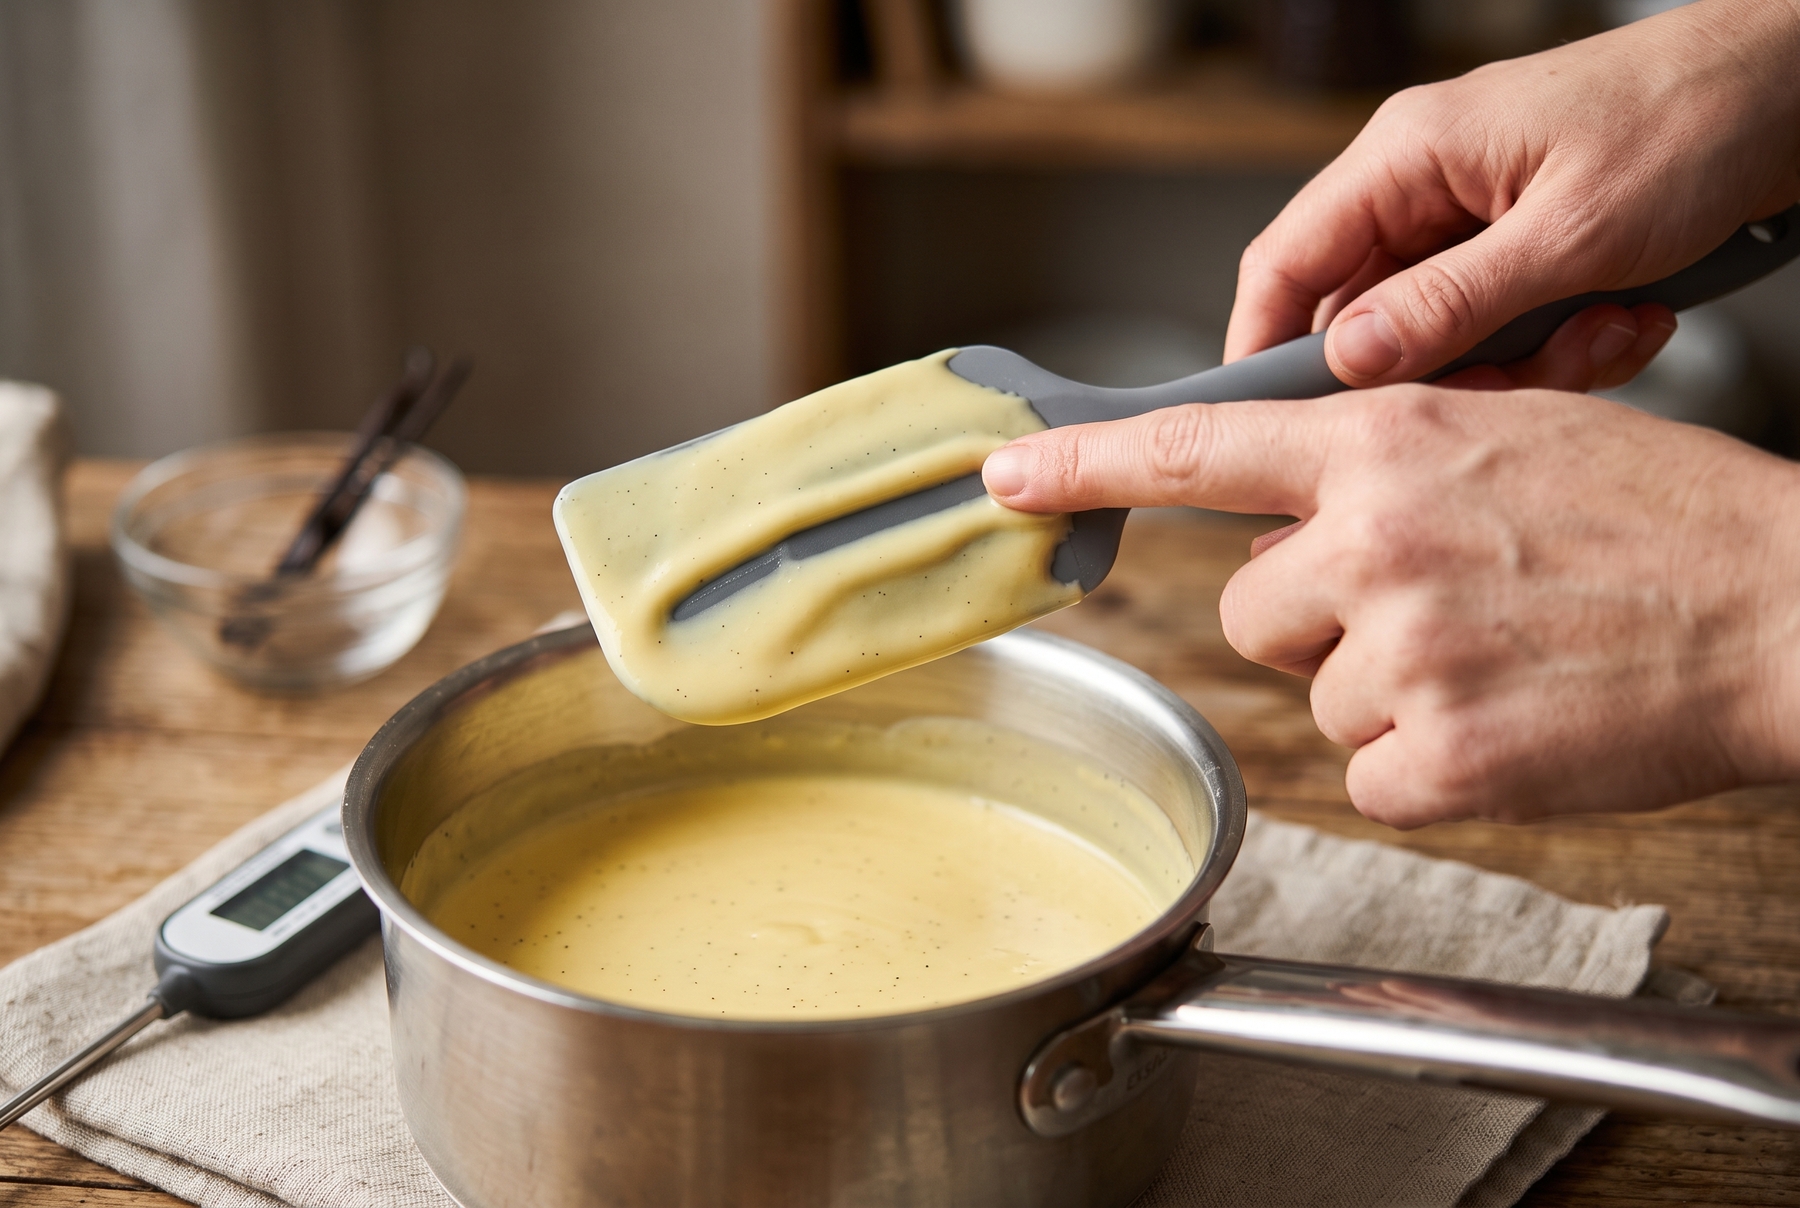
Checking crème anglaise: a clean trail left on the spatula indicates the proper thickness of the mass.
2. Quick Homemade Ice Cream With Condensed Milk and Cream
This method serves as a go-to option for home preparation, bypassing the need for cooking and thermometers. Whipping the cream to soft peaks, mixing the condensed milk separately with flavorings, and gently folding the two masses together makes the process incredibly simple. No cooking is required.
Condensed milk already contains a stable dairy emulsion and a large amount of sugar. The sugar acts as antifreeze, while the milk fat in the cream holds the air. Careful folding is essential to avoid deflating the cream.
Ingredients for 900 g (2 lb) of mixture:
- 500 ml (17 fl oz) heavy cream (33–35% fat), cold
- 380 g (13.4 oz) sweetened condensed milk
- 1–2 tsp vanilla extract or other flavorings (2 tbsp instant coffee, 3 tbsp cocoa powder, 100 g (3.5 oz) dulce de leche)
- a pinch of salt
Preparation:
- Chilling the bowl and mixer beaters in the freezer for 10–15 minutes helps significantly. Cream takes longer to whip and holds its shape poorly in a warm bowl.
- Whipping the cold cream on medium speed for 3–5 minutes creates soft peaks. Lifting the beater should result in a peak that slumps over softly without dissolving. Stiff, rigid peaks mean it has gone too far. Whipping beyond this point causes the butterfat to separate.
- Mixing the condensed milk with salt and flavorings in a separate bowl until completely smooth ensures an even distribution. There should be no lumps of cocoa or coffee.
- Adding a quarter of the whipped cream to the condensed milk lightens it, making it easier to incorporate the rest of the cream later.
- Adding the remaining cream and folding it in gently preserves the volume. Using a wide spatula to work from the bottom up—scraping the bottom, lifting the mass through the center, and turning the bowl a quarter turn—works best. Completing 20–25 slow movements is usually enough. Sharp circular motions quickly deflate the cream.
- Stopping as soon as the white streaks disappear is crucial.
- Pouring the mixture into a chilled dish, pressing plastic wrap directly against the surface, and placing it in the freezer begins the chilling phase.
- After 1 hour, removing it and gently mixing with a spatula by bringing the frozen edges to the center works well. Whisks and blenders are unnecessary here.
- Repeating this one more time after another hour is sufficient. Two stirring sessions are enough for this base. After the second mix, freezing it completely for another 4–5 hours finishes the dessert.
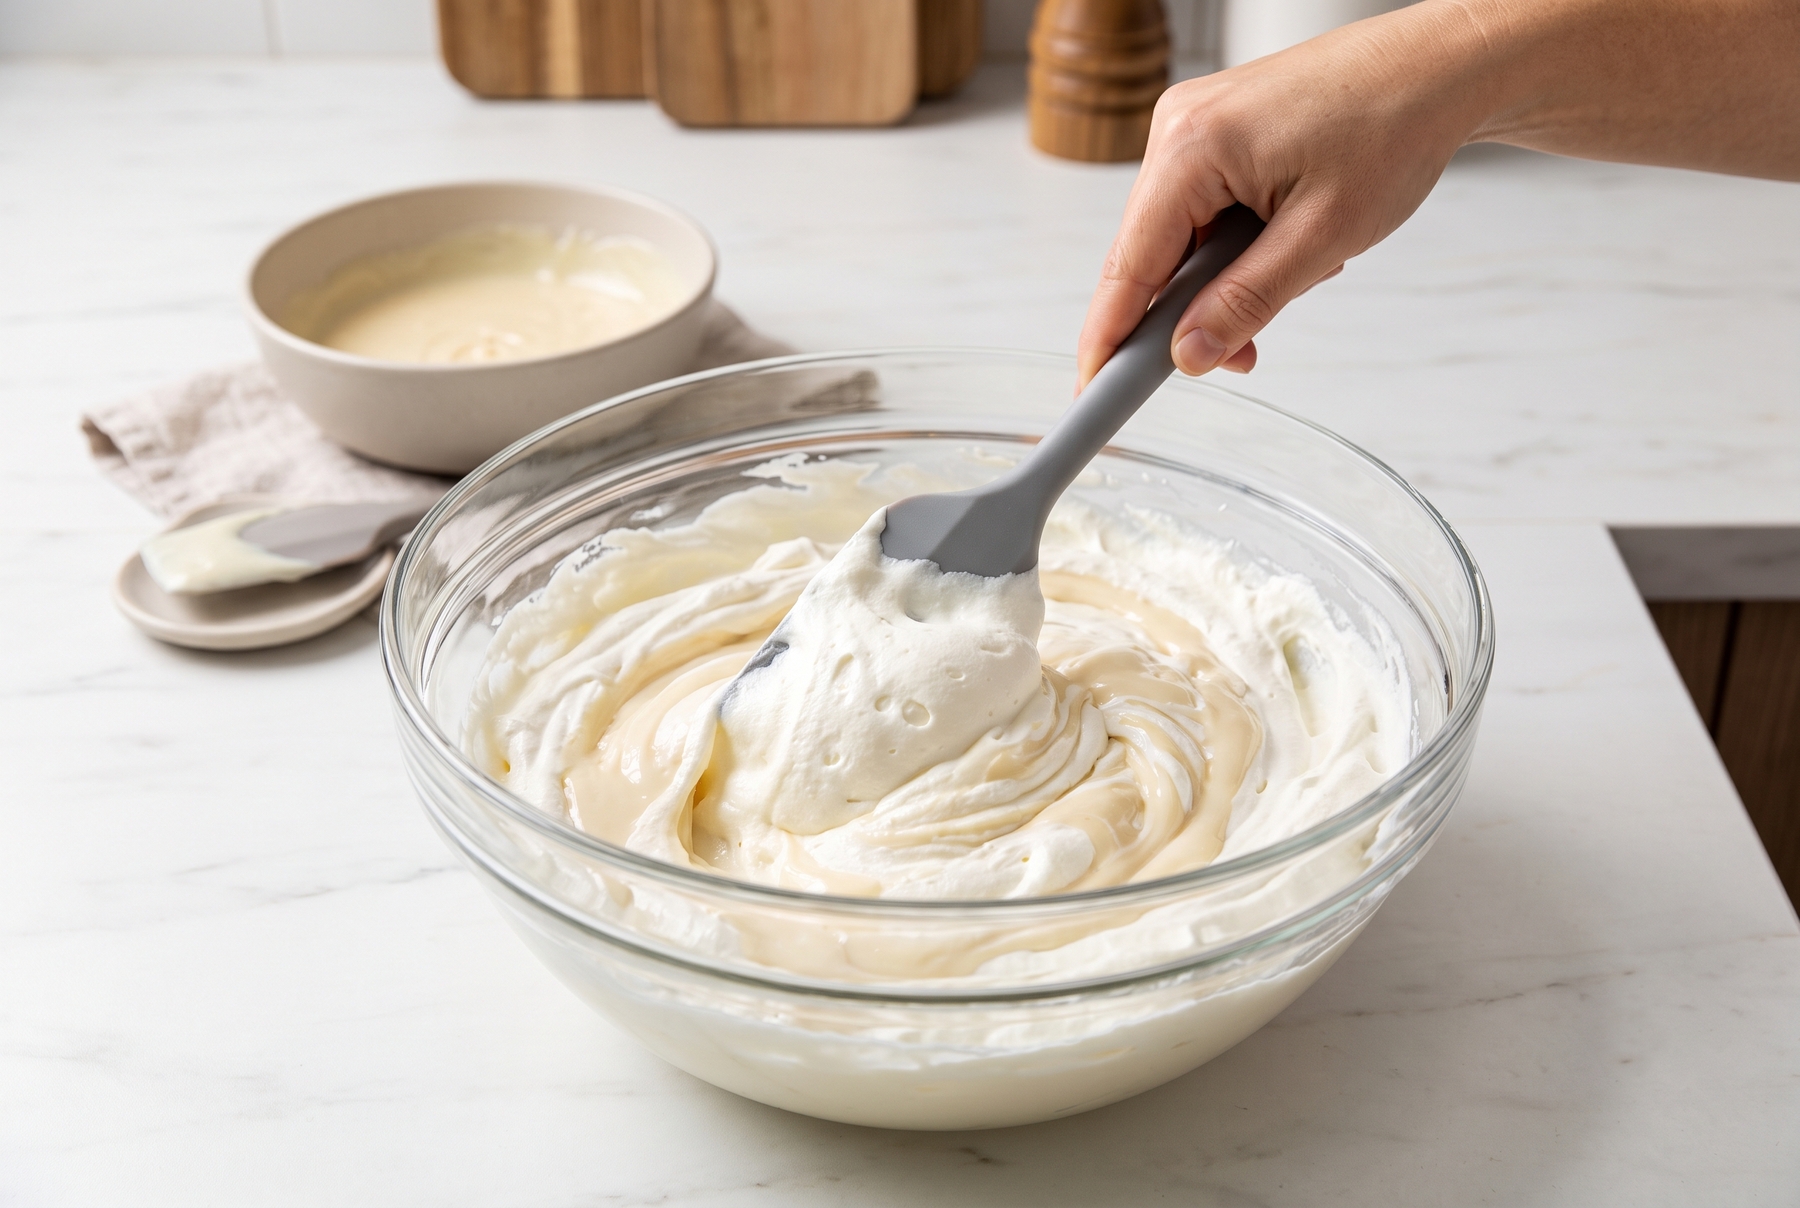
Gently folding whipped cream into condensed milk with a spatula from the bottom up to preserve airiness.
3. Fruit Sorbet and Granita Without a Machine
A fruit base contains almost no fat, meaning the texture largely relies on the sugar content. Balancing the dry matter is vital. Too little sugar turns the sorbet into a solid block of ice. Too much leaves it soft and sticky.
A standard benchmark involves a simple syrup in a 1:1 ratio (equal parts water and sugar by weight), used to dilute fruit puree. The syrup simultaneously softens the tartness of bright berries. Substituting a portion of regular sugar with invert syrup or a spoonful of honey helps the sorbet stay softer.
Ingredients for 700 ml (24 fl oz) of sorbet:
- 500 g (1.1 lb) berry or fruit puree (strawberry, raspberry, mango, peach)
- 150 g (5.3 oz) sugar
- 150 ml (5 fl oz) water
- 20 g (0.7 oz) honey or invert syrup
- 1 tbsp lemon juice
- 1 tsp rum, cognac, or berry liqueur
Preparation:
- Boiling the simple syrup by bringing water and sugar to a boil, stirring until the crystals dissolve, and removing from heat is the first step. Adding honey to the hot syrup and then cooling it completely in an ice bath follows.
- Blending the fruits into a smooth puree works beautifully. Berries with tiny seeds (raspberries, blackberries, currants) require pushing through a sieve, as the seeds become noticeably crunchy in the frozen mass.
- Combining the puree with the cold syrup and lemon juice forms the base. Tasting it at this stage is helpful: it should taste noticeably sweeter than the desired finished sorbet, as cold mutes sweetness.
- Pouring in the alcohol and mixing completes the base. A single teaspoon for the whole batch lowers the freezing point and keeps the sorbet from turning rock-hard (alcohol does not freeze in a residential freezer). Increasing the alcohol is not recommended, as too much prevents the mass from setting.
- Chilling the mixture in the refrigerator for 1–1.5 hours and pouring it into a pre-frozen flat dish in a thin layer, no higher than 3 cm (1.2 in), begins the process.
- After 25–30 minutes, removing the dish, scraping the frozen edges, and whisking the mass is required. Mixing every 25–30 minutes for 3 hours (totaling 6–7 rounds) is necessary. A fruit base demands more frequent stirring than a dairy one.
- Using an immersion blender for 10–15 seconds during the fourth and fifth rounds lightens the sorbet, making it denser and causing it to slide slowly off the spatula.
- Leveling the surface, covering with plastic wrap, and freezing for a final 2–3 hours completes the sorbet.
Pectin and fiber also bind water, and their amounts vary depending on the fruit. Mangoes, peaches, and bananas yield a thick puree that produces a creamy sorbet. Watermelons and melons contain exceptionally high water content. They require a more concentrated syrup and more frequent removal from the freezer for stirring.
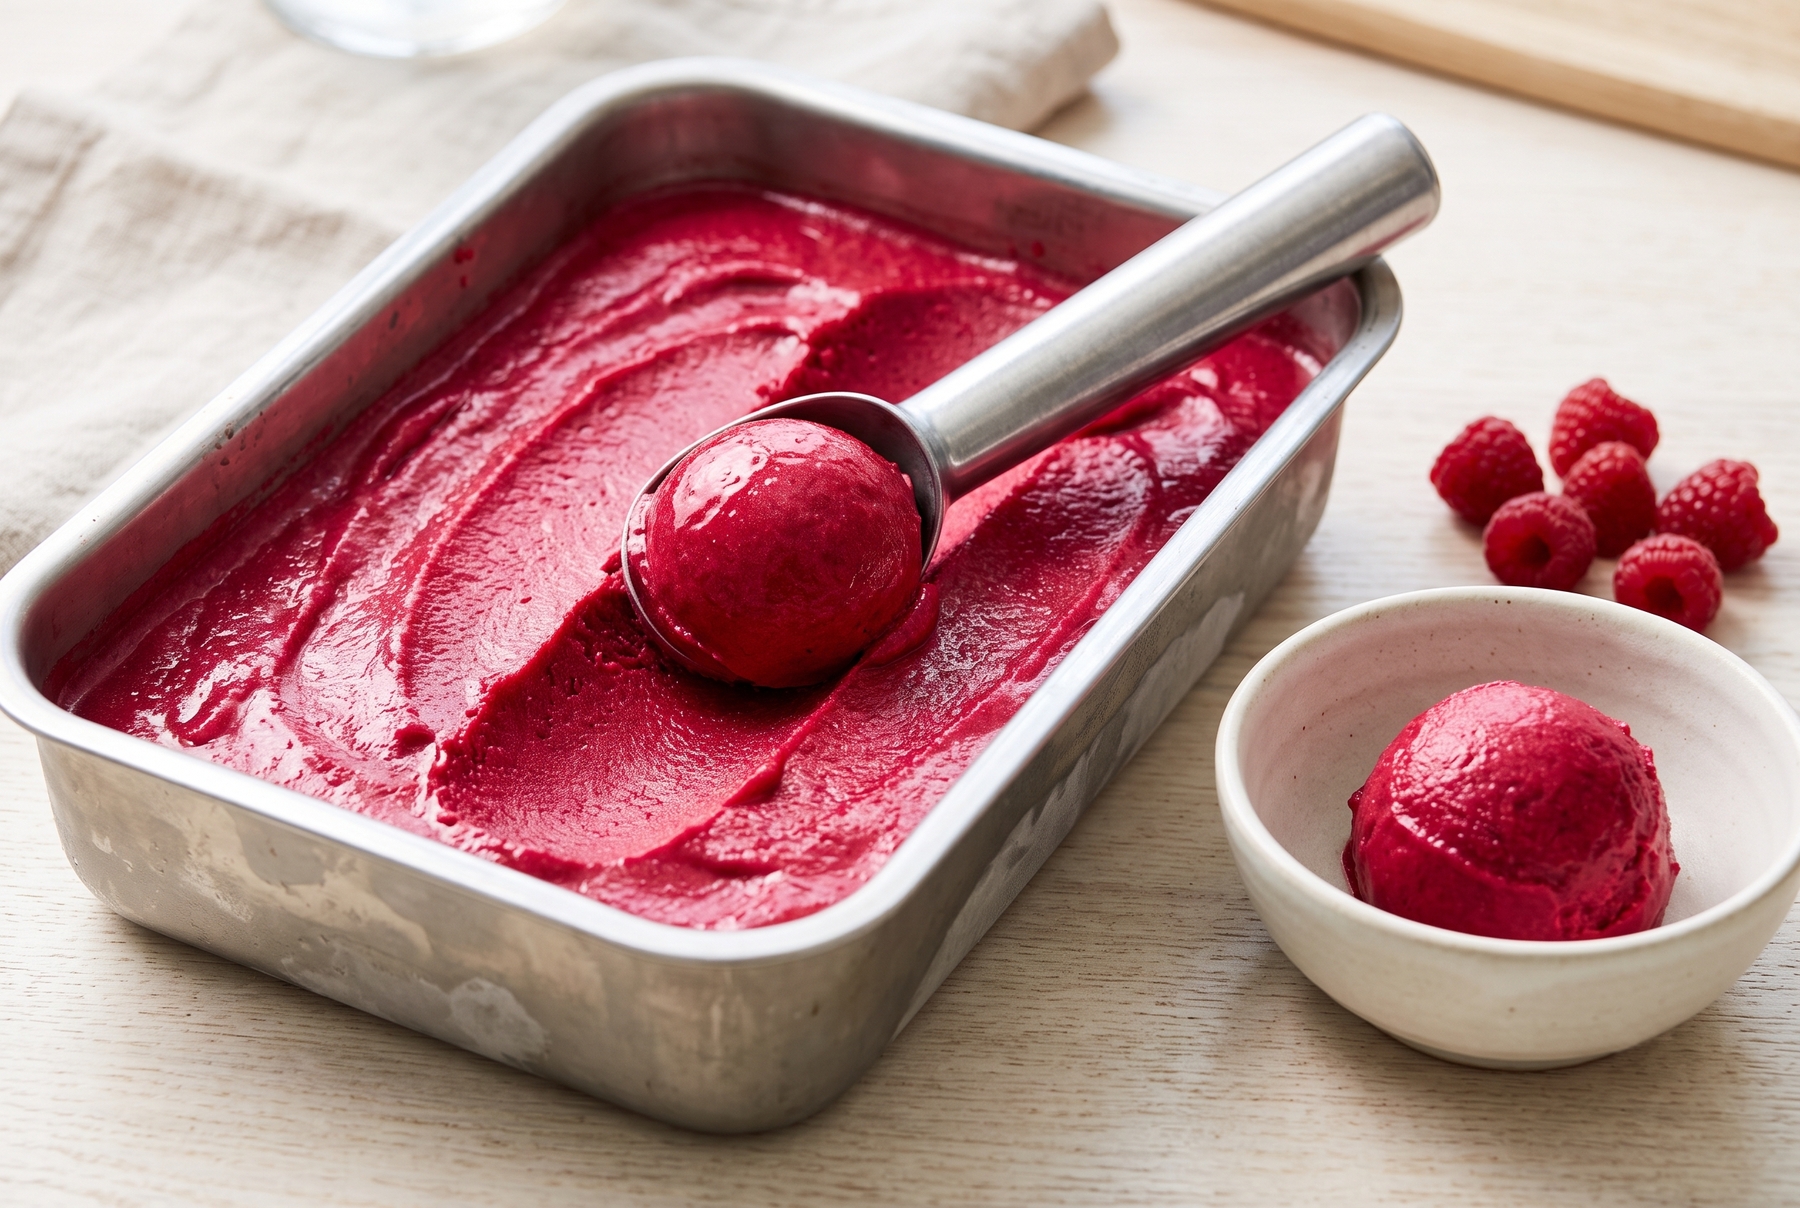
Vibrant raspberry sorbet with a smooth texture, frozen with regular interval stirring.
Granita requires the exact opposite approach: large crystals are desired here. Instead of breaking them down, they are encouraged to grow and then separated with a fork. There are no complex techniques involved, but the dish must be taken out every half hour over a period of about 3 hours.
Ingredients for 700 ml (24 fl oz) of granita:
- 700 ml (24 fl oz) liquid (fruit juice, strong coffee, light tea, water-diluted puree, or dry wine mixed half-and-half with water)
- 100–120 g (3.5–4.2 oz) sugar
- juice of half a lemon
- optional: citrus zest, a few mint leaves, a slice of ginger
Preparation:
- Heating a third of the liquid and dissolving the sugar completely until transparent starts the process. Steeping zest, mint, or ginger in the hot liquid for 10 minutes infuses it with flavor.
- Combining this with the remaining cold liquid, adding lemon juice, and straining readies the mixture.
- Cooling it entirely and pouring it into a wide, flat dish in a layer no deeper than 2 cm (0.8 in) is crucial. A thinner layer yields larger ice flakes.
- Placing it in the freezer for 40–45 minutes until it first begins to set makes the surface matte, with a frozen crust forming at the edges.
- Taking the dish out and vigorously scraping a fork across the bottom and sides breaks the frozen layer into distinct crystals. Gathering the crystals to the center and then spreading them out again ensures even freezing.
- Repeating this process every 30 minutes for another 4–5 times builds the texture.
- The granita is ready when no liquid remains in the dish, and the mass looks like a mound of loose, flaky ice. Serving immediately in chilled glasses is highly recommended.
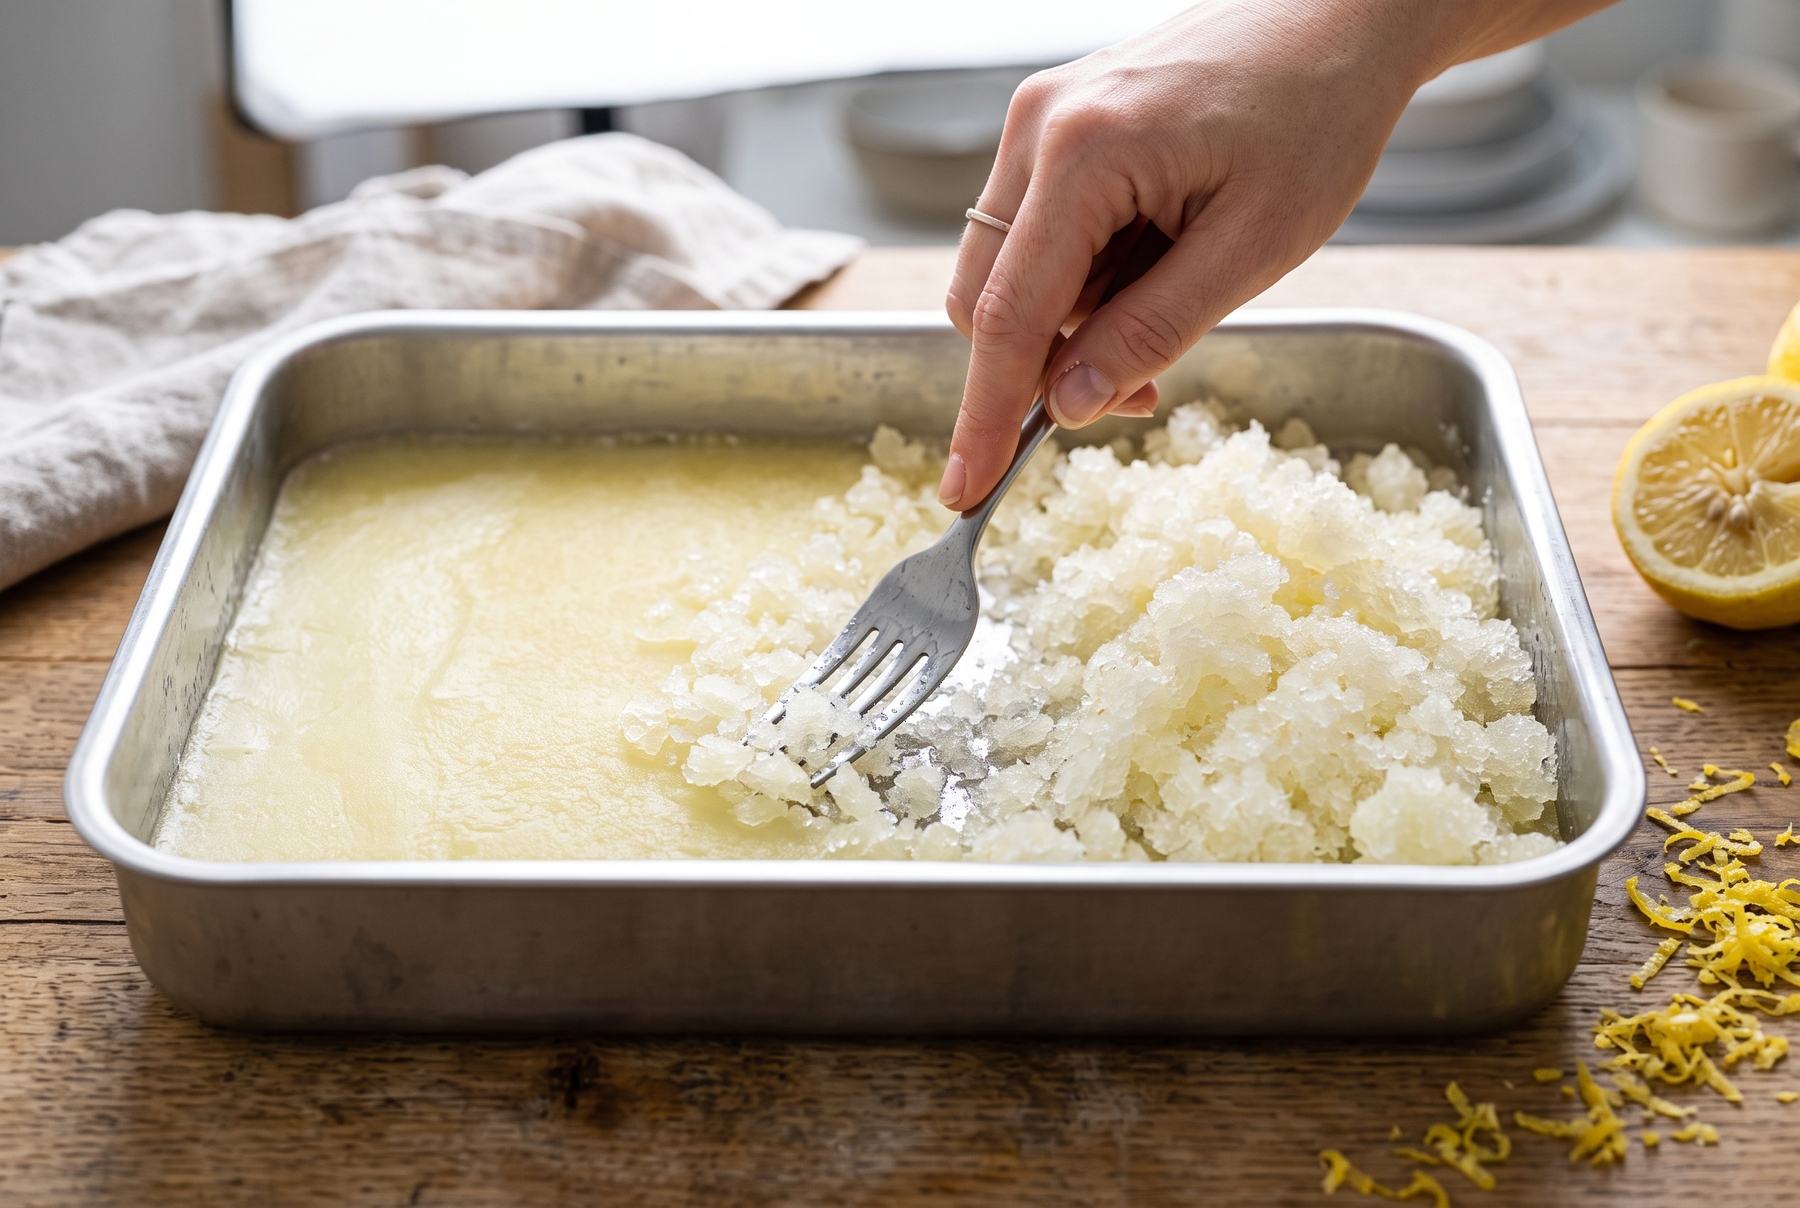
Scraping frozen juice with a fork to form the characteristic crystalline flakes of granita.
How to Freeze Ice Cream Without a Machine
Interval Stirring
Interval stirring allows the cook to manually break up crystals before they have a chance to grow.
- Chilling the base in advance is essential: leaving an egg yolk base in the refrigerator overnight, and other bases for at least 2 hours.
- Pouring the mixture into a wide, flat dish works best. A layer of 3–4 cm (1–1.5 in) is ideal (an 8 cm or 3 in layer in a deep bowl creates freezing issues).
- Placing the dish near the back of the freezer provides the coldest environment.
- Taking the dish out for the first time after 30–40 minutes, scraping the frozen edges toward the center with a spatula, and mixing with a whisk until smooth is required.
- Repeating this every 30 minutes for 2.5–3 hours (totaling 5–6 rounds) breaks down the ice structure continuously.
- Using an immersion blender for 15–20 seconds during the third round incorporates air.
- Once the mixture stops spreading, leveling the surface, pressing plastic wrap directly against it, and freezing completely for 3–4 hours without interference finishes the batch.
A whisk suffices for the early rounds while the mass is still liquid. Later, an immersion blender proves more useful: it shatters crystals, restores the emulsion, and folds in a bit of air. If the mass starts becoming grainy, blending it once during the second or third interval resolves the issue.
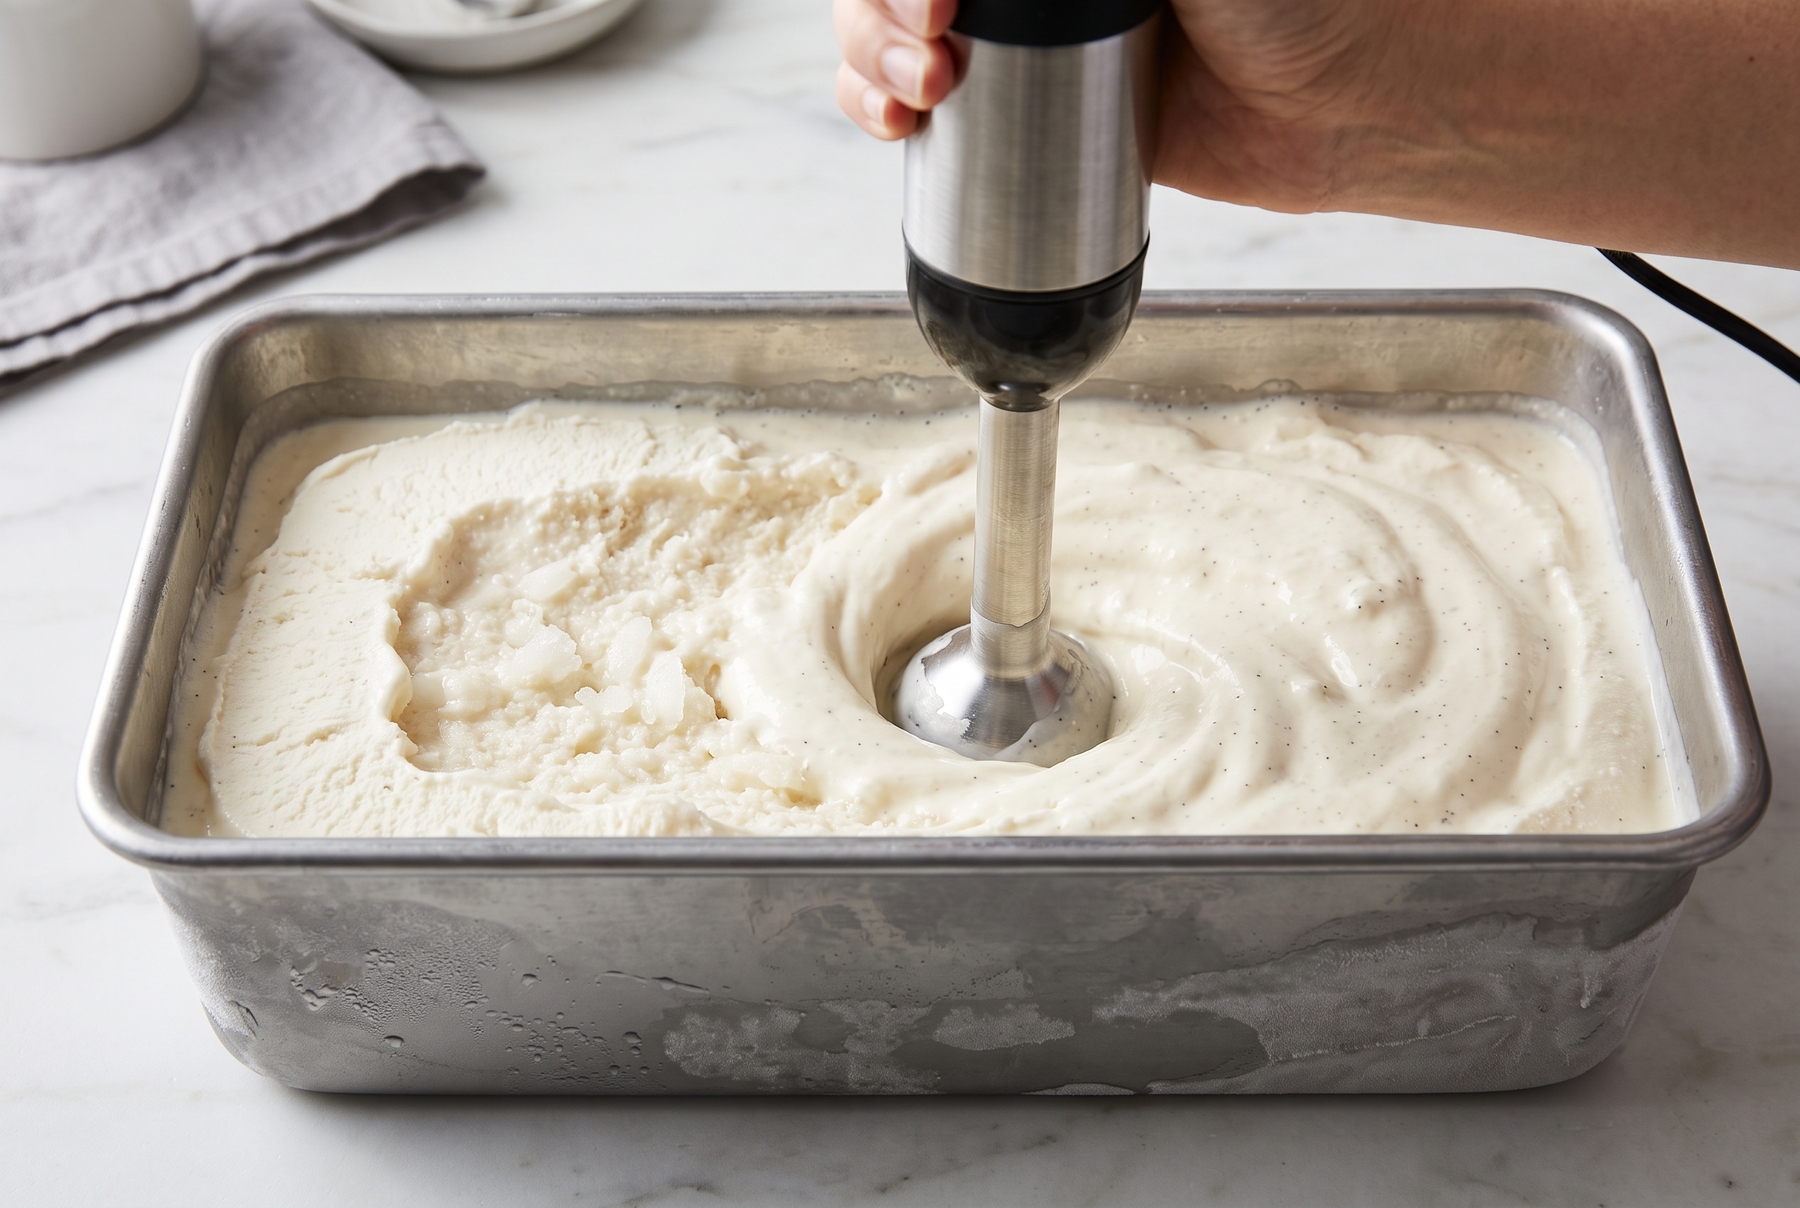
Breaking up ice crystals using an immersion blender during the interval freezing process.
Salt and Ice: Emergency Freezing in 15 Minutes
This method shines when ice cream is needed urgently. As coarse salt dissolves in melting ice, the mixture’s temperature plummets to -18 °C (0 °F). This drop is sufficient to freeze a portion in just 15 minutes.
What is Needed:
- 300–400 ml (10–13 fl oz) chilled base
- a 1 L (1 quart) zip-top bag
- a 3–4 L (1 gallon) zip-top bag
- 1.5 kg (3.3 lb) crushed ice
- 150 g (5.3 oz) coarse rock salt
- a kitchen towel
How to Freeze:
- Pouring the base into the smaller bag, squeezing out the air, and sealing it initiates the process. For insurance, placing it inside a second identical bag is a wise move.
- Filling the larger bag with ice and mixing it with salt prepares the freezing environment.
- Placing the smaller bag inside the larger one and sealing it securely completes the setup.
- Wrapping the entire assembly in a towel protects the hands.
- Shaking and massaging the bag continuously for 10–15 minutes forces rapid freezing.
- Removing the inner bag, rinsing it with cold water, and opening it reveals finished ice cream.
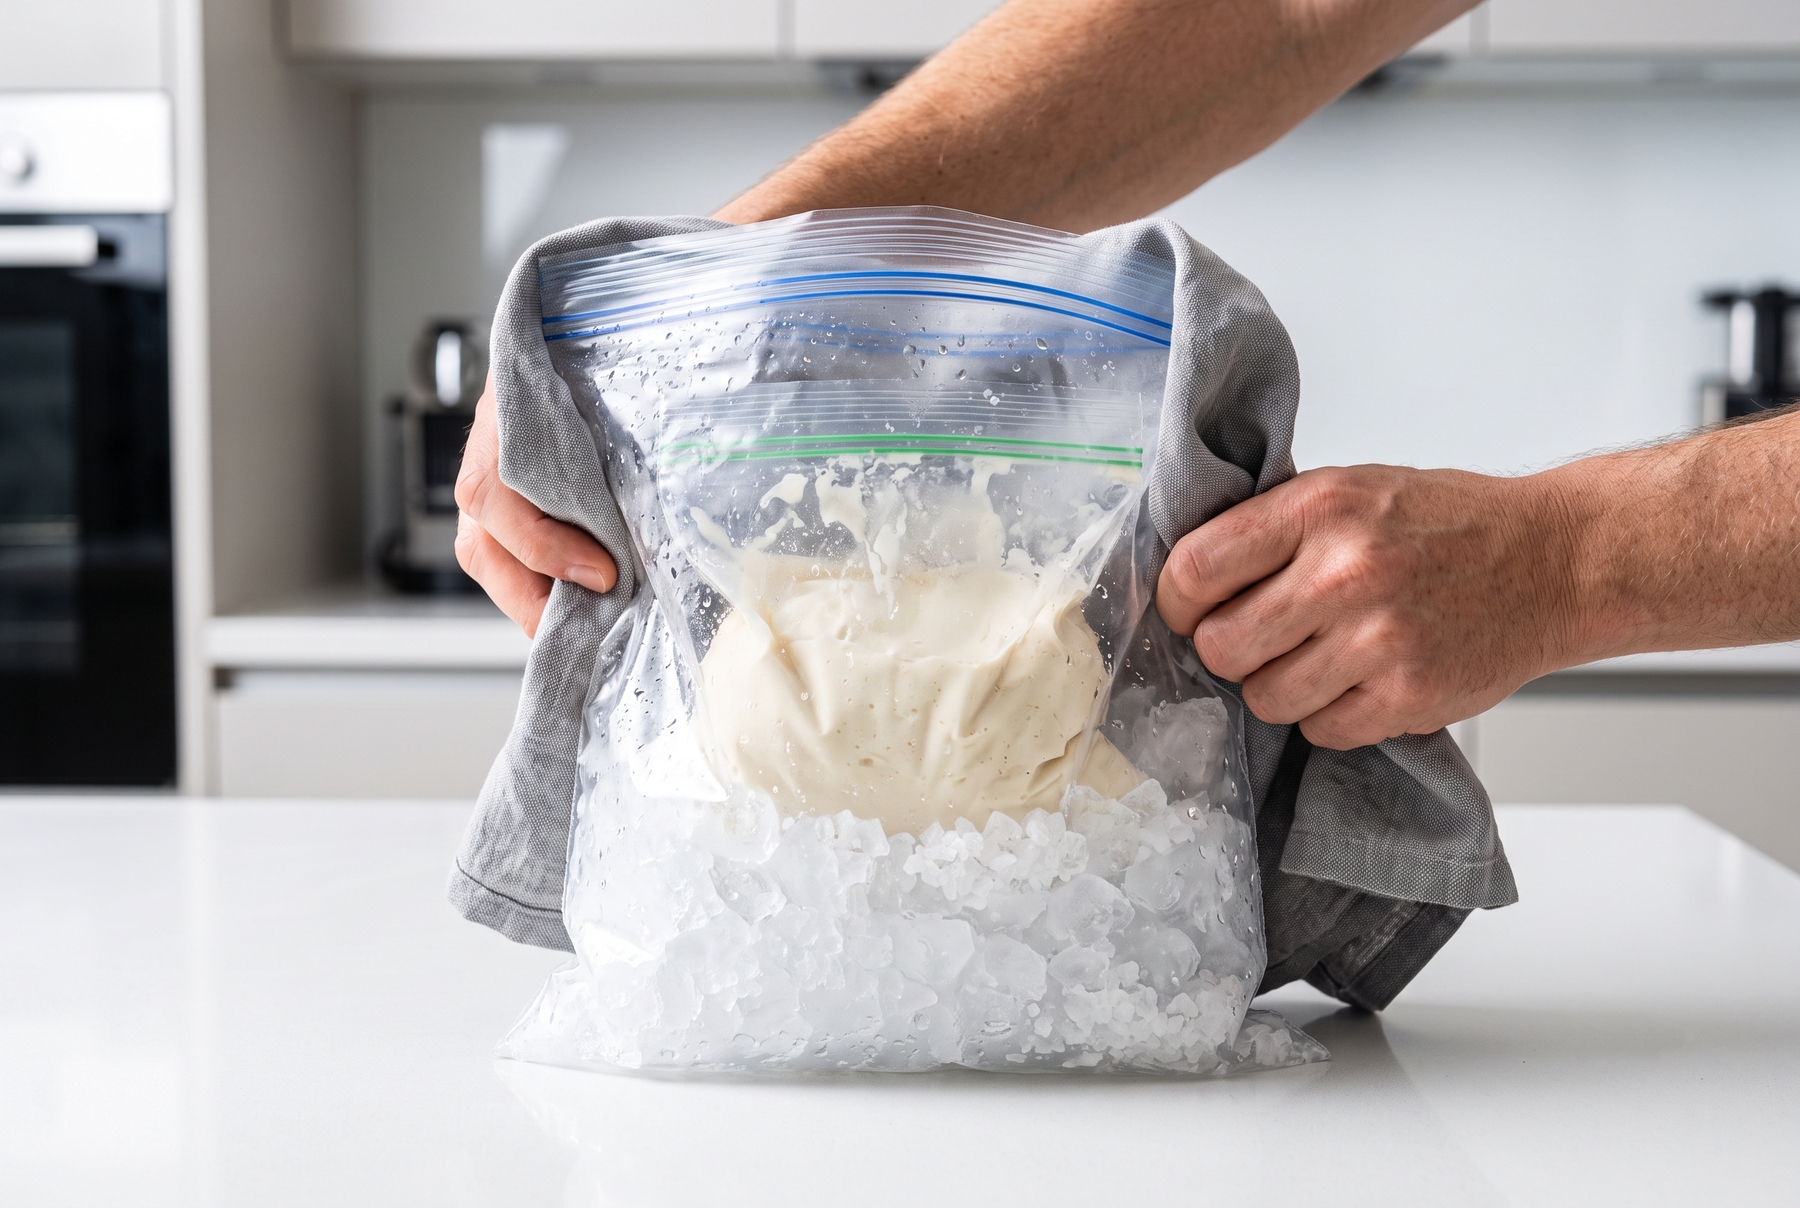
Freezing the base in a double zip-top bag using a mixture of crushed ice and coarse rock salt.
Mix-ins and Serving
Fresh berries and fruit pieces freeze into hard shards of ice inside the dessert. To prevent this, they are first transformed into a thick compote, quickly poached in syrup, or used in a freeze-dried form.
Poaching on the stove takes about 5 minutes: dicing the fruit finely, covering it with hot 1:1 syrup, and holding it over low heat for 2 minutes does the trick. The pieces are then cooled directly in the syrup. The sugar displaces some of the water from the cells, ensuring the pieces remain soft upon freezing.
Nuts and chocolate chips are folded in during the final interval, once the mass has already thickened. Chopping the chocolate into coarse pieces works best. Toasting nuts in a dry skillet until a distinct nutty aroma emerges, and then cooling them completely, enhances their flavor.
When packing the ice cream into the dish, distributing caramel in ribbons between layers creates a beautiful effect. Passing a spatula through the mass once yields a stunning marbled pattern.
Taking the ice cream out of the freezer 10–15 minutes before serving and letting it sit in the refrigerator allows it to soften slightly. Warming an ice cream scoop in hot water and shaking off the drops helps: the warm metal glides over the surface, carving out a perfectly neat scoop.
For the first 3–4 days, the ice cream remains remarkably soft and uniform. Afterward, the crystals gradually grow larger, even when stored under plastic wrap.
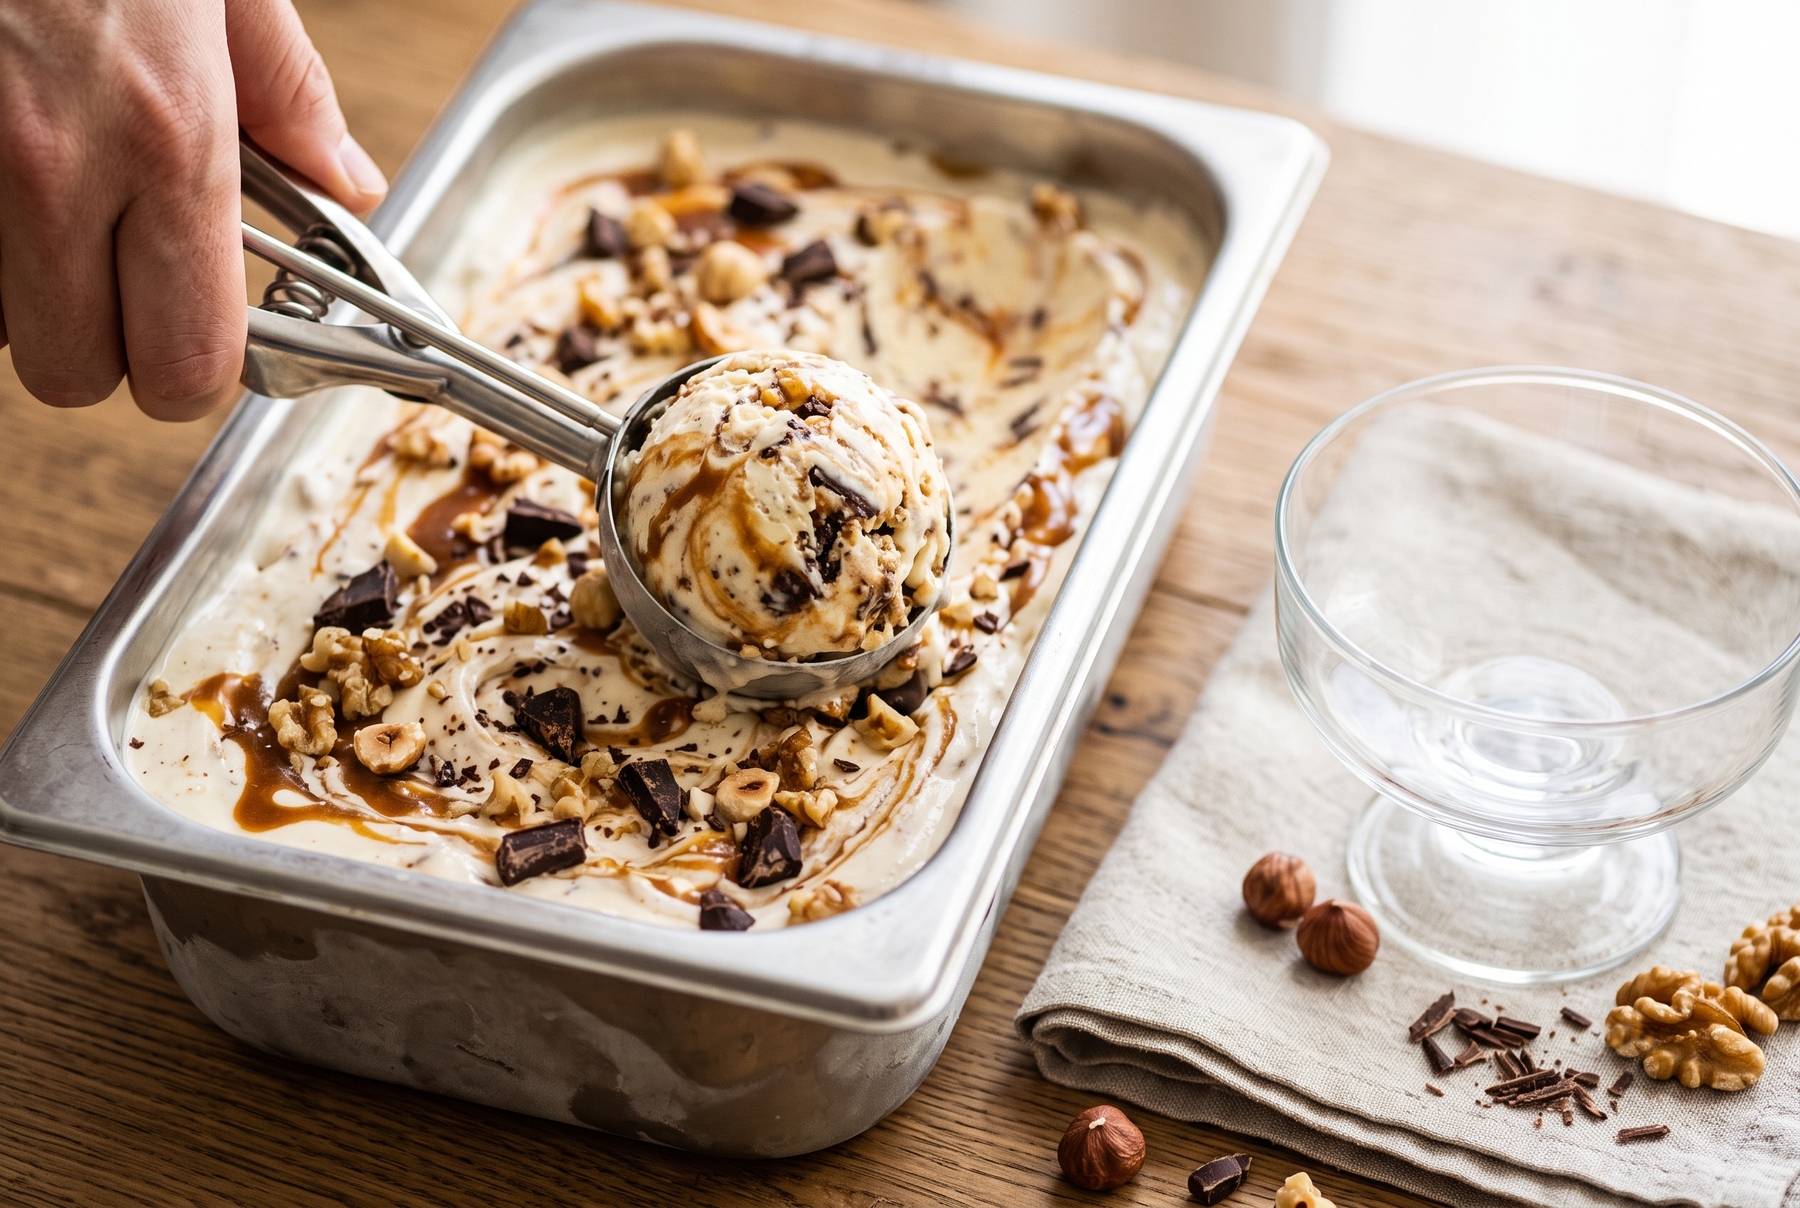
Beautiful presentation of caramel ice cream adorned with toasted nuts and chocolate chunks.
Why Homemade Ice Cream Fails: Common Mistakes
Why the homemade ice cream is rock-hard. Most likely, the base lacked sufficient fat or sugar, or it remained in the freezer for too long. Upgrading to heavier cream, adjusting the sugar ratio, and letting the dessert temper slightly before serving resolves this.
The texture is grainy. Ice crystals managed to grow because the base was not cold enough, or the intervals between stirring were too long. Returning to a strict 30-minute schedule and blending the mass once with an immersion blender corrects this.
The ice cream melts quickly. The mass lacks fat or incorporated air. Using cream with 33–35% fat and ensuring it is properly whipped prevents rapid melting.
The base curdled into flakes. The custard heated past 85 °C (185 °F). Moving the saucepan immediately to an ice bath, blending the mass, and straining it serves as a rescue effort.
A greasy film remains on the palate. Too much fat was present, or the emulsion separated due to overheating. Reducing the proportion of heavy cream and avoiding bringing the base to a boil prevents this unpleasant coating.
0 comments