
In restaurant kitchens, I have heard dozens of theories regarding the ‘secret to Italian dough’: special water, flour from one specific mill, or yeast that someone supposedly brings from Naples in a suitcase. The truth is much more grounded. Pizza dough consists of just four components: flour, water, salt, and yeast. The difference between a rubbery flatbread and a pizza with a blistered, airy crust is not dictated by a secret set of ingredients, but rather by the time allowed for maturation.
Quick dough that rises in an hour in a warm place physically lacks the time to develop flavor. The yeast in such dough works like an engine running at high RPMs: gas is produced, but the aroma is absent. Conversely, dough that spends a day or two resting in the refrigerator transforms completely. It smells different, stretches differently, and bakes differently. This professional method works perfectly at home. It simply requires a refrigerator, a kitchen scale, and patience. An oven heated to 450 °C (840 °F) is entirely unnecessary.
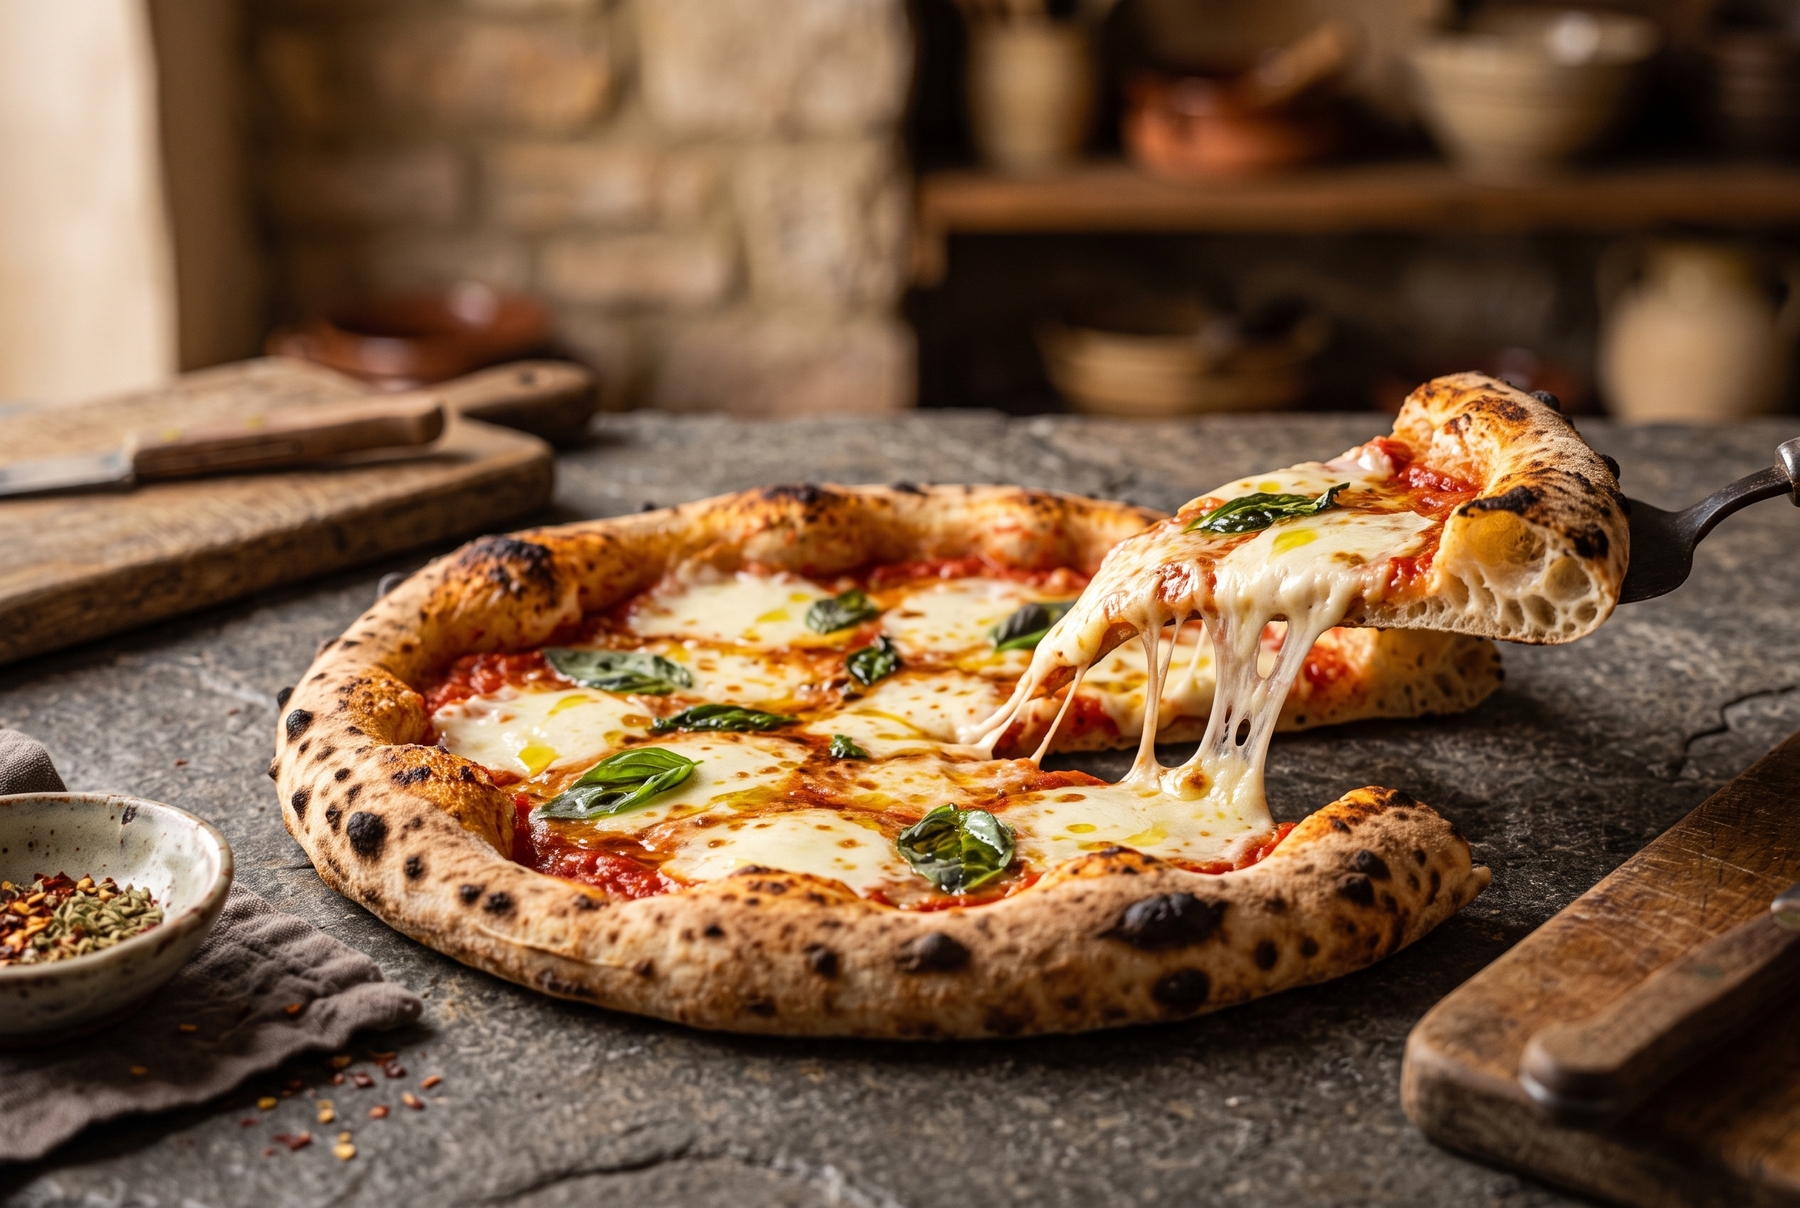
Authentic homemade pizza featuring a puffy crust and a juicy topping of tomato sauce, mozzarella, and fresh basil, prepared using a professional restaurant method.
Table of Contents
- What Sets Restaurant Dough Apart From the Homemade Version
- Flour: Why 'Premium Grade' Does Not Always Save the Day
- Water: Why Sticky Dough Trumps Dry Dough
- Yeast, Salt, and Oil: Quantities and Purposes
- Kneading: Developing Gluten the Easy Way
- Cold Fermentation: The Crucial Stage
- Shaping: How the Crust Gets Ruined
- Toppings: How Not to Drown the Perfect Dough
- Baking: Extracting Maximum Heat From a Home Oven
- A Basic Formula for 3 Pizzas
- 7 Common Mistakes and Quick Solutions
What Sets Restaurant Dough Apart From the Homemade Version
The Flavor Born in 24 Hours
Dough made with a large amount of yeast and a short rise time carries a harsh, flat, distinctly yeasty aroma reminiscent of a bread machine. During a prolonged cold fermentation, yeast is not the only active element. Flour enzymes break down starches into simple sugars, which later allows the crust to caramelize deeply, introducing a subtle sweetness and a barely perceptible tang to the dough. This exact ‘restaurant’ flavor is frequently, and mistakenly, attributed to a secret flour blend.
An Airy Crust Instead of a Dry Edge
A proper pizza edge, or ‘cornicione’, relies on internal air bubbles rather than mere thickness. Tearing the edge of a well-made pizza reveals a network of delicate, irregular webs resembling honeycomb. Before baking, such dough appears alive. It shivers slightly when the container is shaken, stretches easily under the fingers, and refrains from tearing at the first pull.
A Base That Resists Sogginess
The center of the pizza needs to be thin but not cottony. Weak dough collapses under the sauce, turning into a wet rag that droops in the hand. A strong dough holds the toppings, yields a crisp snap when folded, yet remains slightly tender in the middle. This crucial balance depends on the gluten structure of the flour and the correct baking technique.
Flour: Why ‘Premium Grade’ Does Not Always Save the Day
Focus on Protein Rather Than the Brand
The strength of the flour—its gluten’s ability to retain gas during a long fermentation—is crucial for pizza. The simplest indicator on the package is the protein content. Flour containing 12–13 g (0.4–0.45 oz) of protein per 100 g (3.5 oz) will easily withstand a day or two in the refrigerator. Soft pastry flour with 10 g (0.35 oz) of protein is too weak for long-fermented dough; its gluten structure will degrade before the dough has time to mature.
Italian 00: What It Actually Means
Italian Tipo 00 flour simply indicates an exceptionally fine milling process and high refinement, not necessarily its strength. There is weak 00 flour meant for sponge cakes, and strong 00 flour meant for pizza—these are entirely different products sold under the same grade. Therefore, a bag labeled ’00’ guarantees nothing on its own. Looking for the words ‘per pizza’ on the packaging, a protein content of at least 12 g (0.4 oz), or a strength indicator (such as W 260–300) ensures the right choice. Translating Italian flour types directly into local grades is ineffective due to differing classification systems.
What to Buy in a Regular Grocery Store
The most reliable options, in order of convenience, include dedicated pizza flour, high-protein bread flour, or a 50/50 blend of standard all-purpose flour and strong flour. Regular all-purpose flour can work, but the rules shift: hydration must be slightly reduced, handling needs to be gentler, and fermentation is shortened to a single night rather than two days. Keeping semola or semolina (coarsely milled durum wheat flour) on hand for dusting is highly recommended, as it allows the dough to glide off the pizza peel like sand.
Water: Why Sticky Dough Trumps Dry Dough
Hydration Without Complex Formulas
Hydration simply represents the amount of water relative to the weight of the flour. Using 65 g (2.3 oz) of water for every 100 g (3.5 oz) of flour equals a 65% hydration rate. For homemade pizza, the working range falls between 60% and 70%. The lower end results in an obedient dough ideal for beginners. Pushing towards the upper limit yields a brilliantly airy crust, though it demands experience, as high-hydration dough flows, sticks, and struggles to hold its shape.
The Main Mistake of Early Attempts
When the dough is first mixed, it inevitably sticks to the fingers and the work surface, often inducing panic. The natural reaction is to reach for extra flour. After a few more handfuls, the dough becomes smooth, convenient, and obedient—yet fundamentally ruined. Excess flour results in a dense crumb, a dry edge, and a heavy crust. Initial stickiness is perfectly normal; after a 20-minute rest, the flour absorbs the water, and the dough naturally becomes smoother.
How to Know the Dough Is on the Right Track
Dough that is ready for fermentation stretches without flowing. It gathers into a ball and maintains its shape for at least a few minutes. Tearing off a small piece and stretching it gently between the fingers should form a translucent windowpane that lets light through. If it tears immediately, the gluten remains underdeveloped, signaling that the dough requires further kneading or a few more folds.
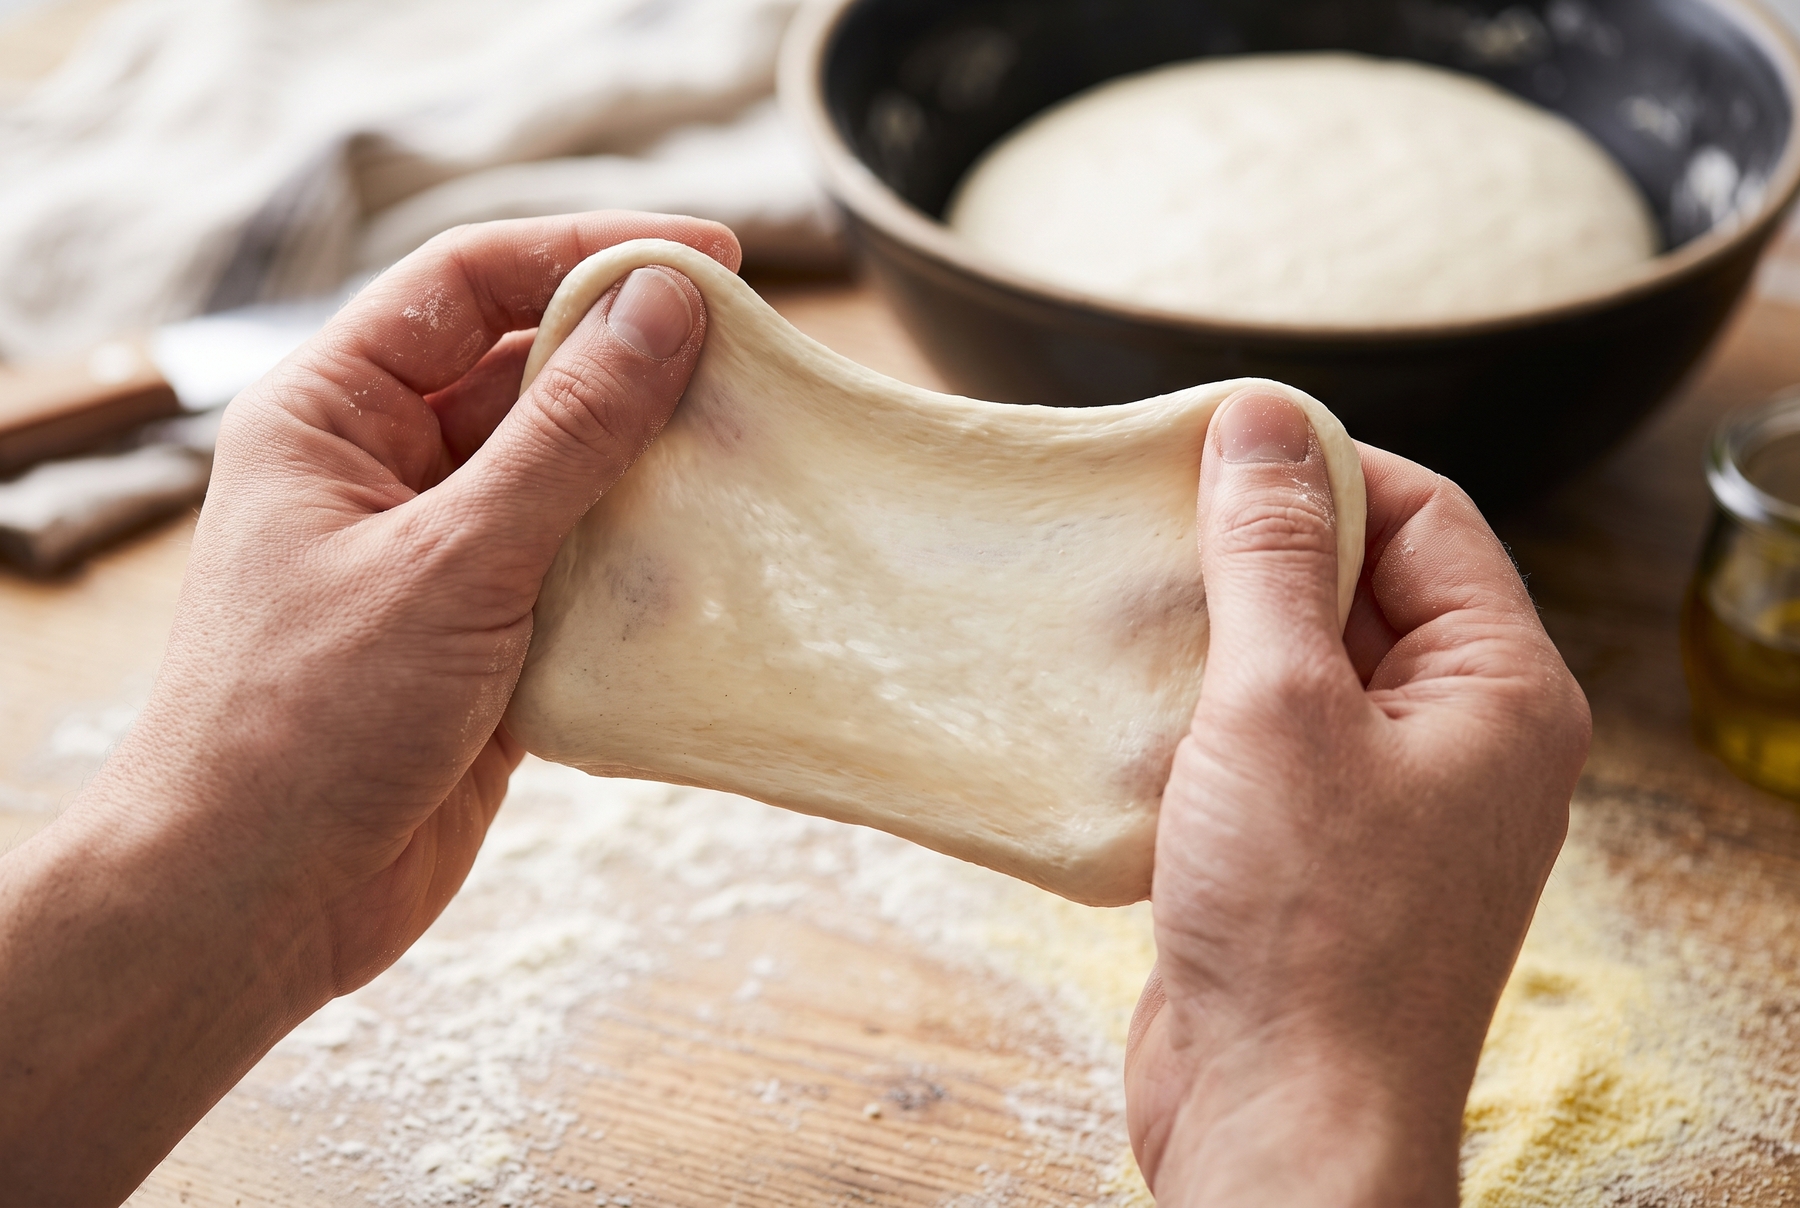
Properly kneaded dough stretches easily into a translucent membrane without tearing, indicating an excellently developed gluten structure.
Yeast, Salt, and Oil: Quantities and Purposes
Yeast Requires Astonishingly Small Amounts
For cold fermentation involving 500 g (1.1 lb) of flour, a mere 1–2 g (0.03–0.07 oz) of dry yeast or 3–5 g (0.1–0.17 oz) of fresh yeast is entirely sufficient. This amounts to less than a teaspoon. Standard 11 g (0.38 oz) yeast packets are designed for a rapid rise, and using the entire packet will cause the dough to explode in volume within hours, develop a sharp alcoholic smell, and over-ferment in the fridge by morning. Minimal yeast combined with maximum time remains the ultimate secret to deep flavor.
Salt Restrains the Dough
Salt contributes far more than flavor. It strengthens the gluten network and actively slows down yeast activity, preventing the dough from racing ahead. The standard ratio is 2.5–3 g (0.08–0.1 oz) per 100 g (3.5 oz) of flour. Ensuring even distribution is crucial, often achieved by dissolving the salt in water before adding the flour. Unsalted dough turns slack and bakes to a pale, unappetizing finish.
Oil: Heresy or Helpful Addition
Classic Neapolitan dough contains no oil, as a wood-fired oven operating at over 450 °C (840 °F) blisters the crust instantly, preventing it from drying out. A standard home oven requires a longer baking time, which often leads to a dried-out crust. Incorporating a tablespoon of olive oil per 500 g (1.1 lb) of flour makes the dough more pliable and encourages a richer, golden-brown crust. Using oil at home is a pragmatic choice, even if purists might frown upon it.
Kneading: Developing Gluten the Easy Way
A Simple Pause Works Better Than Vigorous Kneading
Mixing the flour and water into a shaggy mass and leaving it covered with plastic wrap for 20–30 minutes initiates a process known as autolyse. The flour hydrates naturally, proteins swell, and the gluten structure begins to form without any active effort. Following this pause, the dough becomes twice as easy to knead, saving considerable energy.
By Hand or With a Mixer
When working by hand, adding the salt and yeast after the autolyse phase and kneading for 8–10 minutes on a lightly oiled surface is ideal. The technique involves folding the dough over itself, pushing it away with the heel of the hand, and giving it a quarter turn.
When using a stand mixer fitted with a dough hook, running it on low speed for 6–8 minutes yields excellent results. Monitoring the temperature is vital, as planetary mixers heat the dough, and warm dough ferments too aggressively. Ideally, the dough should sit between 23–25 °C (73–77 °F) after mixing, feeling slightly cooler than the palm of the hand.
Folding Techniques for High-Hydration Dough
If the hydration exceeds 65%, traditional kneading becomes ineffective, as the dough slips through the fingers. This is where the stretch-and-fold method shines. With wet hands, grasping the edge of the dough in its container, stretching it upward, and folding it into the center proves highly effective. Rotating the container and repeating this motion four times completes one set, taking about thirty seconds. Executing three to four sets spaced 20–30 minutes apart magically transforms a slack mass into an elastic, resilient ball.
Cold Fermentation: The Crucial Stage
How Long to Wait
The minimum resting time is an overnight stay of about 12 hours. The sweet spot for most applications lands between 24 and 48 hours at 4 °C (39 °F). By the third day, strong flour holds its ground, while standard flour begins to degrade. Extending the fermentation beyond 72 hours offers no benefits, as the flavor profile plateaus and the gluten structure deteriorates. Portioning the dough into individual balls before placing them in the fridge ensures an even, controlled maturation.
Identifying Perfectly Matured Dough
Properly matured dough increases in volume by one and a half to two times. The surface exhibits a mix of large and small fermentation bubbles. The aroma is pleasant, carrying bready and slightly milky notes with a delicate tang. Pressing a finger into the surface leaves an indentation that springs back slowly and lazily. Such a dough ball is perfectly primed for stretching.
When the Dough Has Over-Fermented
Over-fermented dough is easily recognizable by a harsh alcoholic odor, a sticky, porous surface, and a tendency to flatten out completely and tear upon handling. It will not rise in the oven, as the yeast has exhausted its food supply and the gas has escaped. While shaping a traditional pizza with an airy crust is no longer possible, the dough is not entirely lost. Stretching it out on a generously oiled baking sheet and topping it with coarse salt and rosemary results in an excellent focaccia, or it can be pan-fried into thin flatbreads.
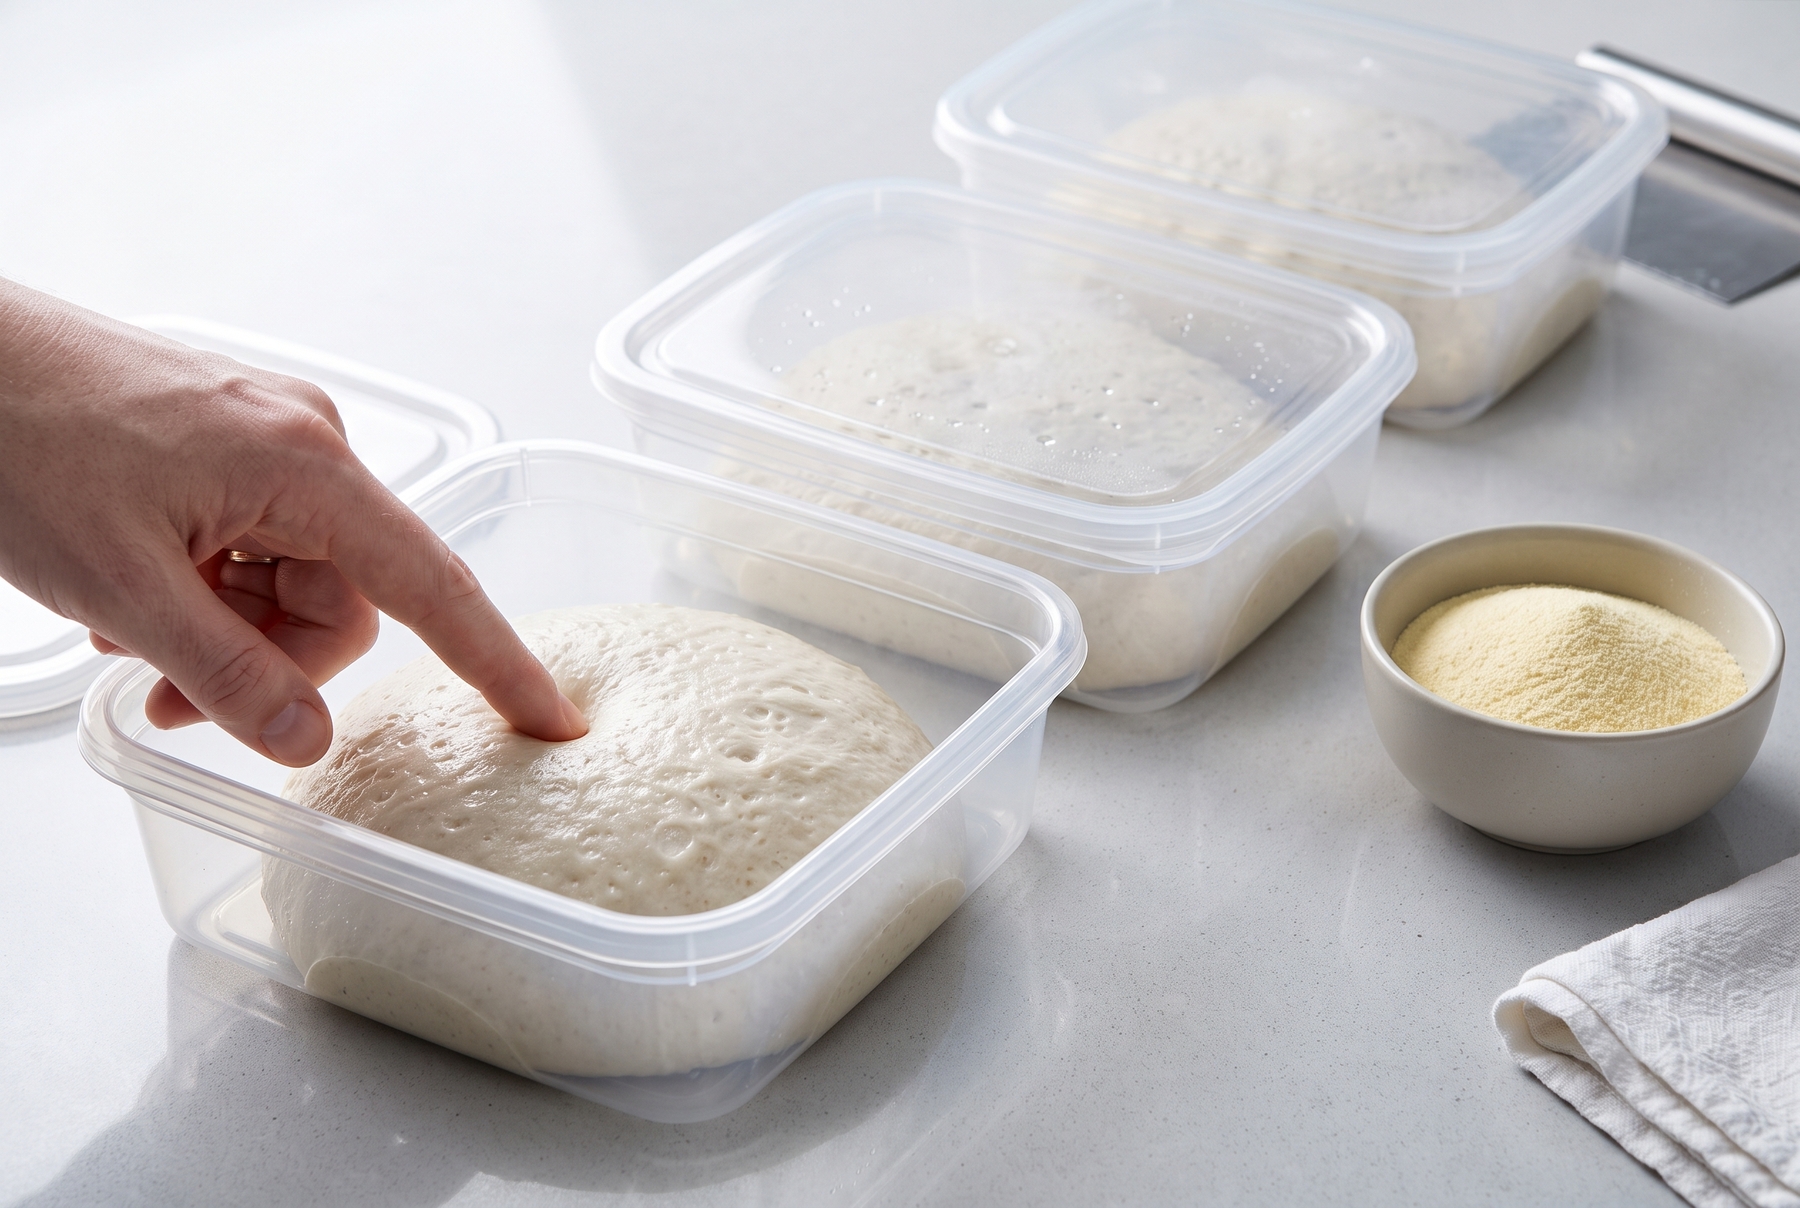
Checking the dough's readiness after cold fermentation by gently pressing it with a finger: the indentation should recover slowly and lazily.
Shaping: How the Crust Gets Ruined
Putting the Rolling Pin Away
A rolling pin ruthlessly forces out all the delicate gas bubbles developed over two days of cold fermentation. Working exclusively with the hands is essential. Placing the dough ball on a lightly dusted surface and pressing the center with the fingertips, moving outward while leaving a 1.5–2 cm (0.6–0.8 inch) rim untouched, forms the perfect base. Transferring the dough over the knuckles and letting gravity stretch it while rotating ensures the gas is pushed toward the edges rather than expelled entirely.
Allowing the Dough to Warm Up
Cold dough pulled straight from the refrigerator behaves like rubber, immediately shrinking back when stretched. Removing the dough balls from the fridge an hour or two before baking resolves this. The exact time depends on ambient kitchen temperatures—40 minutes might suffice during a hot summer, while two hours may be needed near a drafty winter window. The primary indicator is a dough that stretches smoothly without snapping back.
Dusting: A Fine Balance
Flour on the work surface prevents sticking, while a dusting on the pizza peel ensures a smooth transfer to the baking stone. However, excess raw flour burns violently on the hot stone, leaving an acrid bitterness on the bottom of the crust. Semola or fine semolina resists burning far better, acting like microscopic ball bearings. Shaking off any excess before launching the pizza into the oven remains a critical step.
Toppings: How Not to Drown the Perfect Dough
Less Is More
A pizza is not a deep-dish pie. For a standard 30 cm (12-inch) base, utilizing 70–80 g (2.5–2.8 oz) of sauce, 100–120 g (3.5–4.2 oz) of mozzarella, and a maximum of three additional toppings is plenty. The urge to overload the pizza is universal, yet every extra ingredient introduces moisture, weighs down the center, and steals precious heat from the crust.
Protecting the Base From Moisture
Reducing the tomato sauce until it holds its shape on a spoon prevents a soggy base. Opting for low-moisture mozzarella works best, but if fresh mozzarella stored in brine is preferred, slicing it an hour in advance and letting it drain on paper towels is necessary. Pre-cooking moisture-heavy ingredients like mushrooms prevents them from releasing puddles of water during baking. Delicate toppings like fresh tomatoes are best added post-bake or thoroughly patted dry.
Adjusting for a Standard Home Oven
In a commercial pizza oven, a pie bakes in 90 seconds, giving moisture no time to penetrate the crust. A home oven requires 6–8 minutes, allowing ample time for excess liquid to turn the center into mush. The weaker the oven, the stricter the discipline required regarding topping quantities.
Baking: Extracting Maximum Heat From a Home Oven
The Problem With Bottom Heat
A professional pizza oven blasts intense heat directly into the base, instantly sealing the dough, crisping the exterior, and turning internal moisture into steam that puffs up the crust. A standard home oven heats the air rather than the floor, causing a pizza placed on a cold baking sheet to dry out long before it browns. The objective is to store massive amounts of thermal energy in a heavy surface and transfer it rapidly to the dough.
Using a Baking Stone, Steel, or an Inverted Baking Sheet
A baking steel conducts heat the fastest, followed closely by a ceramic or cordierite baking stone. Both guarantee a beautifully browned undercarriage in minutes. In the absence of either, preheating the heaviest available baking tray inverted in the oven acts as a viable substitute. Any chosen surface must be preheated at the oven’s absolute maximum temperature (usually 250–275 °C / 480–525 °F) for no less than 45 minutes, with an hour being preferable for a stone. While it consumes electricity, it remains the sole path to a properly blistered crust at home.
Oven Settings and the Final Touch
The ideal setup involves standard top and bottom heat, with the baking stone positioned slightly above the middle rack. Convection tends to dry out the top too quickly and is generally avoided. In the final minutes of baking, engaging the broiler helps achieve those coveted dark, charred spots on the crust—monitoring this visually rather than relying on a timer is crucial, as it comes down to mere seconds. Safety first: never engage in practices that contradict the oven manufacturer’s guidelines.
Indicators of Readiness
A fully baked pizza boasts a puffed, airy rim adorned with spots resembling burnt caramel. The cheese is fully melted and bubbling, yet not baked into a dry, hardened layer. The bottom crust must be deeply browned with distinct char marks—lifting the edge slightly with a spatula reveals the truth. A pale bottom usually indicates either a poorly preheated baking surface or a rack positioned too high in the oven.
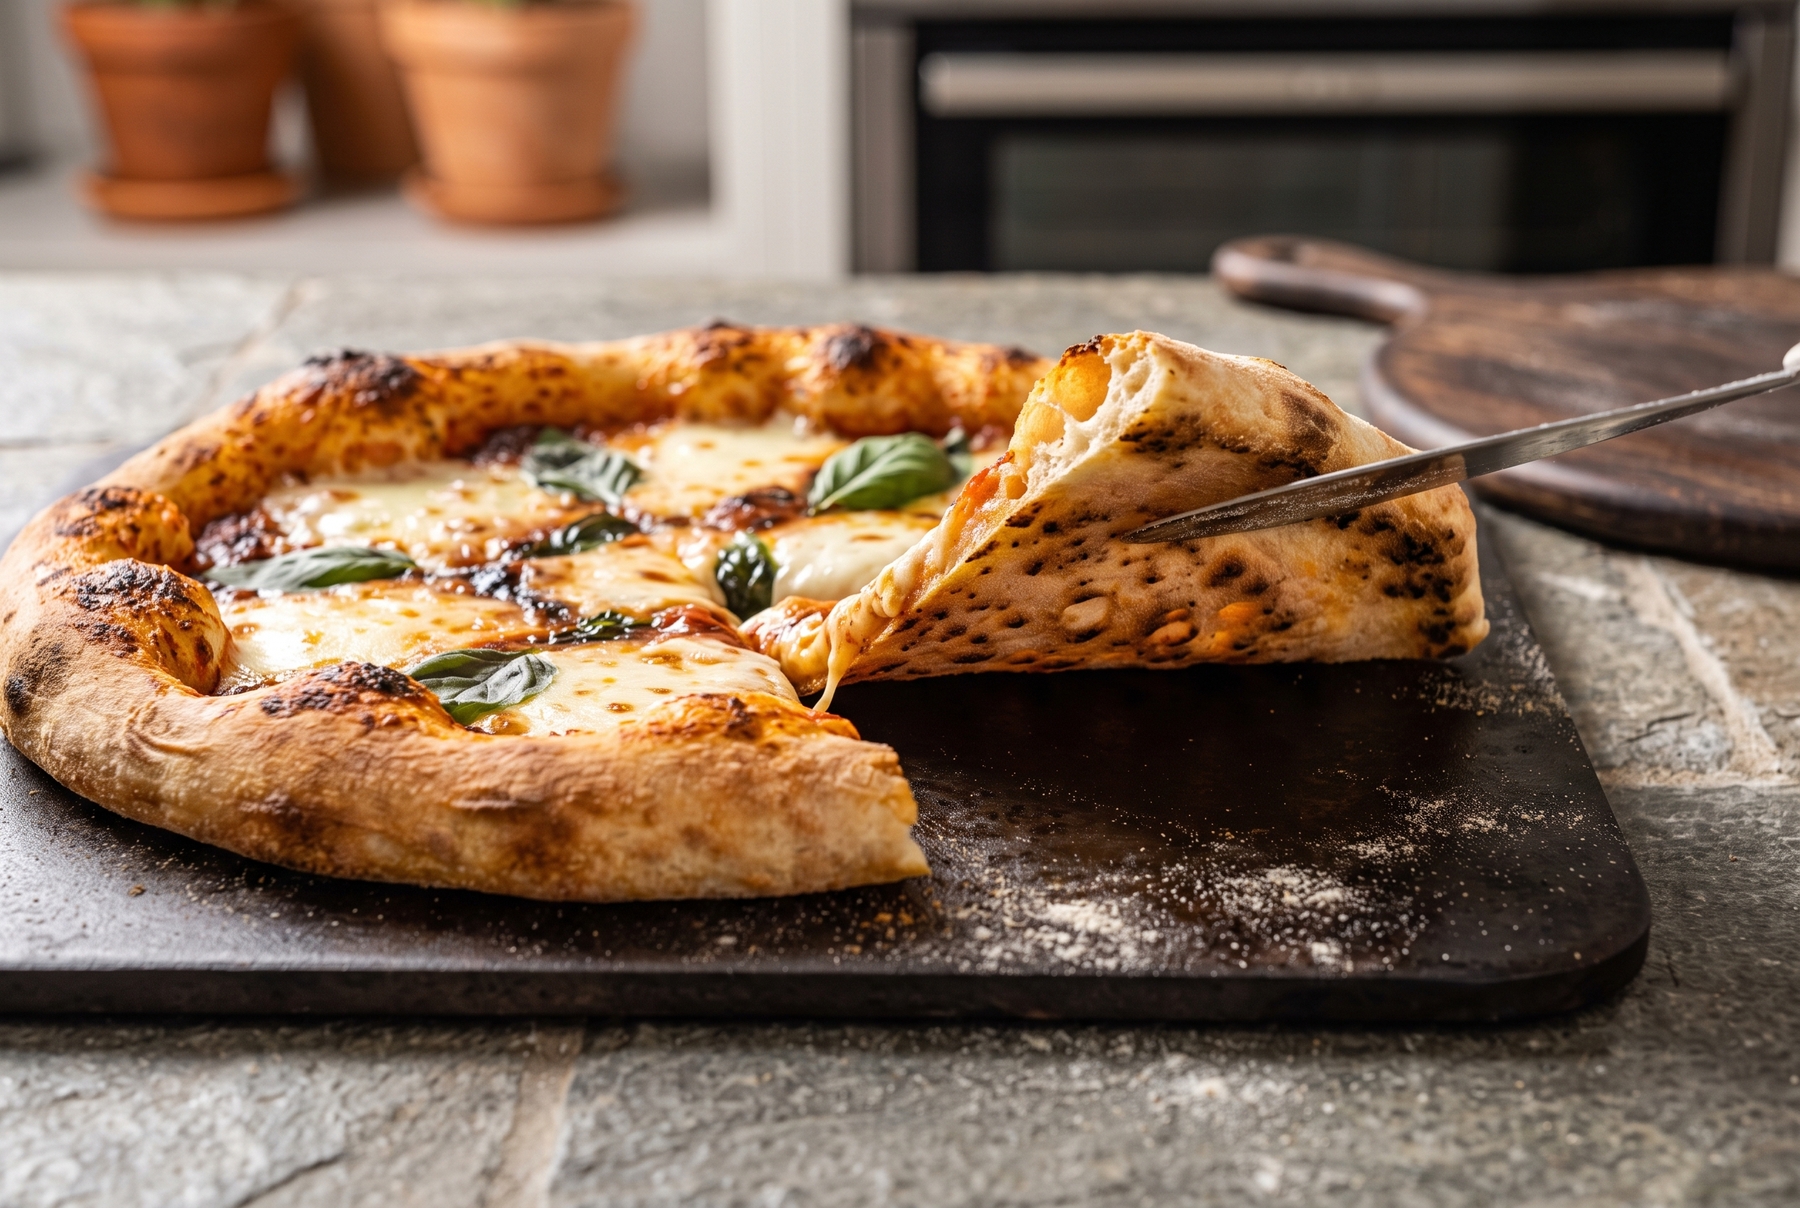
Baking on a preheated baking stone or steel yields a characteristic leopard-spotted crust and a crispy bottom even in a standard home oven.
A Basic Formula for 3 Pizzas
Bakers’ percentages are calculated based on the total weight of the flour, making scaling up or down remarkably simple.
- 500 g (1.1 lb) strong bread flour (100%)
- 325 g (11.4 oz) cold water (65%)
- 13 g (0.45 oz) fine sea salt (2.6%)
- 1.5 g (0.05 oz) instant dry yeast (0.3%)
- 15 g (0.5 oz) extra virgin olive oil (optional)
Yield: Three 280 g (9.8 oz) dough balls, each suitable for a 30 cm (12-inch) pizza. The hydration should be adjusted based on the flour’s absorption capacity; weaker flours demand less water, while stronger ones can handle more. Adjusting yeast amounts correlates with fermentation times: 1 g (0.03 oz) suffices for a 48-hour cold rest, while 2 g (0.07 oz) accelerates the process for an overnight schedule.
An Approachable Method for Beginners
This method involves starting with 62% hydration (310 g / 10.9 oz of water), kneading by hand for 10 minutes, and resting at room temperature for an hour, followed by 12–24 hours in the refrigerator. This results in a highly manageable dough that forgives shaping errors.
A High-Hydration Method for an Airy Crust
This method utilizes 68–70% hydration, a 30-minute autolyse, four sets of stretch-and-folds spaced 20 minutes apart, and a 48-hour cold fermentation. Shaping requires a gentle touch, pushing from the center out to leave a generous rim. The resulting crust is spectacular and full of large bubbles, but the sticky dough demands confident handling.
7 Common Mistakes and Quick Solutions
- The dough tears when stretched: It is either too cold or the gluten is underdeveloped. Letting it rest at room temperature for another 15 minutes usually resolves the issue.
- The dough sticks relentlessly to the hands: Working with slightly wet or oiled hands prevents sticking; resisting the urge to add raw flour is vital.
- The bottom of the pizza is pale: The baking surface lacks sufficient stored heat. Preheating the stone longer and placing it lower in the oven corrects this.
- The crust is dry and cracker-like: The culprits are often a rolling pin, excessive dusting flour, or an overextended baking time. Shaping by hand and monitoring the crust’s browning helps.
- A strong yeasty smell in the baked pizza: An excessive amount of yeast was used. Reducing the yeast to 1–2 g per 500 g of flour and allowing ample fermentation time brings out the true flavor.
- A soggy, wet center: Overloading toppings or using watery sauce/cheese ruins the bake. Reducing the sauce and thoroughly draining the mozzarella are essential steps.
- The pizza sticks to the peel: Assembling the pizza took too long, or the peel lacked a proper dusting. Working swiftly and giving the peel a sharp shimmy before launching ensures a smooth release.
Judging a homemade pizza solely against strict Neapolitan standards is an exercise in futility; achieving the certified ‘Vera Pizza’ blistering without a 450 °C (840 °F) wood-fired oven is physically impossible. Moreover, it is unnecessary. A phenomenal homemade pie boasts an incredibly flavorful crust free from harsh yeast aromas, a bottom that shatters slightly and easily supports the tip of the slice, and a puffy edge riddled with airy pockets. Four simple elements dictate this success: high-protein flour, embracing slightly sticky dough, leveraging cold fermentation, and unleashing maximum thermal energy in the oven.
The ultimate quality check remains simple. Tearing a piece of the crust and squeezing it between the fingers should result in the dough springing back to its original shape, revealing an interior web of glossy, irregular pores releasing a waft of fragrant steam.
0 comments