
I still remember my first real culinary disaster. I was interning in Paris, making a festive soufflé for eight, and feeling quite proud of myself as I kept the mixer running “just in case.” The egg whites were holding a glossy peak. Yet, I kept whipping. A minute later, the shine disappeared, the mixture curdled into a grainy mush resembling wet soap, and a puddle of cloudy liquid separated at the bottom. The chef took one look, silently pulled out a copper bowl and a whisk, and sent me to redo everything by hand. It took forty minutes. I could not feel my elbow for the rest of the day.
That experience taught me a simple truth. Meringue involves only two main players: egg whites and sugar. Missing are yeast, proofing times, and waiting for the dough to rise. Yet, these two basic ingredients frequently bring seasoned pastry chefs to tears. Achieving a perfect meringue happens when you understand exactly what occurs within the egg white and know exactly when to stop.
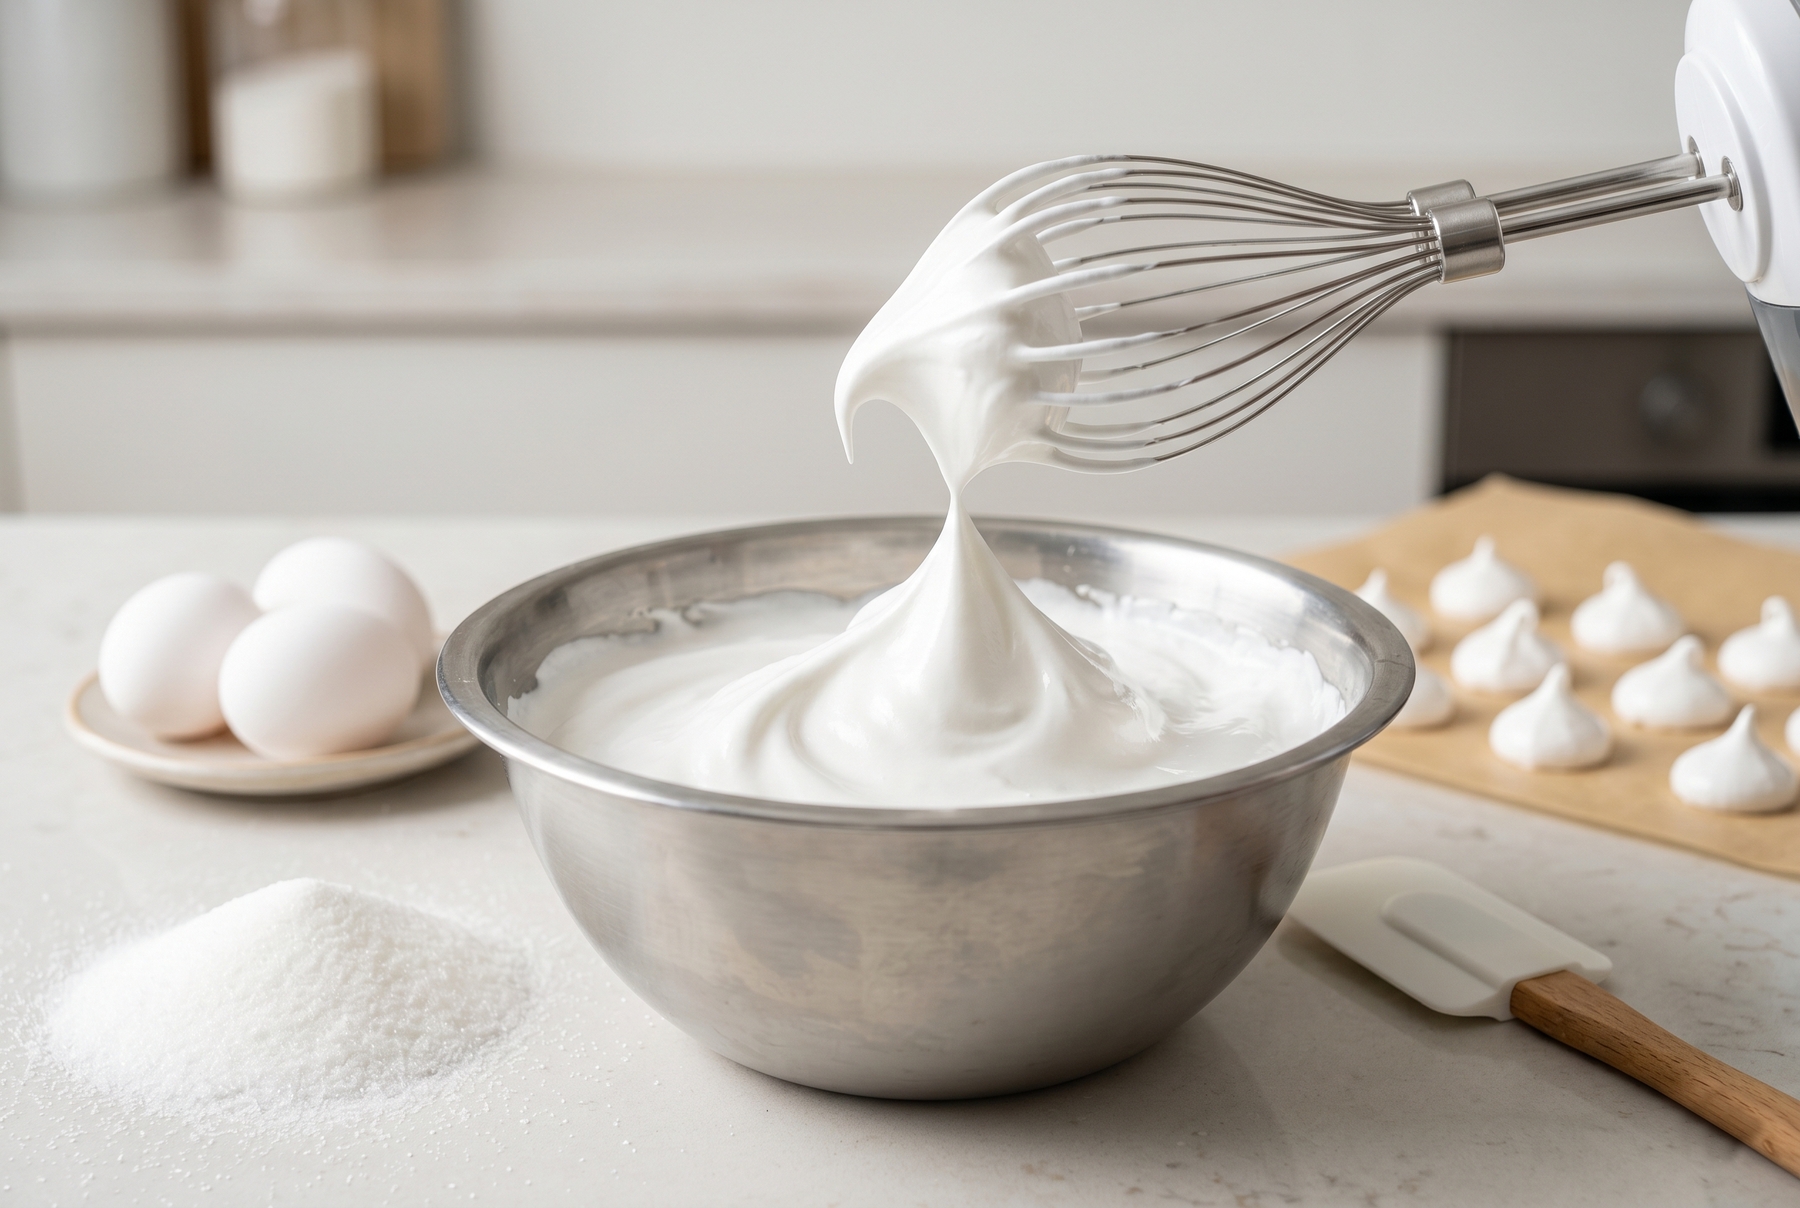
A properly whipped meringue must be glossy and hold the shape of a sharp beak on the whisk.
Table of Contents
What Happens in the Bowl While Whisking
An egg white consists almost entirely of water (about 90%). The remainder is mostly proteins folded into tight coils. As the whisk forces air into the egg white, these coils unfurl in a process known as denaturation. The unfolded molecules link together around the air bubbles, forming a delicate film. This structural film is what holds the foam together.
Sugar serves a greater purpose than mere sweetness. Dissolving into the watery film surrounding the bubbles, it thickens the structure and prevents the water from draining away. This explains why sweetened meringue can stand for hours, whereas plain whipped egg whites deflate right before your eyes.
This also reveals why my chef reached for a copper bowl. Whisking egg whites against copper releases copper ions into the mixture, which bind to a specific protein called conalbumin. This compound resists overheating and coagulates much more slowly. Whipping whites in a copper bowl makes overbeating difficult, keeping the mixture smoother for longer. Lacking a copper bowl (most home cooks do, and I only have one myself) is not an issue. Adding a drop of lemon juice or a pinch of cream of tartar achieves a similar effect by shifting the acidity. It costs pennies, yet stabilizes the foam remarkably well.
Recognizing when to stop whisking comes down to reading the peaks:
- Soft Peaks: Lifting the whisk reveals a foamy tip that slumps over in a lazy loop;
- Medium Peaks: The tip curls into a smooth comma, holding its shape, but the very top remains soft;
- Stiff Peaks: The foam follows the whisk in a sharp beak and stands perfectly still. Holding the inverted bowl over your head is entirely possible (tested, though doing it over the sink is safer).
Three Meringues for Different Culinary Tasks: French, Swiss, and Italian
Whisking egg whites with sugar yields three distinct types of meringue, and the choice depends entirely on the intended dessert.
French Meringue remains the most straightforward method. Whipping raw egg whites while gradually adding sugar creates an airy mixture ideal for classic dry meringues destined for the oven. However, it is also the most temperamental. Letting it sit in the bowl for ten minutes causes it to deflate and weep from the bottom. Transferring it straight to the baking sheet immediately after whisking is essential. It lacks the structural stability needed for buttercreams or assembled desserts and may collapse before serving.
Swiss Meringue requires a double boiler. Placing the egg whites and sugar over a pot of gently simmering water (ensuring the bowl does not touch the water) and whisking constantly helps the sugar dissolve completely. The target temperature hovers around 60 °C (140 °F); exceeding 65–70 °C (150–160 °F) risks scrambling the edges into a sweet omelet. Once rubbing the mixture between two fingers reveals absolutely no sugar granules, removing the bowl from the heat and whipping it to a dense, glossy finish is the next step. This offers the most reliable foundation for a homemade Pavlova, robust buttercreams, and piped decorations.
Conflating two different concepts here is easy. Heating the mixture to 60 °C (140 °F) is necessary for dissolving the sugar and ensuring structural stability, but it does not guarantee food safety on its own. Using pasteurized egg whites provides a safer alternative for creams or garnishes that will not see any oven time, or, if the recipe allows, heating the mixture to a fully safe temperature is recommended.
Italian Meringue is the most demanding yet structurally sound. Pouring a hot sugar syrup, cooked to the soft-ball stage (around 118 °C (244 °F)), in a thin stream into soft-peaked egg whites creates a dense, glossy foam. It holds its shape for hours and handles early dessert assembly flawlessly. This technique serves as the backbone for macarons, mousses, and light buttercreams. Lacking a candy thermometer is easily remedied by dropping a small amount of boiling syrup into a glass of cold water; reaching the soft-ball stage means the syrup forms a pliable ball that flattens easily between the fingers.
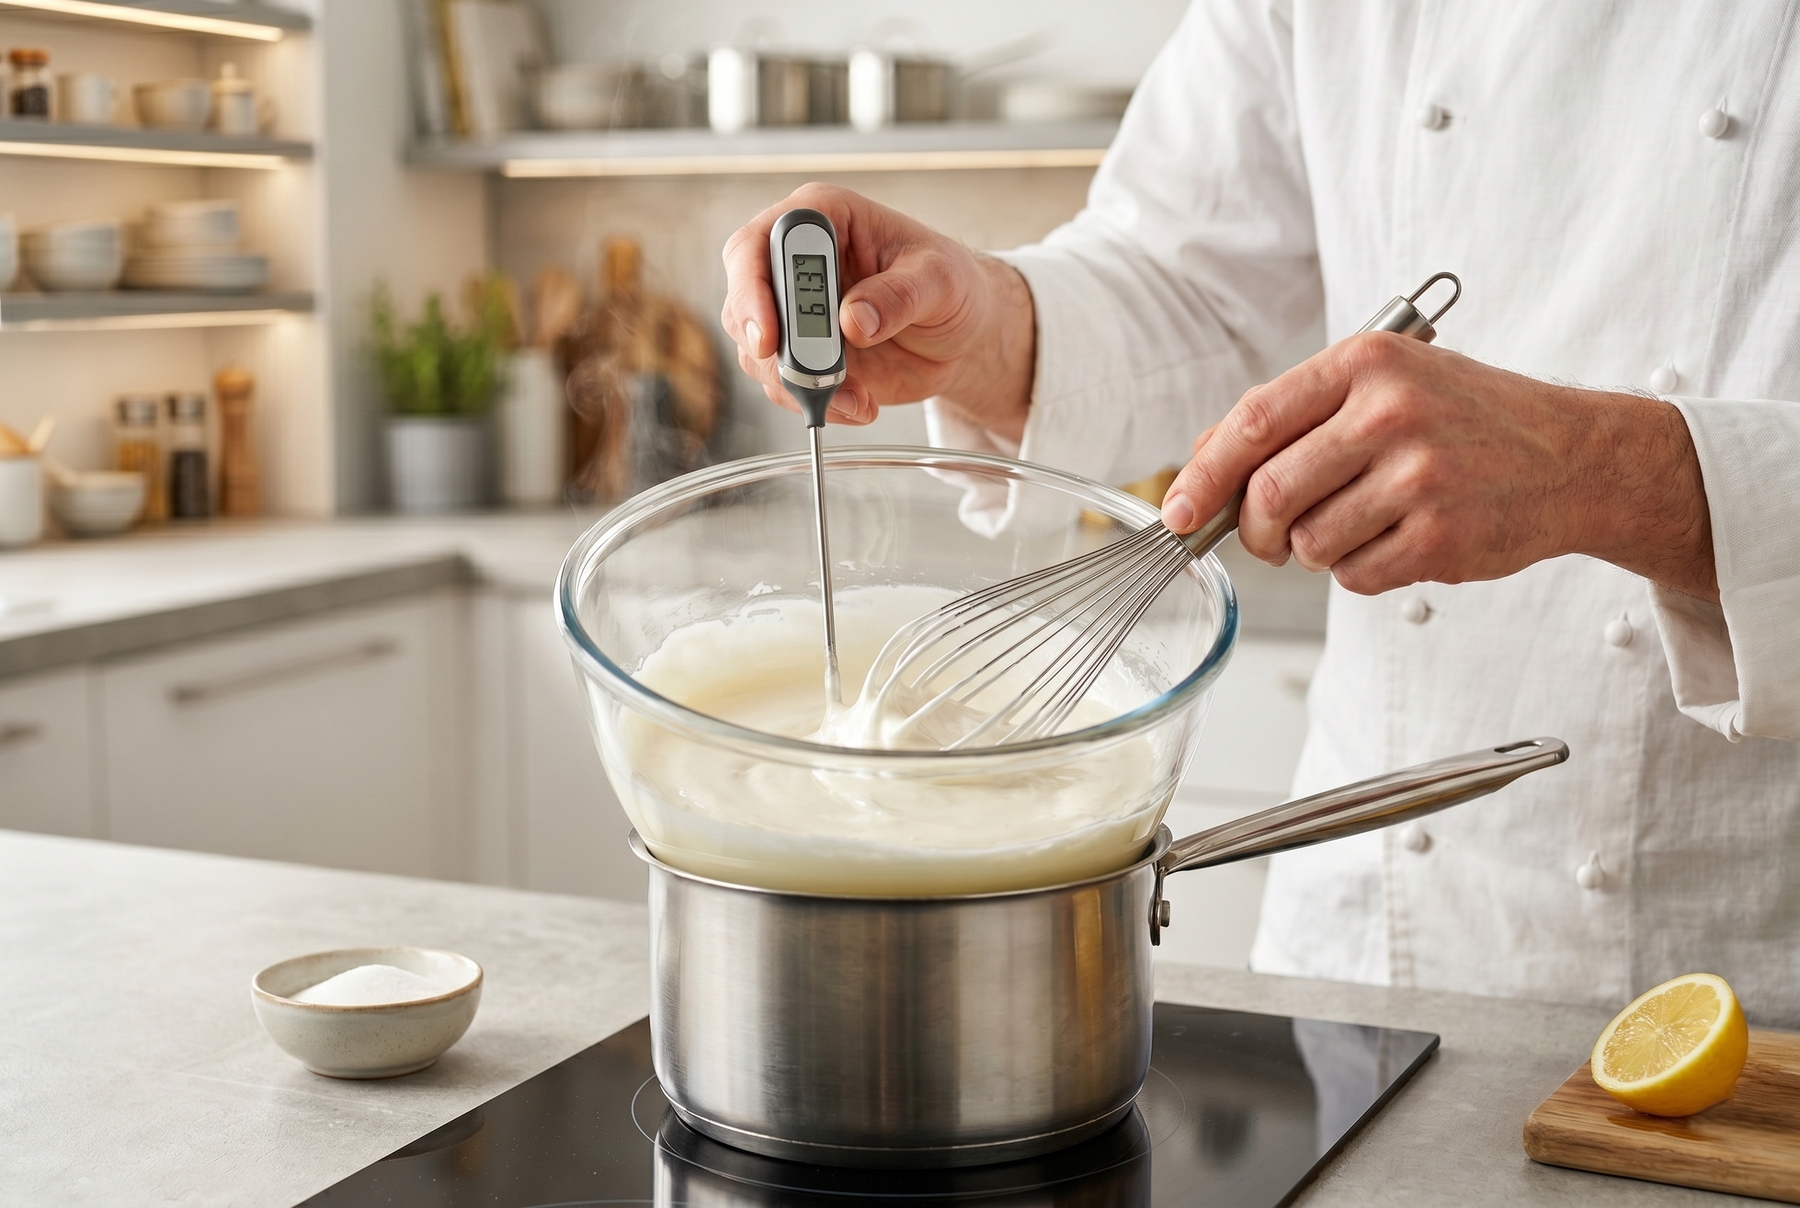
When making a Swiss meringue, reaching a temperature of 60 °C (140 °F) is crucial to dissolve the sugar completely.
Why Meringues Fail: Fat, Humidity, and Unclean Bowls
Minor oversights usually spell disaster for a meringue: a trace of egg yolk, humid air, or a greasy mixing bowl.
A noticeable trace of yolk or a greasy film on the bowl effortlessly ruins the entire endeavor. Fat occupies the boundary between air and water, exactly where the proteins need to align, preventing the foam from expanding. More fat guarantees a weaker result. While a microscopic speck of yolk might not instantly destroy the foam, testing this theory on an important dessert is unwise. Separating eggs while they are cold, one by one into a small ramekin before adding them to the main bowl, prevents disaster. If a yolk breaks, setting that small cup aside keeps the rest of the batch perfectly intact.
Sugar pulls moisture from everywhere, including the surrounding air. Drying meringues on a humid day or next to a boiling kettle leaves them sticky and weeping, making dry weather far preferable to a rainy day for baking.
Equipment plays a final, crucial role. Wiping the bowl and whisk with a lemon wedge or a drop of vinegar, then drying them completely, ensures absolute cleanliness. Plastic bowls often harbor hidden grease in microscopic scratches, making glass, stainless steel, or the iconic copper much better choices for whipping whites.
From Crispy Meringue Kisses to the Architecture of a Pavlova
Classic Meringue: Drying Rather Than Baking
Attempting to bake a classic meringue remains the most common mistake; it actually needs slow drying. Setting the oven very low, under 100 °C (210 °F)—with an ideal working range around 90–100 °C (195–210 °F)—and leaving the meringue undisturbed for hours is key. Allowing the temperature to spike causes small meringues to yellow, over-dry on the surface, crack, or turn chewy like toffee. Sugar is not the culprit here, as it does not have time to caramelize. The meringue simply heats up too fast, dries unevenly, and browns in spots. Propping the oven door slightly open (wedging a wooden spoon in the gap works perfectly) allows moisture to escape instead of becoming trapped inside. Checking for doneness requires a gentle tap on the bottom; a fully dried meringue yields a hollow sound and releases effortlessly from the parchment paper.
The Pavlova: Crisp on the Outside, Cloud-Like on the Inside
The undeniable charm of a Pavlova (a classic meringue-based dessert named after the Russian ballerina Anna Pavlova) lies in its contrast: a delicate, brittle shell encasing a soft, marshmallow-like center. Folding a spoonful of cornstarch and a splash of vinegar or lemon juice into the finished meringue guarantees that plush interior. The starch retains internal moisture, preventing the center from turning into a dry rusk, while the acid stabilizes the structure. Adding cream and fresh berries at the absolute last minute is highly recommended. Meringue greedily absorbs moisture, and a pre-assembled Pavlova loses its signature crunch within an hour. The crust turns soggy, the dessert begins to weep, and the whole structure collapses under the weight of the topping.
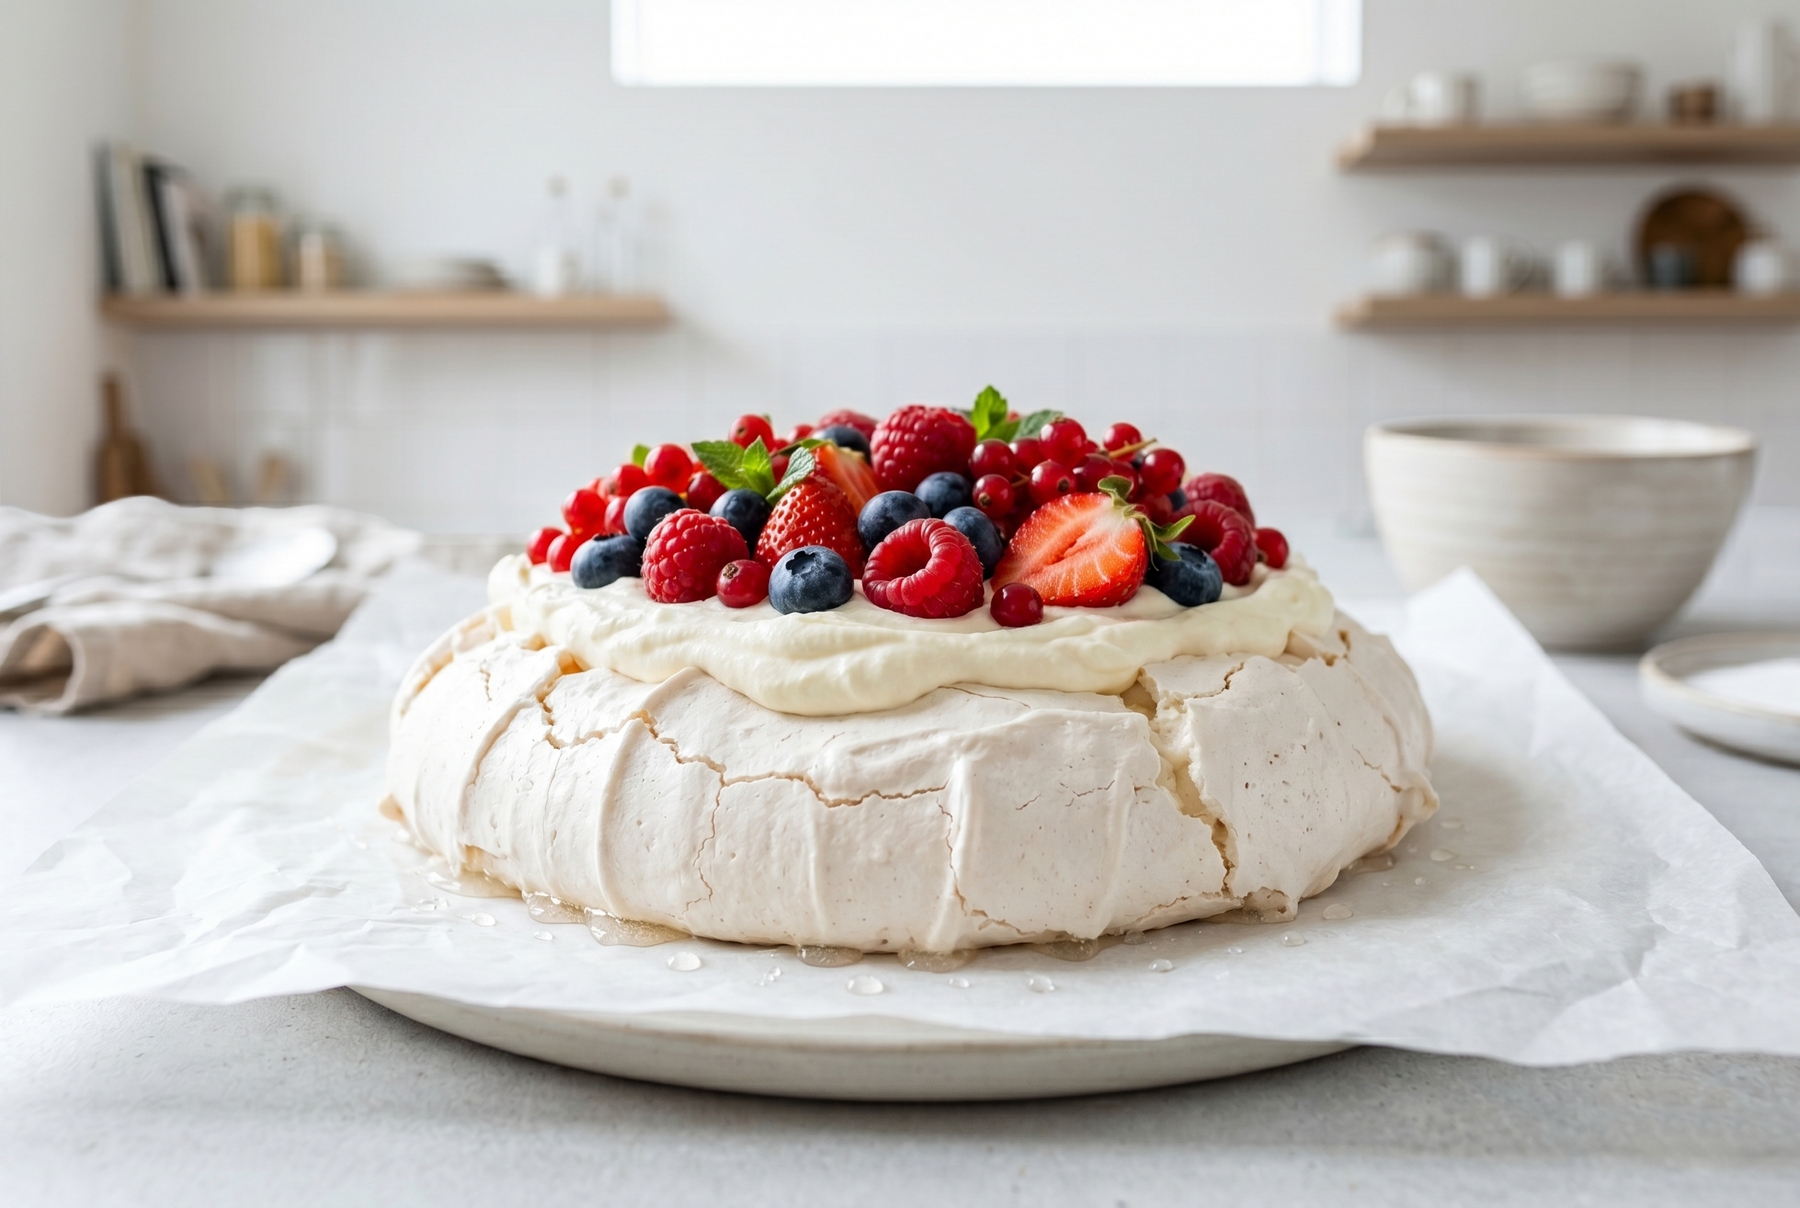
A classic Pavlova combines a crisp meringue crust with a soft, marshmallow-like center.
Why Meringue Weeps, Cracks, and Turns Gray
Meringue missteps usually present themselves instantly: sugary droplets, surface cracks, a rubbery texture, or a dull gray hue.
Syrup or Sweet Droplets Under the Baked Meringue. Incomplete sugar dissolution ranks among the most frequent reasons for weeping meringues. Rubbing a pinch of the mixture between two fingers reveals the truth: feeling grit means the sugar was added too quickly or the whipping time was too short. Relying on the Swiss or Italian method offers more peace of mind, as both ensure the sugar melts completely. However, sugar is not always to blame. High kitchen humidity, incorrect oven temperatures, condensation, under-baking, or improper storage can also cause these sticky puddles.
Surface Cracks. Excessive heat or a sudden temperature drop usually causes cracking. Pulling a hot meringue out into a cold draft makes the fragile shell shatter. Cooling the dessert gradually inside the turned-off oven with the door slightly ajar prevents this.
The Meringue Turns Rubbery or Weeps in the Bowl. Overbeating causes this precise scenario—my Parisian disaster. The protein network becomes overly tight and begins squeezing out water. Reversing this state is impossible; starting over is the only solution. Catching the mistake right as the gloss begins to fade, however, offers a slight chance of rescue. Gently folding in one fresh egg white by hand can occasionally smooth the foam back out, allowing it to trail off the spatula in a silky ribbon.
A Gray or Dull Hue. This discoloration often results from a reaction between the egg whites and the metal of the mixing bowl (such as aluminum). Choosing glass, stainless steel, or copper guarantees a pristine, bright white color.
Tapping a finger against the bottom of a cooled meringue provides the ultimate test: a perfectly dry bake echoes like tapping on an empty cardboard box.
0 comments