
Making a good chicken broth does not mean simply boiling a chicken for as long as possible. This is the first rule to remember. Extended rolling boils do not inherently deepen the flavor. Instead, they readily produce cloudiness, a harsh boiled odor, and unnecessary storage complications.
Chicken broth becomes entirely predictable when three main elements are kept under control: the ingredients, the temperature, and the cooling speed. Everything else—spices, the shape of the pot, or your current mood—is secondary.
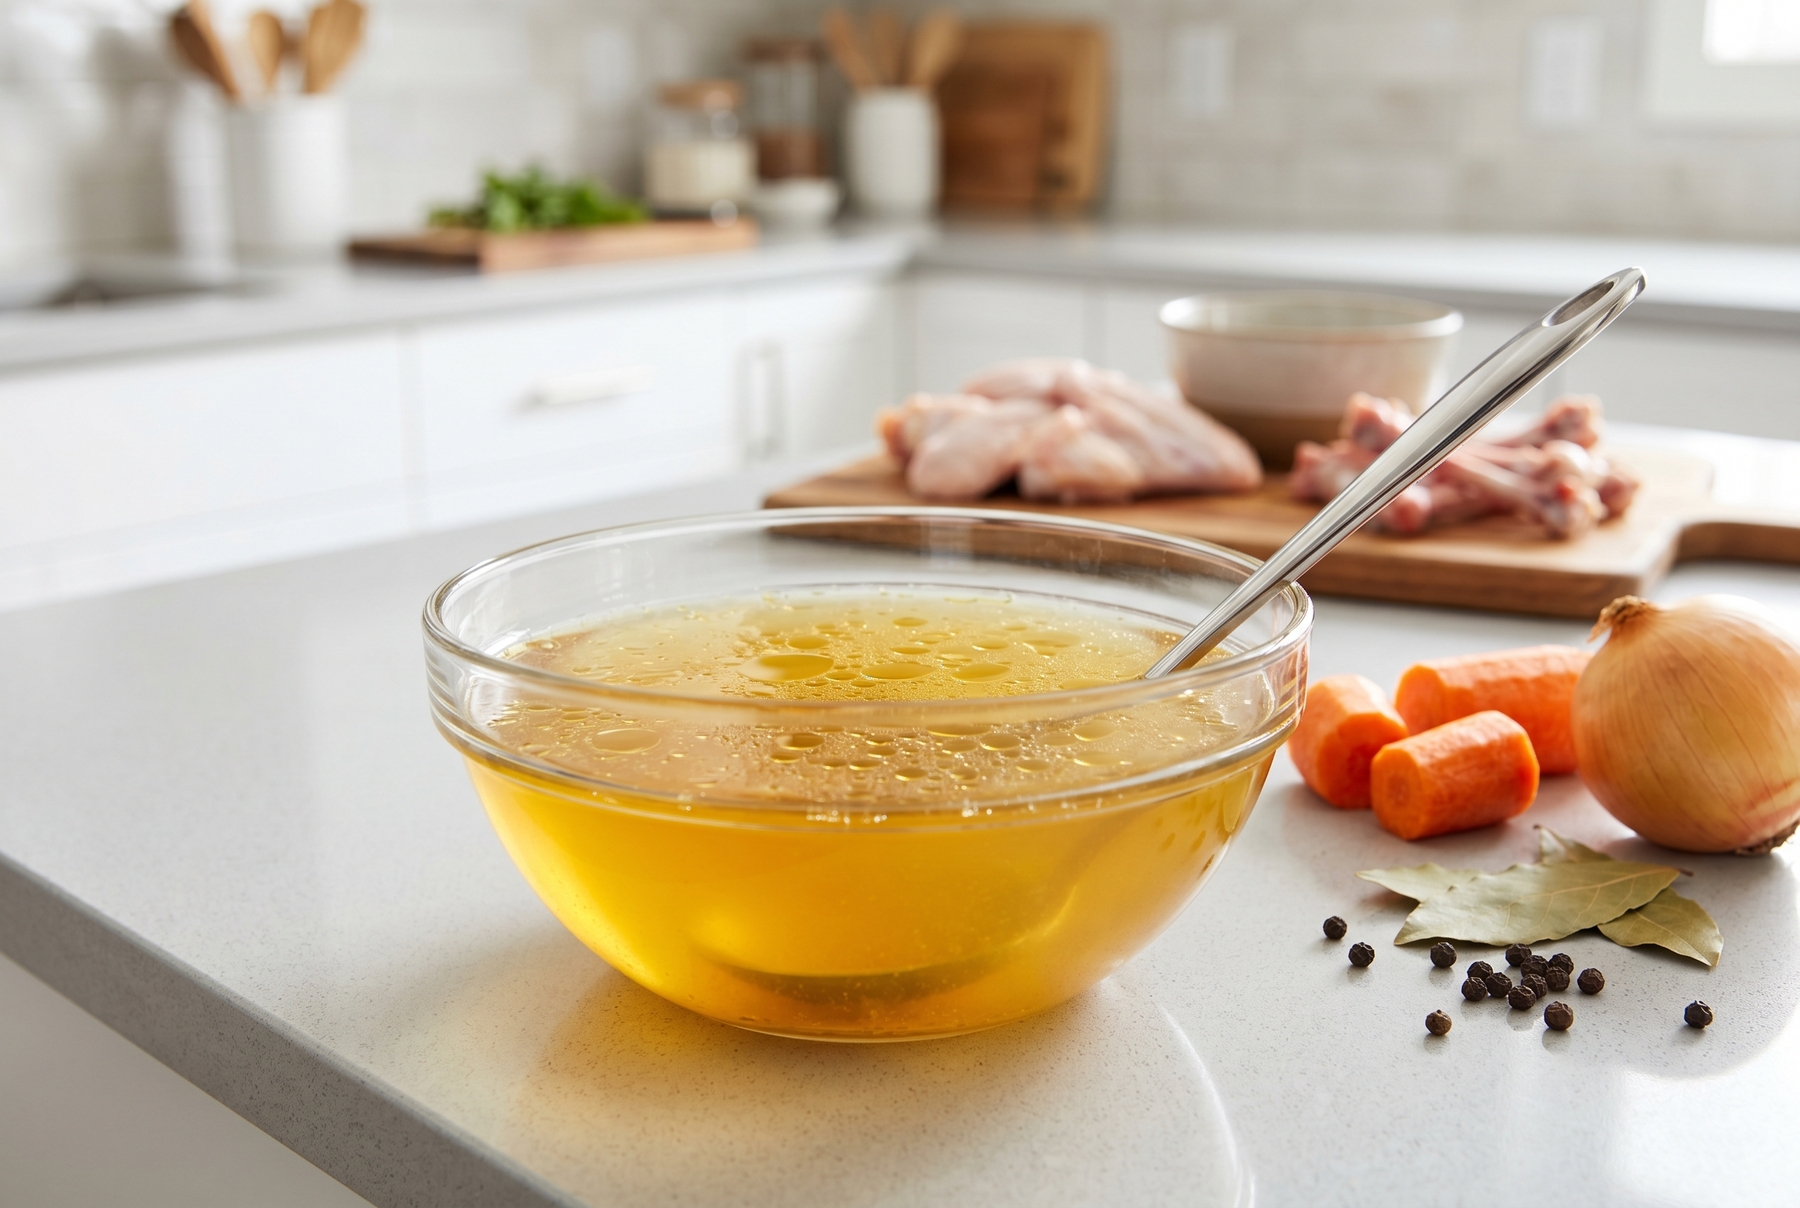
A quality chicken broth should be perfectly transparent, featuring a light golden hue and a remarkably clean aroma.
Table of Contents
- What Is a Basic Broth and Why You Need It at Home
- What to Make It From: Whole Chicken, Carcasses, Wings, Backs, and Bones
- Vegetables and Spices: What to Add and What Ruins Versatility
- The Primary Technique: Never Boil, Just Simmer Gently
- Foam, Cloudiness, and Fat: What to Skim and What to Leave
- How Long to Simmer Chicken Broth for Maximum Flavor
- Step-By-Step Guide to a Basic Chicken Broth
- Straining and Rapid Cooling: The Most Underrated Step
- How to Store Chicken Broth in the Refrigerator: Shelf Life, Containers, and Spoilage Signs
- How to Freeze Chicken Broth to Make It a Convenient Ingredient Instead of an Ice Block
- How to Use a Basic Chicken Broth
- Common Mistakes and Quick Fixes
- A Quick Cheat Sheet for the Road
What Is a Basic Broth and Why You Need It at Home
Not Just a Soup or a Remedy
A basic broth serves as a neutral foundation. It eventually evolves into soups, sauces, risottos, porridges, and stews. It should not be the star of the show; its primary job is to lend flavor to other ingredients without overpowering them.
Because of this, a basic broth is never overloaded with spices, salt, or bold aromas. If turmeric, garlic, and a smoked rib are thrown in at the very beginning, the broth will dictate the flavor of every subsequent dish it enters. That is rarely the desired outcome.
What the Result Should Look Like
A proper chicken broth is easily recognizable. The aroma is clean and chicken-forward, lacking any musty notes or harsh boiled smells. Its body is moderate: the liquid is slightly denser than water, noticeable on the palate but never sticky. A gentle background sweetness from carrots and onions is barely perceptible.
Fat gathers on the surface in distinct golden pools rather than hanging in a cloudy suspension. The broth itself remains transparent or exhibits a faint opalescence (meaning it glows slightly milky when held to the light, yet the bottom of the bowl remains clearly visible). Murky, gray sediment has no place in this picture.
What to Make It From: Whole Chicken, Carcasses, Wings, Backs, and Bones
Why Chicken Breasts Are Not Enough
Chicken breasts alone will not take the flavor very far. Pure, boneless meat yields a watery infusion with a weak body and a flavor that quickly becomes dull. The true richness of a broth comes from other parts.
Bones and cartilage are packed with collagen. During a long, gentle simmer, this collagen transforms into gelatin, which is directly responsible for the dense mouthfeel and the way a chilled broth sets into a jelly. Skin adds fat and deep flavor. A small amount of meat is only required for that distinct meaty note.
The Ultimate Homemade Kit
A successful homemade base is typically assembled from what remains after breaking down a whole chicken:
- Carcasses (the spine and ribs left after removing the fillets);
- Wings and necks, as they are rich in connective tissue;
- Backs;
- A couple of drumsticks or a thigh, if a stronger meaty taste is desired.
Adding offal to a basic broth is generally not recommended. Livers and hearts introduce a harsh metallic flavor and an unfilterable cloudiness. They are wonderful for pâtés but terrible for a neutral liquid base.
Raw Versus Roasted Chicken
A crucial choice happens right at the start. A raw poultry kit yields a light, universal broth with a mild flavor that fits perfectly into any recipe. If those same bones and vegetables are roasted first in the oven at 200 °C (390 °F) until golden brown, the resulting flavor will be darker, richer, and feature a slight, saucy bitterness from the caramelized edges.
The roasted variation is slightly less versatile (it might feel too robust for a delicate cream soup), but it creates outstanding gravies and dark sauces. While we are not building a traditional demi-glace here, the concept remains similar.
Vegetables and Spices: What to Add and What Ruins Versatility
The Classic Base
The classic vegetable base is remarkably modest: onions, carrots, and celery stalks. Celery is not always a staple in every household, which is perfectly fine; a beautiful broth can be made using just onions and carrots. As for spices, a single bay leaf and a few black peppercorns are entirely sufficient.
The onion is typically not peeled down to the white flesh; leaving the outer layer of skin gives the liquid a warm, golden hue. Carrots are chopped into large chunks so they do not disintegrate into mush and cloud the water.
Why Adding Everything at Once Is a Mistake
The temptation to throw every available spice into the pot is strong. It is understandable, yet restraint is key. Garlic, handfuls of bay leaves, dill, turmeric, smoked meats, chili peppers, and pre-mixed seasonings all pull the flavor profile in drastically different directions.
A basic broth overwhelmed by spices ceases to be a base. It can no longer be used seamlessly in a simple chicken noodle soup, a delicate risotto, and a refined fish sauce simultaneously. It will assert its dominant flavor everywhere. Brightness is best added later, directly into the specific dish, once the exact desired taste is known.
When to Add Salt
Salt is added very sparingly to a basic broth, or sometimes skipped altogether. The logic is straightforward. Broth is frequently reduced later, meaning the water evaporates while the salt remains; what tasted perfectly seasoned initially quickly becomes unpleasantly salty. Furthermore, this liquid goes into porridges, sauces, and stews, where salt will be adjusted on the spot.
If a slight seasoning is desired to bring out the clean flavor of the finished broth, it is best done at the very end and in tiny increments. Adding salt is effortless. Removing excess salt is nearly impossible.
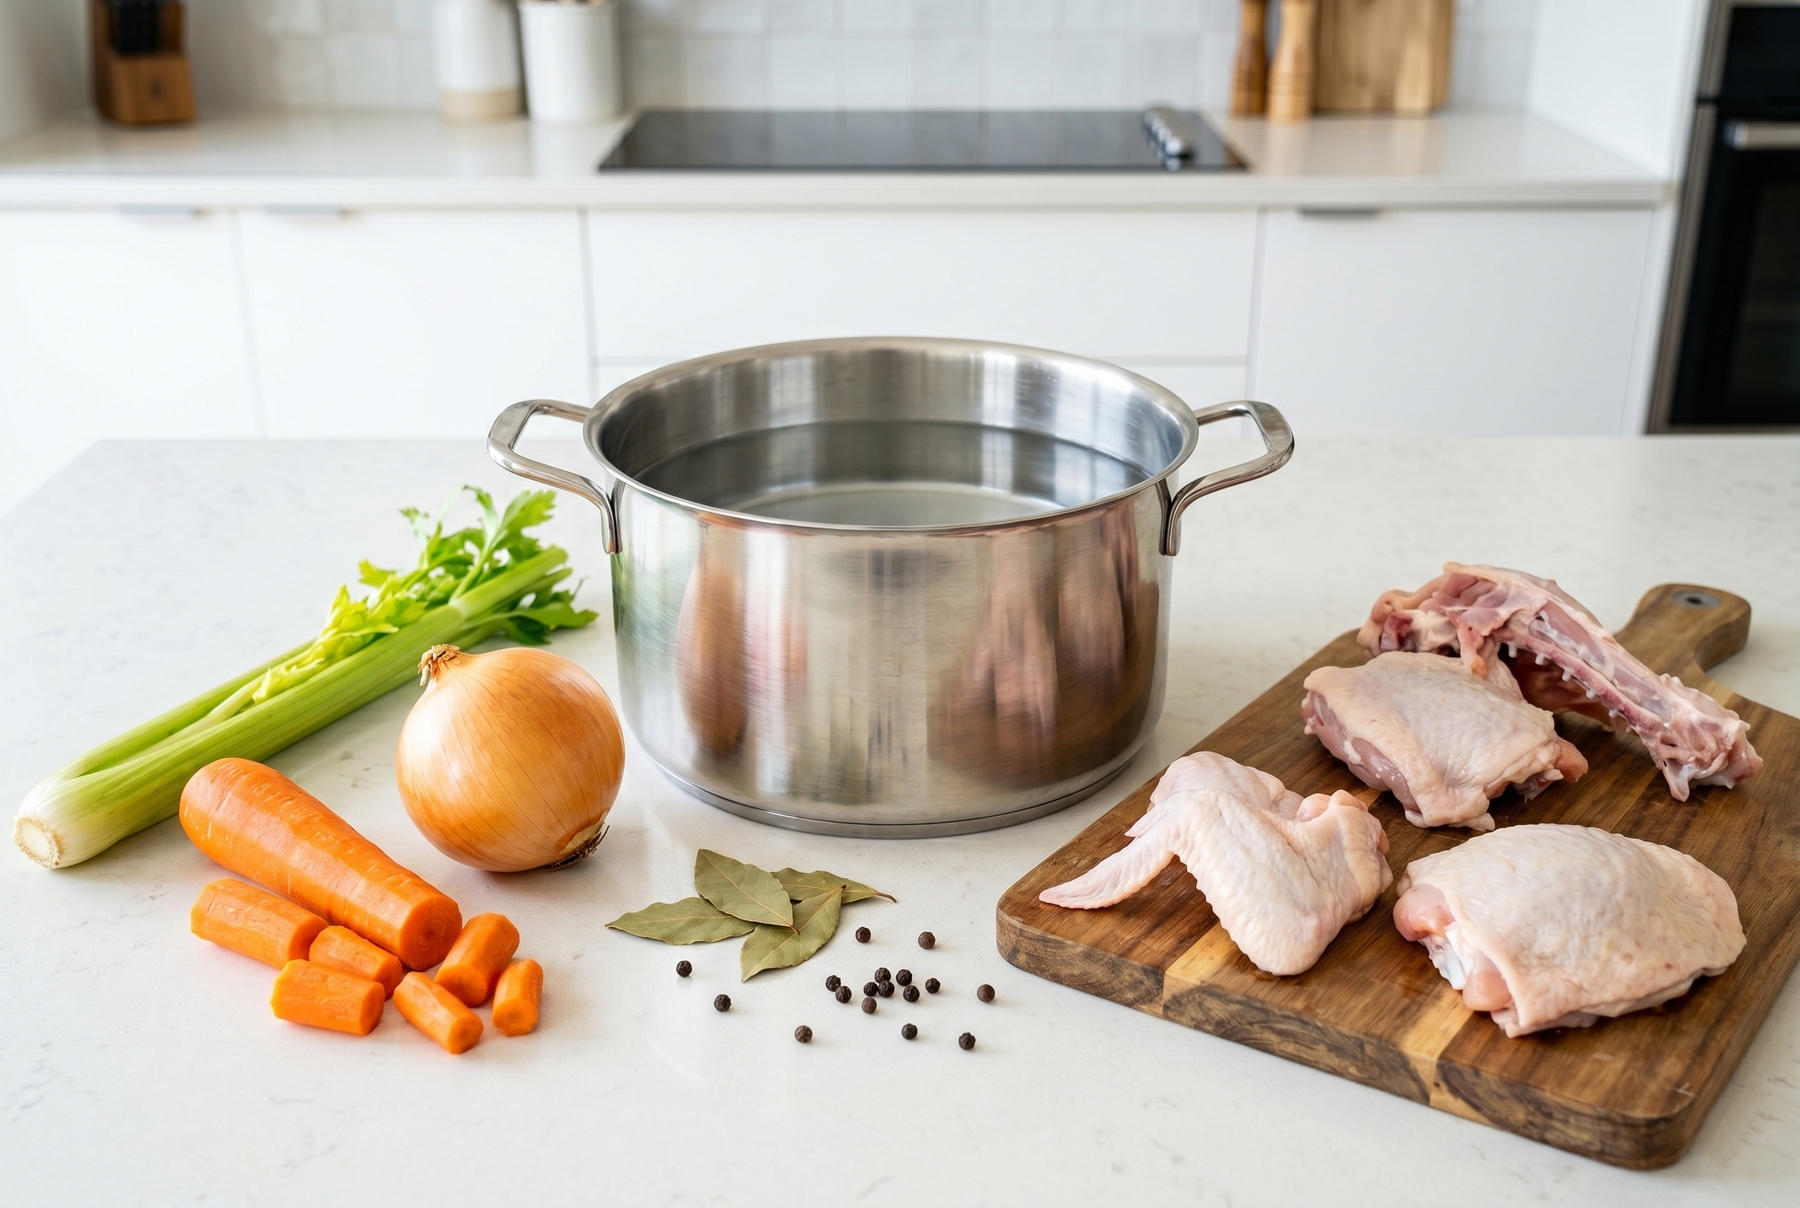
Crafting a deeply flavored base requires more than just meat; bones, wings, and aromatic vegetables are absolutely essential.
The Primary Technique: Never Boil, Just Simmer Gently
What Happens Inside the Pot
The entire difference between a crystal-clear broth and a cloudy one comes down to temperature management. During a rolling boil, the water churns violently, large bubbles burst on the surface, and the contents are constantly agitated. Small protein particles and fat droplets are shattered and dispersed throughout the liquid. They will never settle back down. This results in a permanent, muddy cloudiness.
A gentle heat keeps everything calm. Proteins coagulate and rise to the surface in large flakes, which are effortlessly skimmed away. Fat collects neatly on top. Flavor extraction proceeds slowly and evenly. The resulting liquid remains perfectly pristine.
The Right Start
The beginning stages dictate half the success. The chicken is submerged in cold water, never boiling. In cold water, proteins release their soluble compounds gradually, allowing the foam to form a neat, manageable cap. If boiling water is poured over the meat, the proteins seize instantly, trapping some of the impurities inside the liquid.
The pot is then slowly brought to a bare simmer. As soon as foam appears, it is skimmed off. Afterward, the heat is reduced to a point where only solitary bubbles occasionally break the surface.
How to Catch the Right Temperature Without a Thermometer
A thermometer is quite helpful here (the ideal range is roughly 85–95 °C (185–200 °F), well below a rolling boil), but it is easy to manage without one. Watching the surface is the best indicator.
The ideal state looks exactly like this: the surface barely quivers, occasional distinct bubbles rise from the bottom, and the liquid never churns in large waves. If the broth is bubbling vigorously and bubbles are streaming continuously, the heat is too high. It must be reduced.
Foam, Cloudiness, and Fat: What to Skim and What to Leave
Why the Foam Must Be Skimmed
Foam frightens many cooks more than it deserves to. It consists simply of coagulated proteins and fine particles rising from the meat. There is no danger in it, and discarding an entire batch because of foam is completely unnecessary. However, skimming it is crucial: the foam carries away a portion of the impurities and the grayish sediment that ruins the visual appeal and slightly roughens the taste.
The foam is removed using a spoon or a skimmer during the first few minutes, just as the pot is reaching its initial heat. Later, once the gentle simmering phase begins, new foam barely forms.
Why Chicken Broth Becomes Cloudy
Cloudiness rarely appears out of nowhere. It is usually the result of a few specific factors:
- Boiling too vigorously (the primary culprit);
- Active stirring;
- Microscopic particles of meat and shattered bones;
- An excess of starchy vegetables (such as potatoes);
- Delayed straining, where the liquid sits on the solids for too long.
Eliminating these triggers ensures natural clarity, completely avoiding the need for egg white clarification techniques.
Surface Fat
Fat carries immense flavor, but moderation is essential. A thin film on top delivers a wonderful chicken aroma and a pleasant mouthfeel. A thick layer, however, leaves an unappealing greasy slick on the lips.
Removing excess fat is easiest when the liquid is completely chilled. The broth is cooled and placed in the refrigerator; by morning, the fat solidifies into a firm disk that can be lifted away with a single movement of a spoon. If a quick fix is needed while it is still warm, running a paper towel across the surface absorbs the slick beautifully, or a specialized fat separator with a bottom spout can be used.
How Long to Simmer Chicken Broth for Maximum Flavor
Why Longer Is Better Does Not Work
Time is only an asset up to a certain point. During the first few hours, extraction is highly active: flavors and gelatin dissolve into the water. After that, the gains slow down dramatically, while vegetables begin to release an overcooked sweetness and a tired, slightly cardboard-like aroma. Bones will never surrender absolutely everything in a home kitchen environment, no matter how hard one tries, but ruining the vegetables is remarkably easy.
Cooking Times for Chicken Broth
Rough guidelines for a gentle simmer are as follows:
- Light broth made from chicken with meat: 1–1.5 hours;
- Rich broth made from bones, wings, and backs: 2.5–3 hours;
- Broth from pre-roasted bones: 3–4 hours.
Vegetables do not need to simmer the entire time. They are best added during the final third of the cooking process: 40–50 minutes is plenty of time for them to infuse their flavors without disintegrating into a starchy mush.
How to Know When It Is Ready
Readiness is both seen and smelled. The aroma becomes deeply rounded, losing any raw poultry notes. The meat falls away from the bones effortlessly, dropping off when prodded with a fork. A drop of broth cooled on a chilled plate thickens slightly and feels tacky to the touch. The liquid no longer tastes watery; it has developed a distinct body.
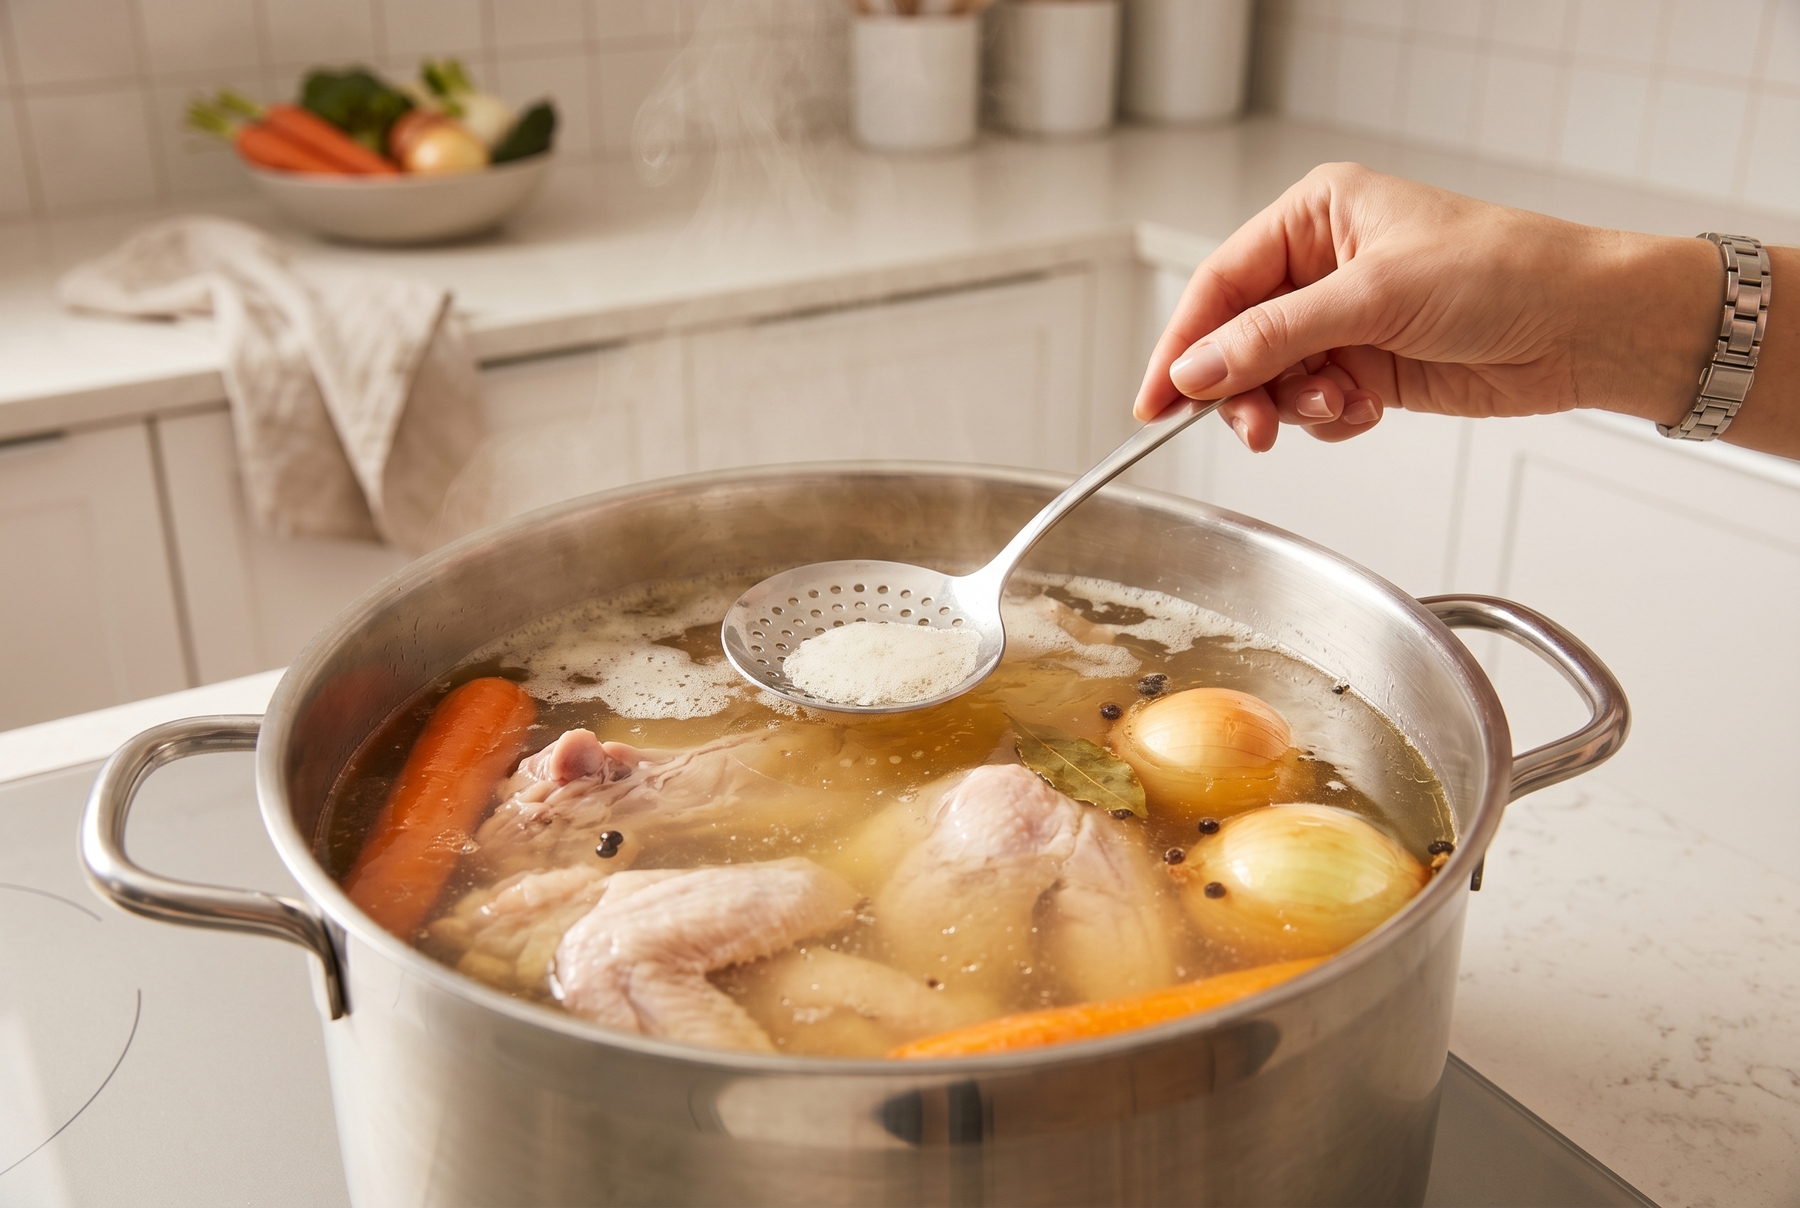
Skimming the surface foam during the initial simmering stages guarantees visual clarity and a pristine final taste.
Step-By-Step Guide to a Basic Chicken Broth
Proportions for a Standard Kitchen Pot
The working ratio is quite simple. For every kilogram (2.2 lbs) of chicken parts, approximately 1.5–2 liters (6–8 cups) of water are used. The water should generously cover the ingredients by a couple of inches, but it should not splash around in a half-empty pot: excessive water dilutes the final result.
For a standard five-liter (5-quart) pot, the breakdown looks roughly like this:
- 1–1.2 kg (2.2–2.6 lbs) of chicken parts (carcass, wings, backs, a little meat);
- 2.5–3 liters (2.5–3 quarts) of cold water;
- 1 onion;
- 1 carrot;
- 1–2 bay leaves;
- 5–6 black peppercorns.
The Sequence of Actions
- The chicken parts are placed in the pot and covered completely with cold water.
- Over medium heat, the pot is slowly brought to the first signs of a simmer. A tight lid should be avoided.
- The foam is skimmed off gently as soon as it forms a thick layer, ensuring the liquid is not agitated.
- The heat is reduced until only rare, solitary bubbles appear. From here on, the broth simply simmers quietly.
- Around 40–50 minutes before the end of cooking, the onion, carrot, bay leaf, and pepper are added.
- Once the meat effortlessly separates from the bones and the aroma is fully rounded, the pot is removed from the heat.
- The liquid is strained through a fine sieve (lined with cheesecloth if desired), carefully avoiding pressing down on the solids.
What to Avoid During the Process
- Pouring in large amounts of cold water, as this abruptly drops the temperature and dilutes the flavor (if too much has evaporated, a splash of boiling water is better);
- Stirring the pot actively, especially scraping the bottom with a spoon;
- Pressing mushy vegetables and meat through the sieve, which forces all the trapped cloudiness straight into the clear liquid;
- Leaving the pot to cool slowly on the stove for hours, let alone overnight.
Straining and Rapid Cooling: The Most Underrated Step
Why Cooking Does Not Stop When the Stove Is Turned Off
Turning off the burner does not mark the finish line. Bacteria thrive exceptionally well in a warm environment. The most dangerous range lies between roughly 4 and 60 °C (40 and 140 °F)—often referred to as the temperature danger zone. This is exactly where bacteria multiply fastest. Under favorable conditions, their numbers can double roughly every 20 minutes. The longer the liquid sits in this zone, the higher the risk. Therefore, the post-cooking objective is clear: navigate through the danger zone as quickly as possible.
How to Strain Properly
The liquid is strained through a sieve, optionally lined with folded cheesecloth for maximum clarity. The solids are never pressed: overcooked vegetables and meat remnants harbor muddy particles, and applying pressure immediately flushes them into the pristine liquid. Gravity should be allowed to do the work.
How to Cool Quickly at Home
A massive pot of hot liquid takes an agonizingly long time to cool at room temperature, spending all that time squarely in the danger zone. Speeding up the process is remarkably simple.
- The broth is poured into several wide, shallow containers. Heat escapes drastically faster from a shallow layer than from a deep pot.
- The containers are placed in a cold water bath: a sink or a large basin filled with cold water and ice. The water is changed as it warms, and more ice is added.
- The liquid is stirred occasionally to ensure the heat dissipates evenly.
At home, it is easiest to rapidly chill the liquid in an ice bath until it is merely lukewarm, and then transfer it directly to the refrigerator. Placing a giant, steaming pot straight into the fridge is heavily discouraged: it dramatically warms up neighboring groceries and still takes far too long to cool down internally.
How to Store Chicken Broth in the Refrigerator: Shelf Life, Containers, and Spoilage Signs
Choosing the Right Storage Containers
The finished product is stored in clean, airtight containers: food-grade plastic tubs or glass jars with tight lids. A little empty space is left at the top, particularly in glass. Boiling or scalding liquid is never poured into thin plastic; containers explicitly marked as heat-safe are chosen, or the liquid is allowed to cool slightly first.
How Long Does Chicken Broth Last in the Fridge?
Homemade chicken broth holds up well in the refrigerator for about 3–4 days. This is a reliable baseline, provided the fridge maintains 4 °C (40 °F) or lower, the containers are pristine, and the chilling process was rapid. A less-than-spotless jar or a sluggish cooling phase shrinks that window considerably. When in doubt, trusting the aroma and visual cues is much safer than checking the calendar.
How to Tell if the Broth Has Spoiled
Spoiled broth reveals itself quite aggressively:
- A sour or musty smell replaces the clean chicken aroma;
- Gas bubbles or a faint hiss occur upon opening the container;
- The texture becomes slimy or noticeably stringy;
- An unusual, thick cloudiness appears that was not there before;
- A film of mold or distinct stickiness develops on the surface.
A special note regarding re-boiling: boiling spoiled liquid in an attempt to save it is entirely ineffective. High heat kills some microbes, but it does absolutely nothing to neutralize the toxins they have already produced. If a questionable smell arises, it goes straight down the drain without a second thought.
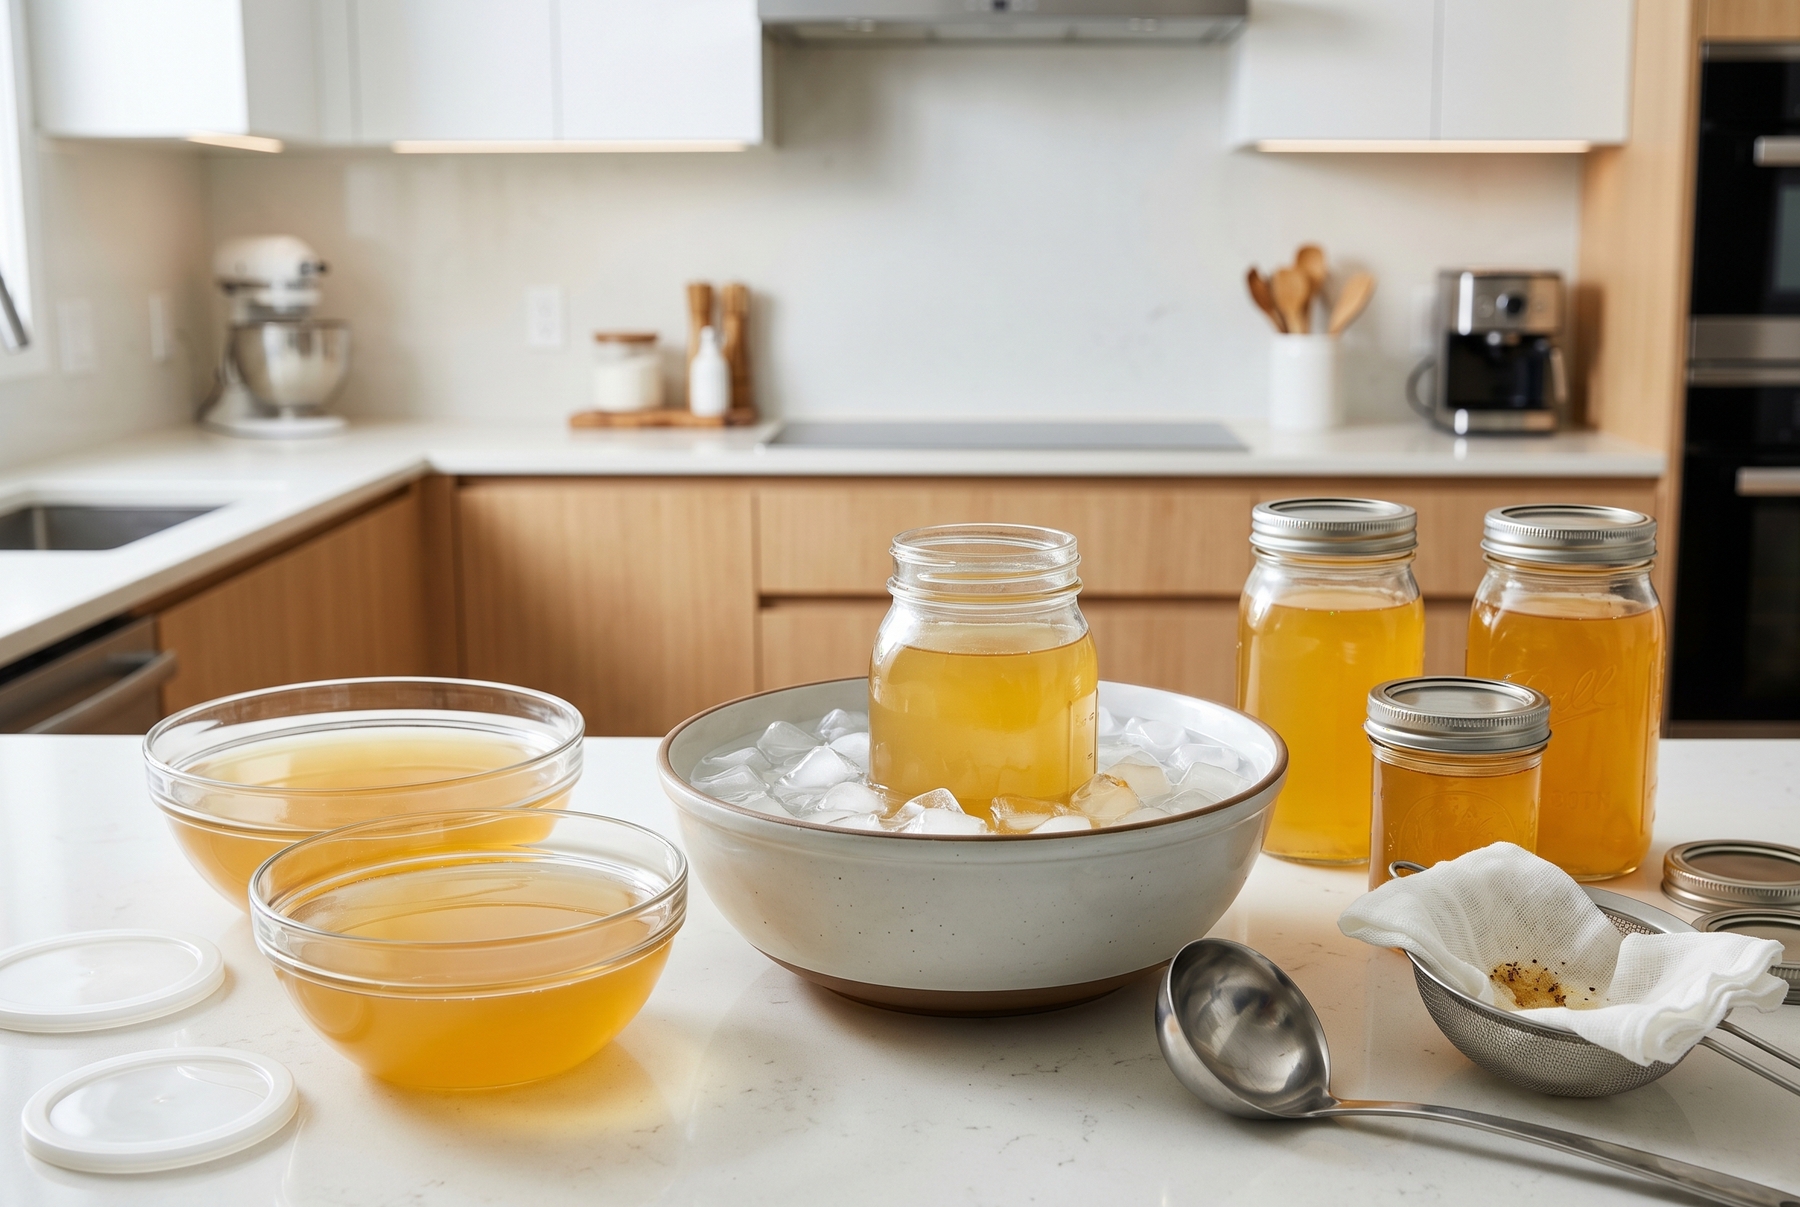
An ice water bath effectively speeds up the cooling process, pushing the liquid past the temperature danger zone to lock in freshness.
How to Freeze Chicken Broth to Make It a Convenient Ingredient Instead of an Ice Block
Portioning for Different Tasks
Freezing in portions tailored to specific tasks is infinitely more convenient than dealing with a single massive block of ice:
- Ice cube trays are perfect for dropping a cube or two into a quick pan sauce;
- 200–300 ml (about 1 cup) portions work beautifully for cooking grains or a small batch of risotto;
- 500 ml (about 2 cups) containers are ideal for building a family-sized soup.
How to Freeze Without Losses
The liquid must be completely chilled before hitting the freezer. The fat can be removed if desired (frozen fat sometimes develops a slightly rancid taste over time). Containers are never filled to the absolute brim: liquids expand as they freeze, and an overfilled jar will inevitably shatter. Every single portion gets labeled with the date and exact volume. A month later, no one remembers whether a generic tub holds 300 or 500 milliliters.
For peak quality, the frozen base is best utilized within 2–3 months; at a stable −18 °C (0 °F), it remains perfectly safe for much longer, though the flavor and aroma gradually fade.
How to Thaw Properly
The most reliable way to thaw is inside the refrigerator rather than sitting out at room temperature, where bacteria easily multiply. A frozen portion is simply transferred from the freezer the night before. Alternatively, the frozen block can be melted directly in a saucepan over low heat. Ice cubes and tiny portions are often never thawed at all; they are dropped directly into a simmering dish. Thawing on the kitchen counter for hours is the one method to actively avoid, as it throws the liquid right back into the perilous temperature danger zone.
How to Use a Basic Chicken Broth
Not Just for Soup
Chicken noodle soup is the obvious answer, but it is far from the only application. Grains like buckwheat, rice, and bulgur cooked in broth absorb its savory depth, resulting in something remarkably more interesting than grains boiled in plain water. It effortlessly steps into gravies, pan sauces, braised vegetables, chicken stews, and homemade noodle dishes. It even constructs a fantastic weeknight risotto when ladled warm into the toasting rice.
How to Avoid Oversalting the Final Dish
As water evaporates during a reduction, salt and soy sauce concentrate heavily. Because of this, dishes built on a broth foundation are seasoned near the very end, in tiny increments, tasting constantly. Extra caution is applied when using soy sauce or commercial seasoning blends: they deliver a sharp, intense hit of salinity.
What to Do If the Broth Is Too Weak
A weak, watery batch is not a tragedy. The most straightforward solution is to reduce it gently over medium heat, boiling away the excess water and concentrating the flavors. For the next attempt: incorporate more bones and wings, roast the parts beforehand, and use slightly less water. Vegetables can also be used to amplify the taste. Masking a watery base with handfuls of spices is generally a poor strategy: the flavor profile becomes chaotic, yet the liquid fundamentally remains thin.
Common Mistakes and Quick Fixes
The Broth Is Cloudy
Restoring crystal-clear perfection after the fact requires tedious effort, and it is rarely entirely necessary. The liquid can be strained again through several layers of cheesecloth, chilled, and the solidified fat removed. A cloudy batch works perfectly in puréed soups, creamy sauces, porridges, and hearty stews where clarity is irrelevant. Simply lower the heat on the next attempt.
The Broth Smells Strongly of Boiled Chicken
An overly aggressive odor usually points to several intersecting issues: the chicken was less than perfectly fresh, the pot boiled too vigorously, excessive skin and fat were included, and the vegetables were boiled into submission. Individually, each factor is manageable. Together, they create a heavy, unpleasant smell. The cure involves switching to a gentle simmer and ensuring absolute freshness of the ingredients.
The Broth Set Like Jelly
Finding a pot of firm jelly in the refrigerator scares some cooks. There is no need to panic; this is a spectacular sign. It proves the liquid is packed with collagen extracted from bones and cartilage. Upon heating, it will melt back into a smooth liquid. This type of gelatin-rich base is exceptionally prized for creating pan sauces that require a glossy, velvety texture.
The Broth Did Not Set
If it remained entirely liquid even after a night in the cold, it is not a disaster. It is highly likely the ratio of bones and connective tissue was too low, and the water volume was too high. This has very little impact on the actual taste: it remains a perfectly suitable foundation for soups, grains, and sauces. For a firmer set next time, wings and chicken feet are highly recommended, as they contain tremendous amounts of collagen.
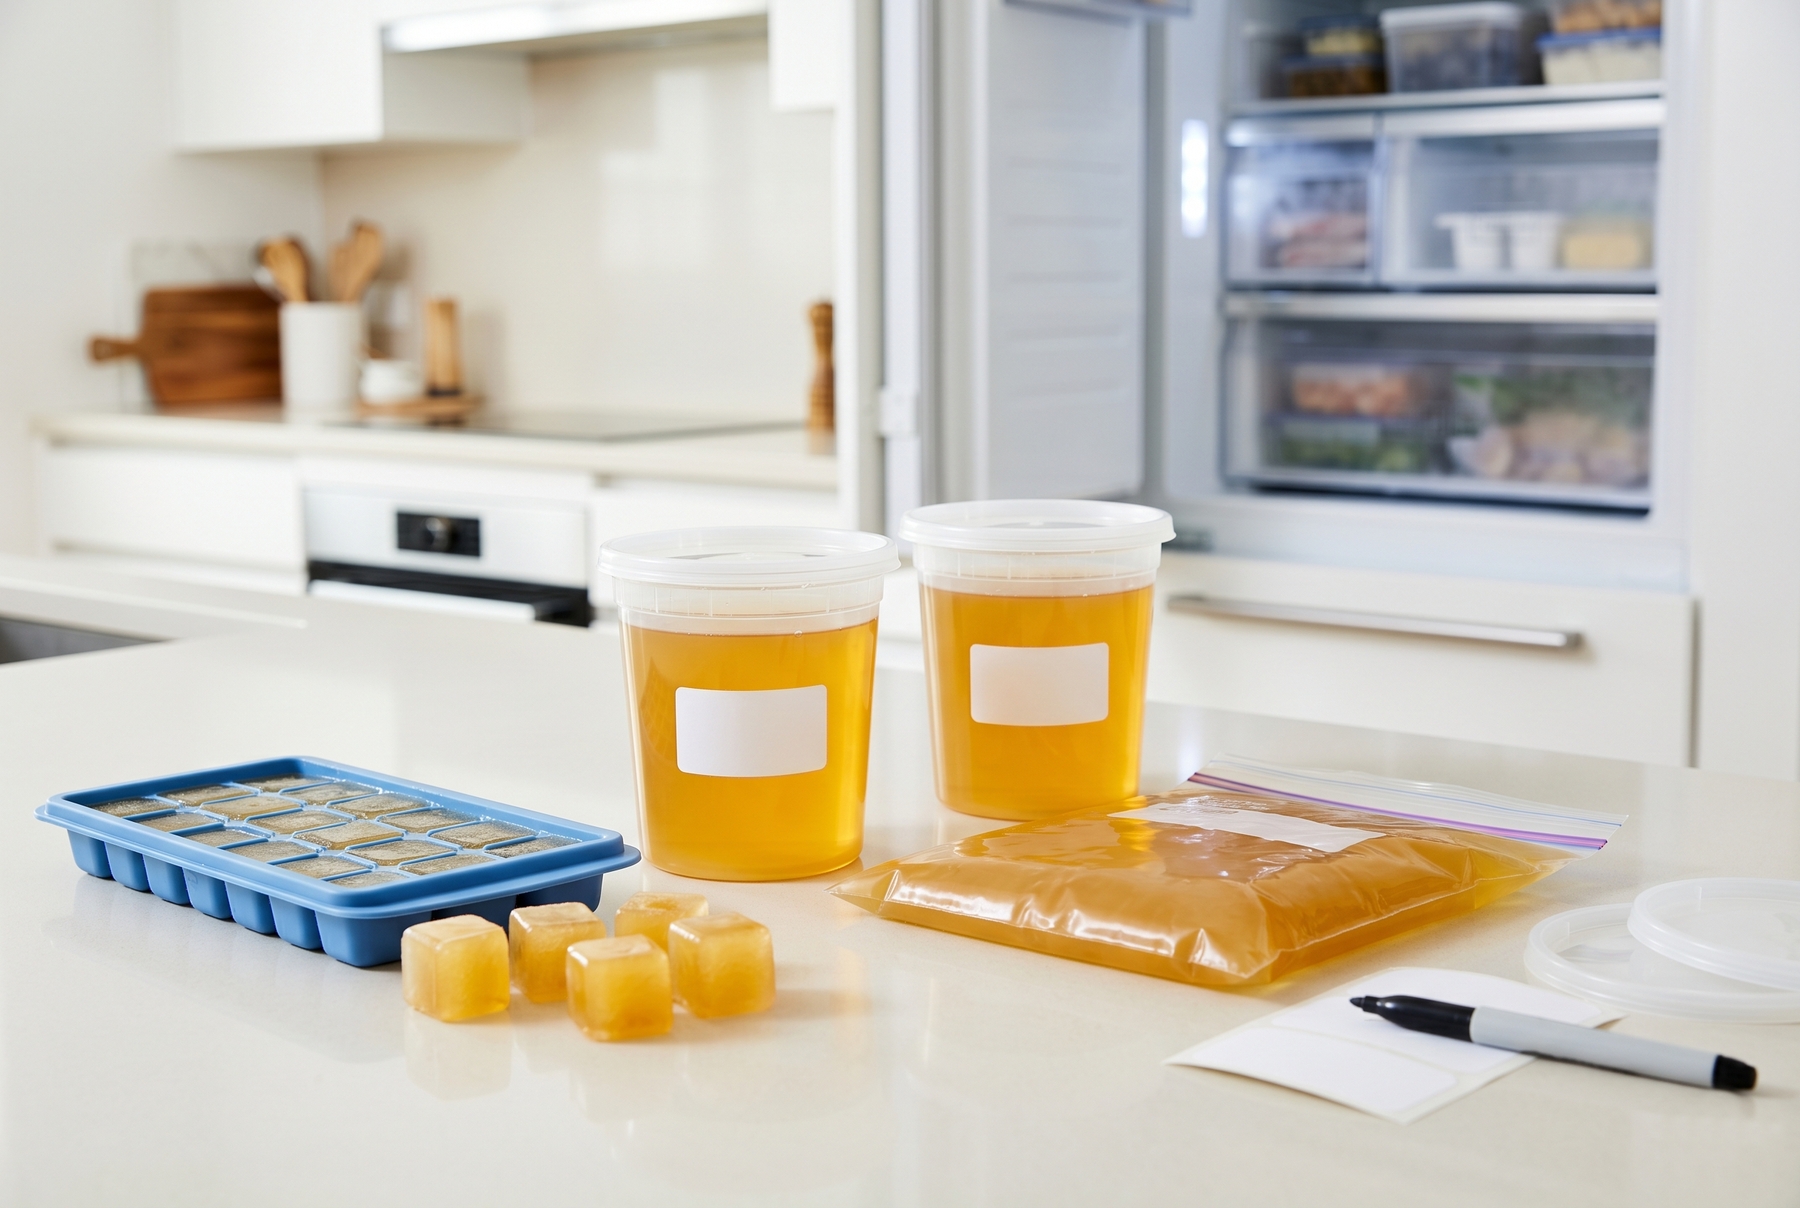
Freezing the liquid in various portion sizes, from small ice cubes for pan sauces to larger containers for family soups, maximizes convenience.
A Quick Cheat Sheet for the Road
If only the absolute essentials are kept in mind:
- Never let the pot reach a rolling boil; maintain a gentle, trembling simmer;
- Do not overload the liquid with bold spices or heavy salt;
- Skim the foam early on to guarantee a clean taste and pristine appearance;
- Strain gently without pressing down on the mushy solids;
- Cool the liquid rapidly using wide containers and an ice-water bath;
- Store in clean, airtight containers at 4 °C (40 °F) for no longer than 3–4 days;
- Always label containers with the exact date and volume before freezing;
- Never attempt to cure a questionable smell by re-boiling.
A single, properly made batch securely tucked away in the freezer equates to several future dinners that will come together faster and taste infinitely better. Currently, there are six neatly labeled 500 ml containers resting in my freezer: this week’s buckwheat will definitely be cooked in chicken broth.
0 comments