
Break a bar of good chocolate in half. Hear that? A dry, sharp snap, without any sluggish resistance. The surface shines so brightly it catches the light from the window. Now recall the chocolate that melted in your hands on the way home from the store: dull, smeary, with chalky streaks along the edges. The quality of the cocoa and the price tag are entirely irrelevant here. Everything depends on how the fat solidified inside.
Tempering chocolate at home frightens people for no good reason. The word itself conjures an image of a marble slab, a pastry chef in a tall white hat, and a wildly expensive thermometer. In reality, tempering chocolate without a marble slab is entirely possible: it all comes down to a reliable thermometer and understanding what happens inside the cooling mass. I ruined my first batch myself. Taking grayish, streaky candies out of the mold, I decided the product was spoiled and almost threw the whole thing away. The chocolate was perfectly fine. The crystals inside just arranged themselves incorrectly.
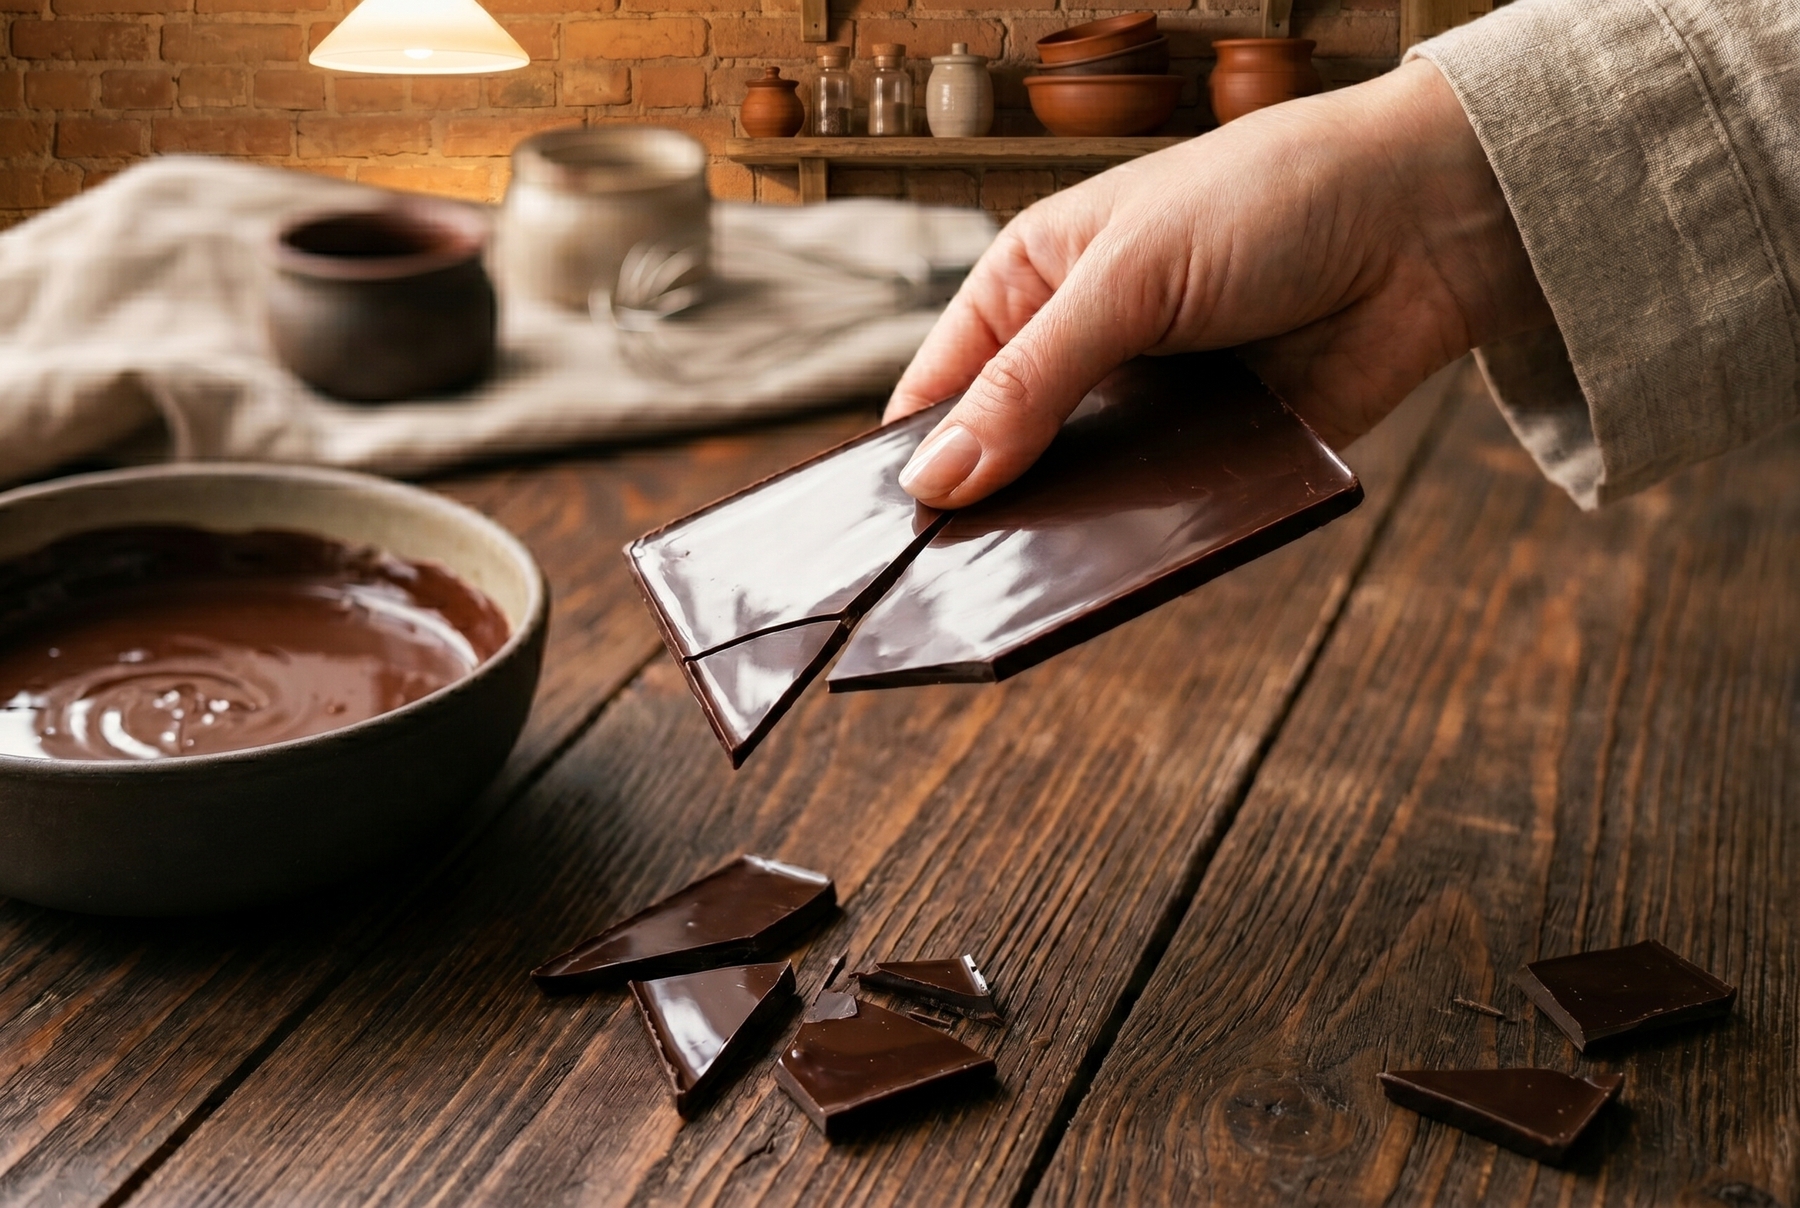
High-quality tempered chocolate features a glossy shine and breaks with a characteristic dry snap.
Table of Contents
- What Actually Solidifies in Chocolate
- What Happens If You Do Not Temper Chocolate
- Which Chocolate to Temper: Couverture or Compound Coating
- 3 Workable Methods to Temper Chocolate at Home
- Chocolate Tempering Temperatures: 3 Points of Control
- How to Tell If It Worked
- Where Things Usually Fall Apart and How to Save It
- How to Secure and Preserve the Result
What Actually Solidifies in Chocolate
Essentially, you control just one thing: the crystallization of cocoa butter. The fat in chocolate can solidify in several different states. Scientists count six crystalline forms of cocoa butter, and each behaves uniquely: some melt slightly above room temperature and leave the mass soft, while others are dense and refractory.
We need exactly one. It is usually designated by the Roman numeral V, the fifth form. It melts somewhere around 33–34 °C (91–93 °F) (just below body temperature, which is why proper chocolate melts on the tongue but holds its shape in the hand) and delivers that holy trinity: shine, snap, and contraction. Imagine a brick wall. You can dump the bricks in a pile, or you can lay them row by row. The brick remains the same; only the arrangement changes. Tempering is simply the method of forcing the cocoa butter to align in a dense, orderly structure rather than haphazardly.
What Happens If You Do Not Temper Chocolate
Untempered chocolate reveals itself instantly. The surface is dull, sometimes with a grayish haze. There is no snap, and the mass crumbles at the breaking point. The texture is soft, and a fingerprint registers immediately. Such chocolate releases from the mold reluctantly, clinging to the sides. It also melts from the slightest heat, simply by being held in the palm of your hand.
Let us immediately remove any unnecessary anxiety: there is no defect or spoilage here. The crystals simply aligned into an unstable form, which will eventually rearrange itself and appear on the surface as a bloom.
Why Chocolate Turns White: Should You Throw Away “Bloomed” Chocolate?
Two entirely different phenomena hide beneath that white film, and they should not be confused. Fat bloom occurs when cocoa butter migrates to the surface and recrystallizes (usually due to poor tempering or temperature fluctuations during storage). It looks like marbled streaks or a matte veil. Sugar bloom has a different origin: moisture settles on the surface, dissolves the sugar, evaporates, and leaves rough white granules behind. A common cause is taking cold chocolate out of the refrigerator, allowing condensation to settle on it.
The practical conclusion is simple. You can eat such chocolate; there is nothing dangerous about the bloom. If it is needed for culinary work, it is easily remelted and tempered all over again.
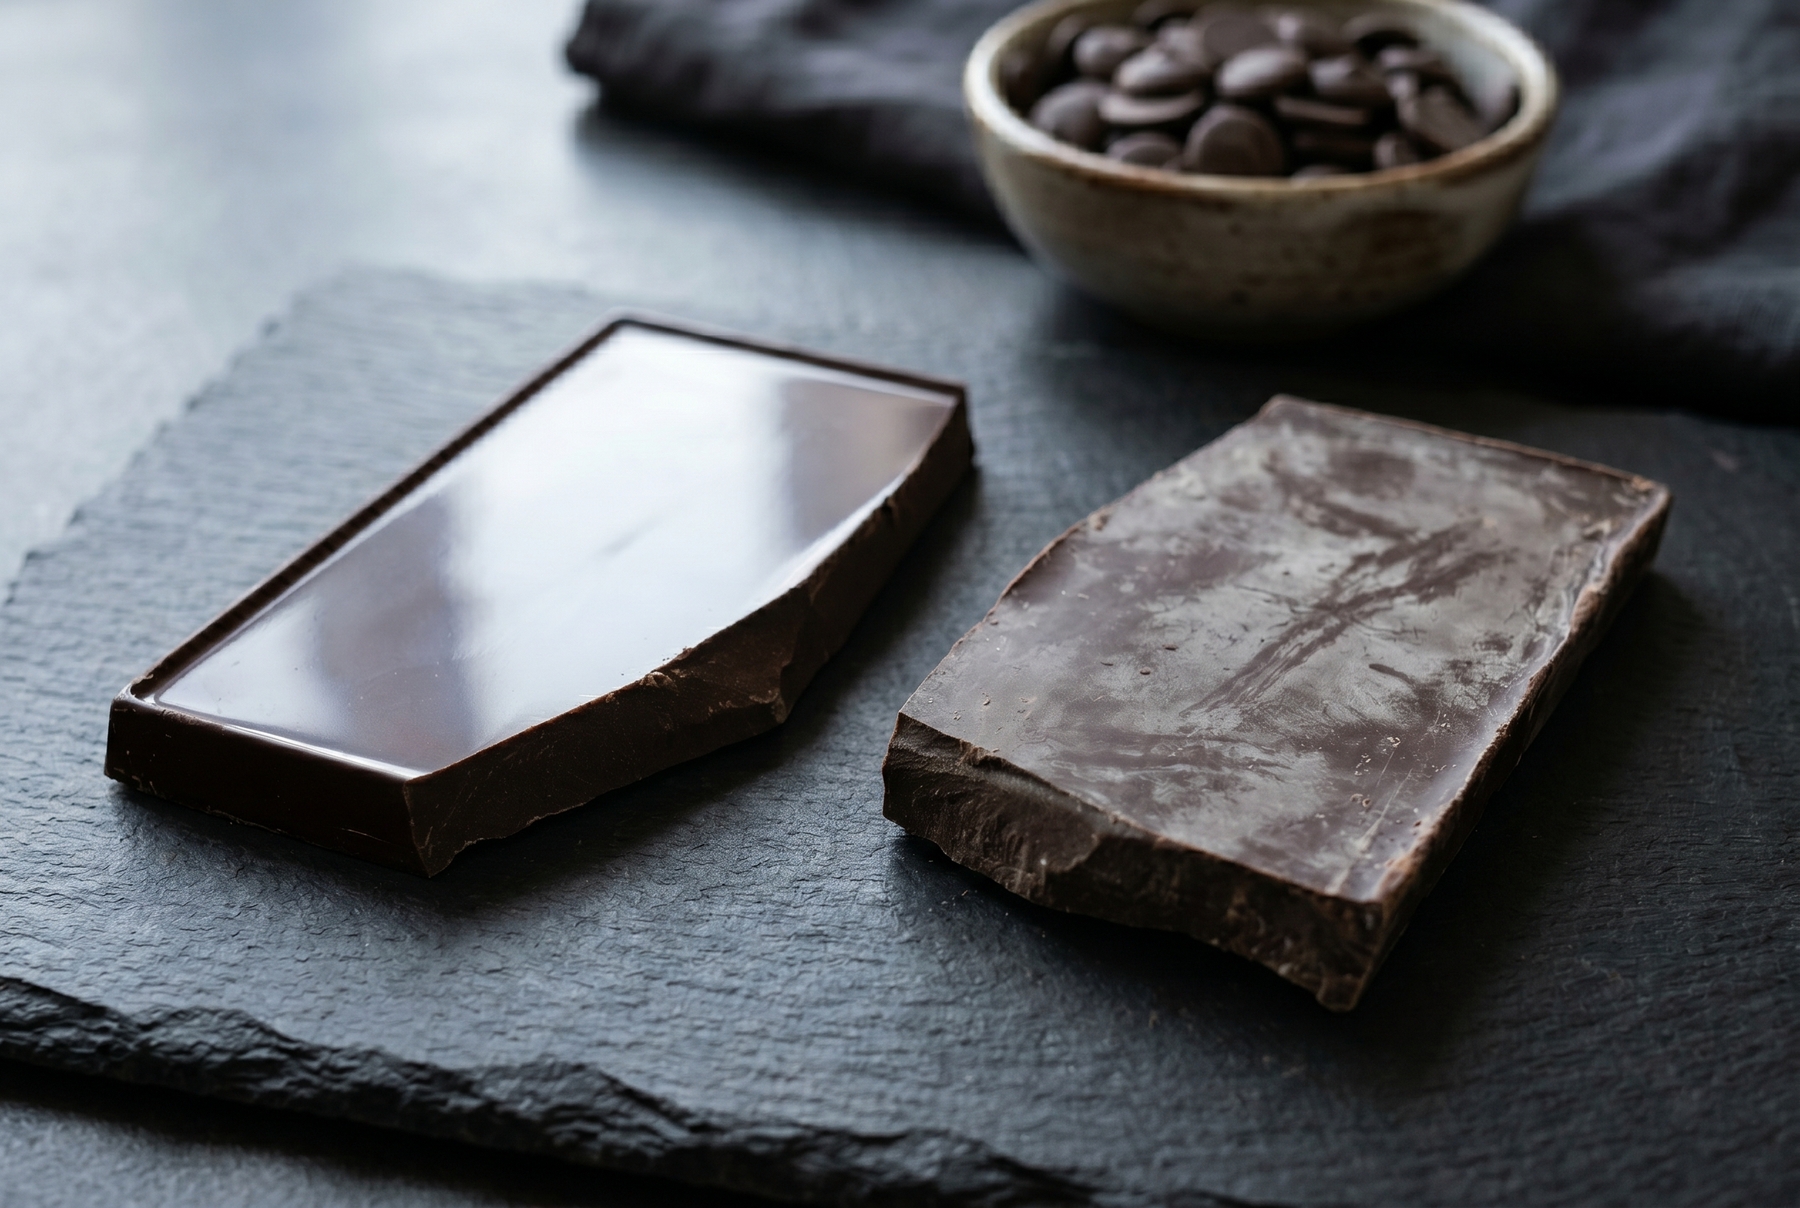
On the left is properly tempered chocolate with a perfect surface; on the right is a bar with fat bloom due to disrupted crystal structure.
Which Chocolate to Temper: Couverture or Compound Coating
Here the home cook faces a fork in the road, and everything else depends on this choice. Two fundamentally different products sit on the shelf. Real chocolate (couverture) contains a high percentage of cocoa butter and requires tempering. Compound coating (also known as compound chocolate or confectioner’s coating) is made with vegetable fats that replace cocoa butter entirely. It is usually not tempered according to the classic chocolate method: it solidifies with a shine and without temperature curves, simply because it contains a different fat with different behavior.
What to look for in the ingredients list:
- Cocoa butter in the ingredients list, ideally without extraneous vegetable fats;
- For culinary work, cocoa butter, fluidity, and the overall fat composition are crucial, rather than just the overall cocoa percentage (cocoa mass also contains fat, but a high percentage alone does not guarantee workable fluidity and a good temper);
- The format of callets or drops (small chips) is more convenient for beginners: they melt quickly and evenly, and also serve well as a seed.
Couverture is often found in specialized pastry shops and in the form of callets from well-known manufacturers. Read the ingredients. If you see palm fat or direct cocoa butter substitutes at the top of the list, you are looking at a compound coating, and it does not need to be tempered according to these rules. The term “cocoa butter equivalent” is trickier: such a product does not always behave like a pure compound coating and sometimes still requires tempering. In questionable cases, look at the manufacturer’s instructions: their guidance supersedes any general rule here.
3 Workable Methods to Temper Chocolate at Home
This is not a ranking, just three different tools for different tasks.
Tempering Chocolate with Callets: The Most Forgiving Method
The logic is as follows. You melt the majority of the chocolate, and then stir unmelted callets into the hot mass. They already contain ready-made stable crystals, and they work as a seed: they dictate the proper structure to the entire mass while simultaneously dropping the temperature. Stir until the callets melt away completely. This method is more reliable than others precisely because you introduce the correct crystals manually rather than trying to grow them from scratch.
The Marble (Tabling) Method: A Classic for Those Who Truly Need It
A portion of the melted chocolate is poured onto a cold stone slab and agitated with a spatula until it thickens and catches the necessary crystals, then it is returned to the main mass. On the stone, the crystals form most evenly. However, at home, it is only justified if you make chocolate regularly and in large volumes. Dragging a stone into the kitchen for the sake of a dozen candies makes little sense.
Tempering Chocolate in the Microwave: Fast but Risky
The chocolate is heated in short bursts of 15–20 seconds, removed, stirred, and heated again. The main danger here is local overheating. The microwave heats unevenly, and it is easy to get a scorched spot inside the mass while whole callets remain on top. Therefore, stirring is absolutely mandatory after every single burst, with no exceptions.
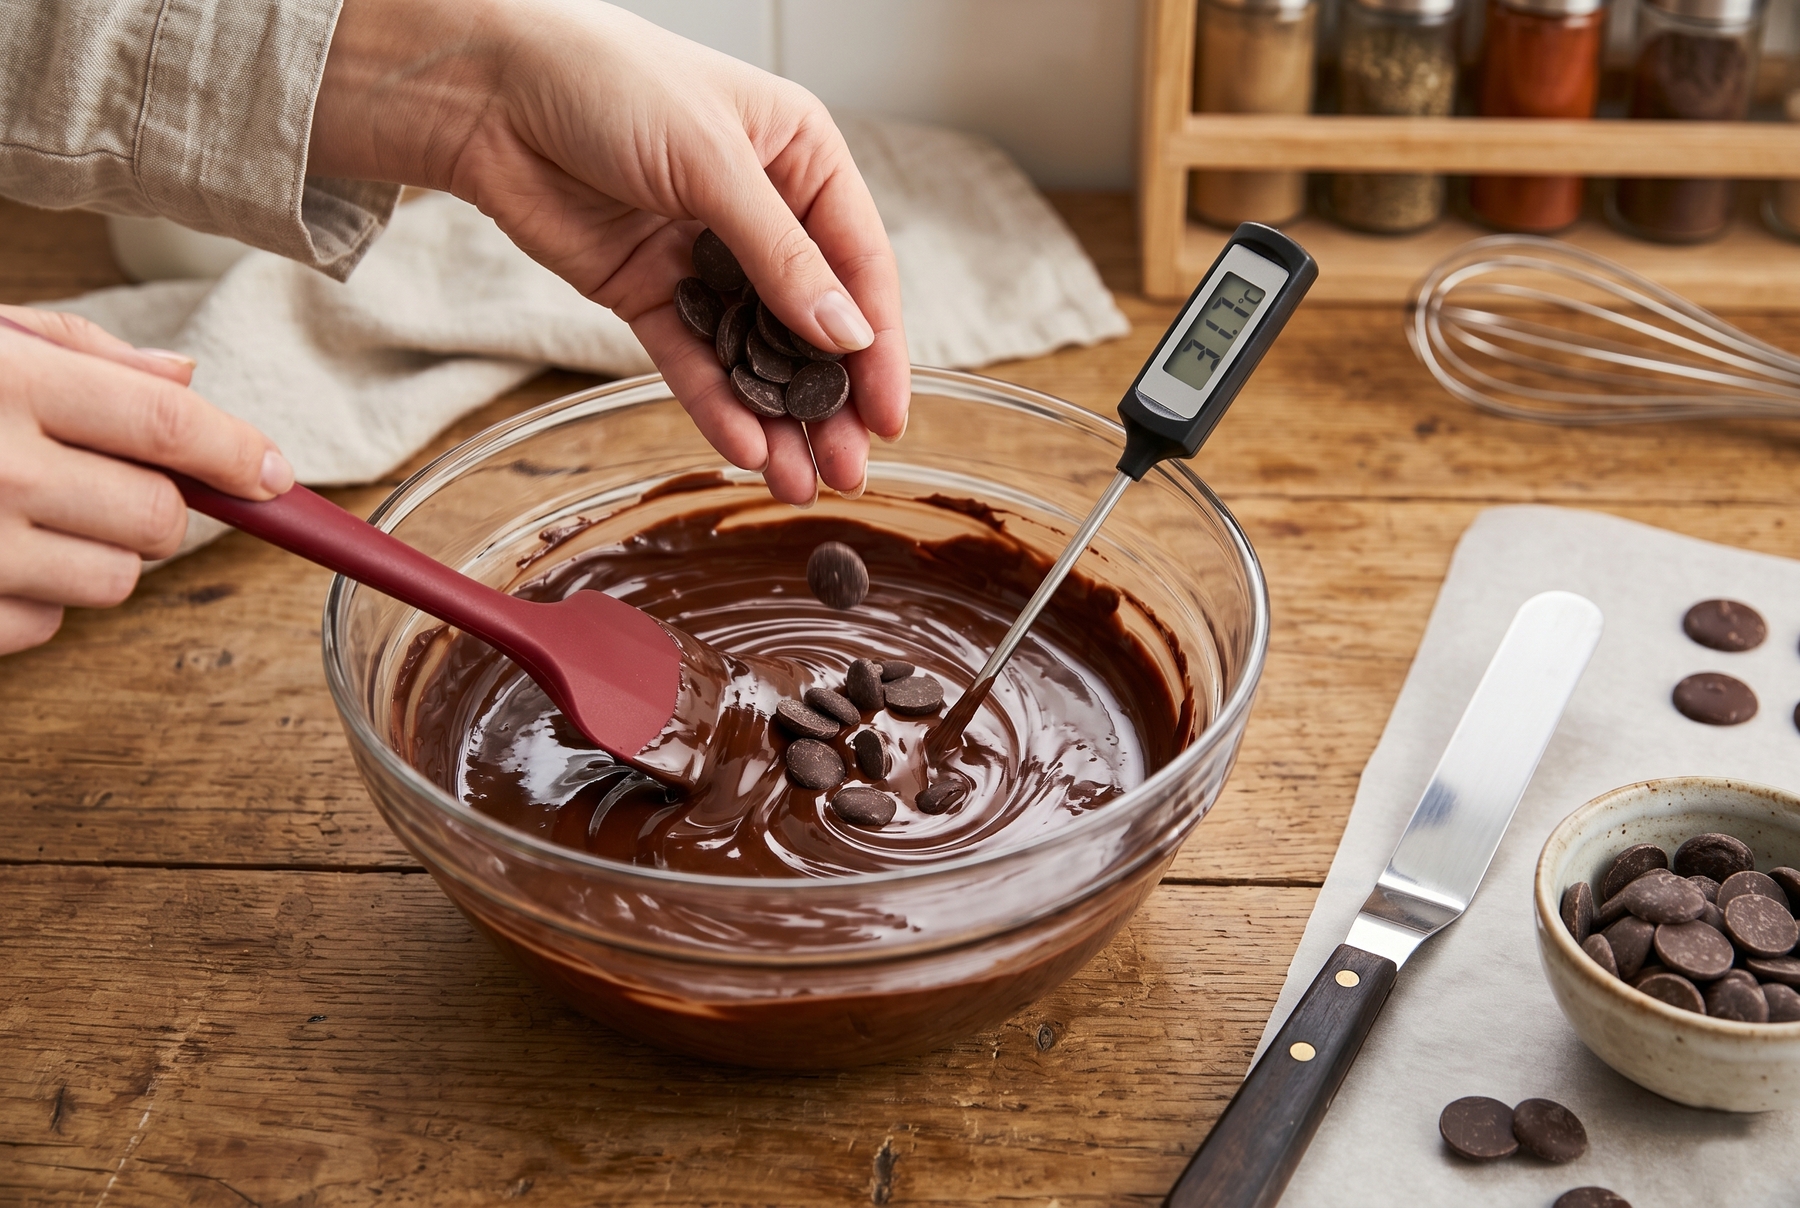
Tempering with callets is the most reliable home method: introducing ready-made stable crystals into the melted mass.
Chocolate Tempering Temperatures: 3 Points of Control
The entire mechanics of tempering fit into three phases, and the shape of this curve is recognizable: a rise, a drop, and a slight return upward.
- Melt. Heat the chocolate completely to erase all old crystals, both good and bad.
- Cool. Drop the temperature so stable crystals begin to form (unstable ones are born along with them).
- Slightly re-warm to the working temperature. A brief return upward melts away the unstable forms and leaves only the desired ones active.
The approximate temperature ranges for tempering chocolate look like this:
| Chocolate Type | Melt | Cool | Working |
|---|---|---|---|
| Dark | 45–50 °C (113–122 °F) | 28–29 °C (82–84 °F) | 31–32 °C (88–90 °F) |
| Milk | 40–45 °C (104–113 °F) | 27–28 °C (81–82 °F) | 29–30 °C (84–86 °F) |
| White | 40–45 °C (104–113 °F) | 26–27 °C (79–81 °F) | 28–29 °C (82–84 °F) |
The numbers here are for reference. Milk and white chocolate are kept lower and burn more easily because they contain more milk solids and sugar. The exact values depend on the brand and recipe, so the first thing to do when opening a new package is to look at the manufacturer’s recommendations on the wrapper. They always overrule any general table.
How to Tell If It Worked
Do not wait for the finale; check as you go. Smear a drop of chocolate on the tip of a knife or on parchment paper and leave it at room temperature (around 18–20 °C / 64–68 °F). Properly tempered chocolate will set in a few minutes, laying down a smooth gloss without streaks or matte spots. If it is still sticky and cloudy after 10 minutes, the tempering failed.
The finished product reveals itself by three signs. An even gloss that reflects light. A clean snap when broken, that exact dry sound. And contraction: as it cools, the chocolate pulls slightly away from the walls of the mold and falls out on its own as soon as you flip it over.
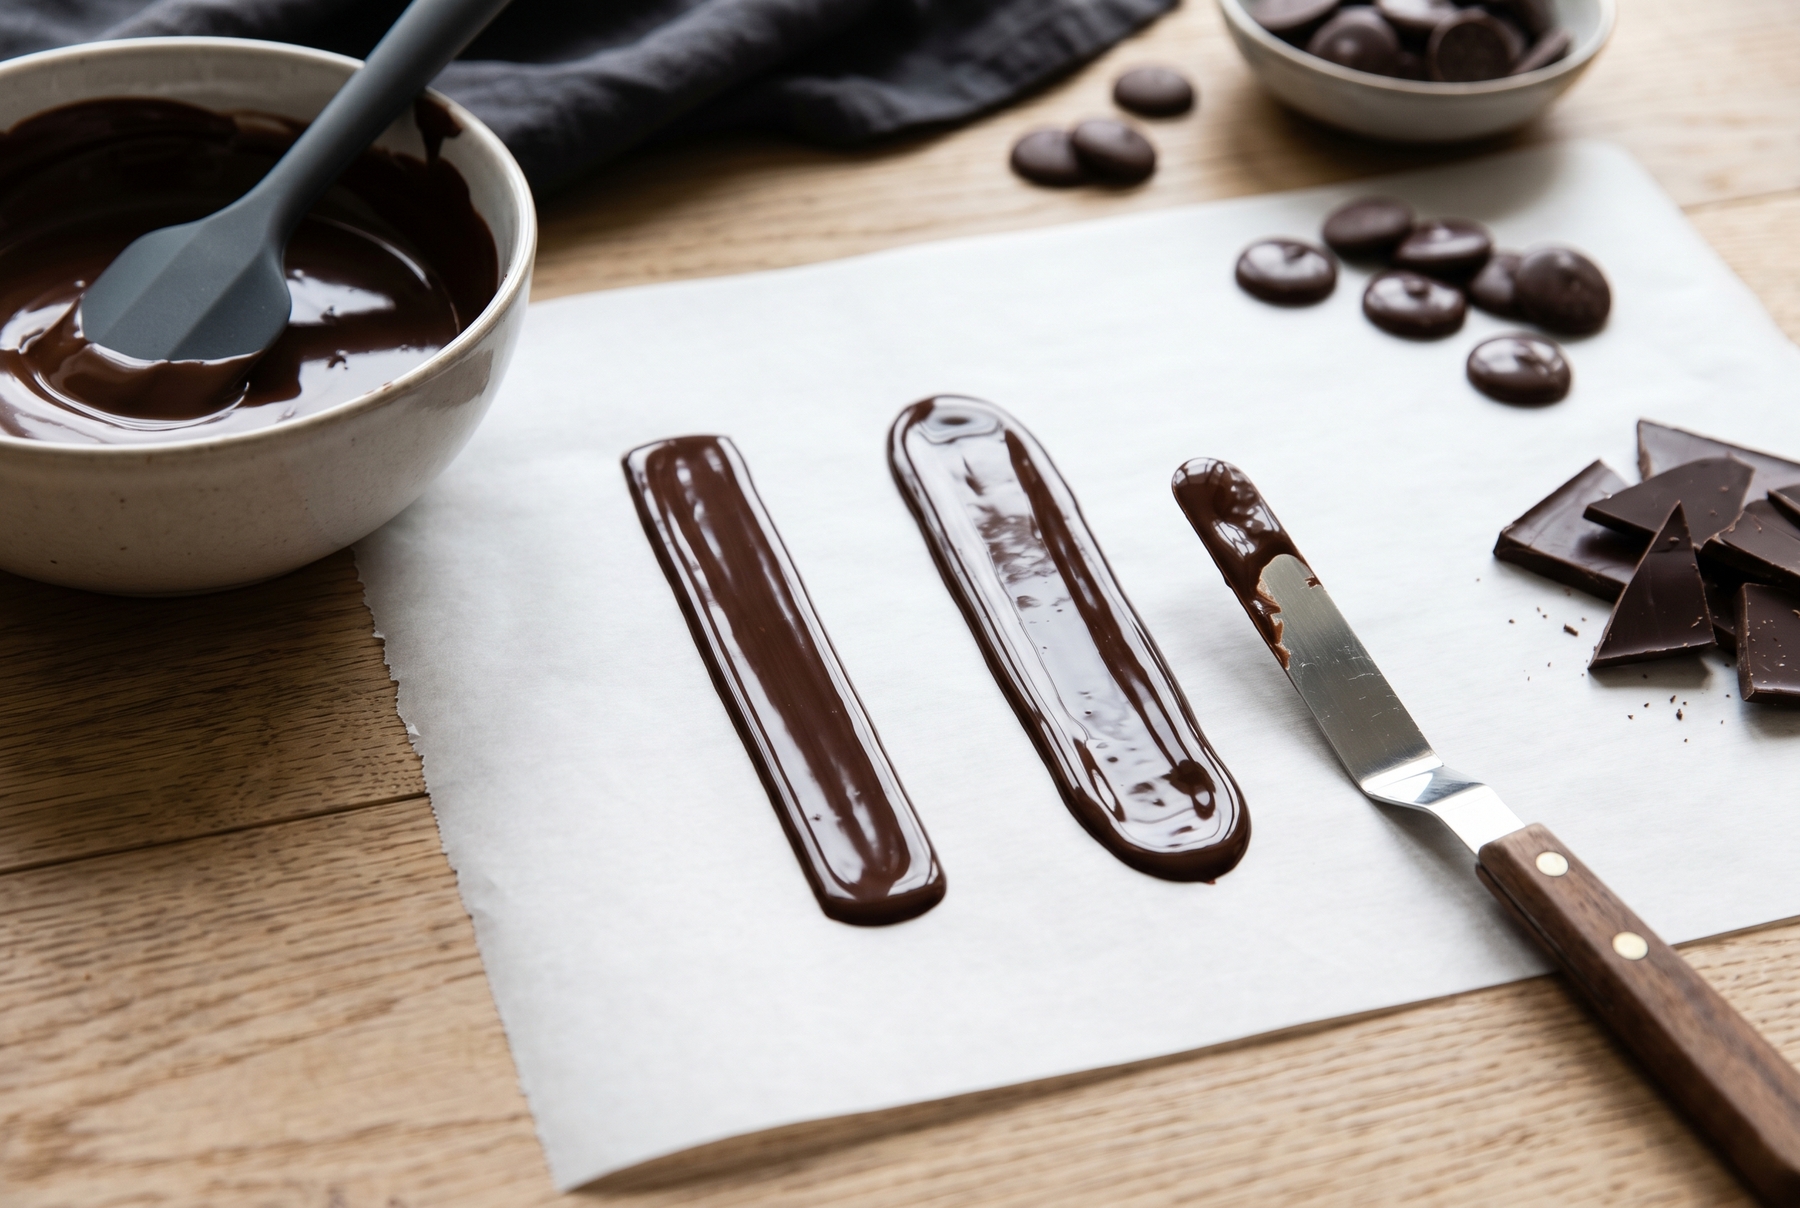
Checking on parchment: if the chocolate sets within a few minutes and becomes glossy, the process was successful.
Where Things Usually Fall Apart and How to Save It
There are not many weak spots, but they repeat themselves time and again.
Water ruins things most often. Even a few drops turn a smooth mass into a matte clump (water binds the sugar particles, and the chocolate instantly “seizes”), so all utensils and the spatula must be completely dry. Right next to that is overheating, especially with milk and white chocolate: sugar and milk proteins burn faster than you can notice, so heat slowly and with a temperature margin.
A warm kitchen also lets you down. If the room is pushing 28 °C (82 °F), the working range slips away, and the mass fails to set properly. Working around 18–20 °C (64–68 °F) is noticeably easier. If you stirred too little, the crystals distribute unevenly: part of the mass tempers, part does not. And if you fiddle for too long, the chocolate cools below the working point and thickens. In that case, it is carefully rewarmed by a couple of degrees and the work continues.
Most failures are reversible, but not all equally so. Chocolate that simply fell out of temper or bloomed can be calmly remelted, resetting the crystals, and tempered again. However, if water gets into the mass and it seizes into a clump, it cannot be brought back into temper: redirect such chocolate into a ganache, sauce, or baked goods where moisture is not an issue. Burnt chocolate, on the other hand, is too late to save; the flavor is irreversibly ruined, and re-tempering will not fix it.
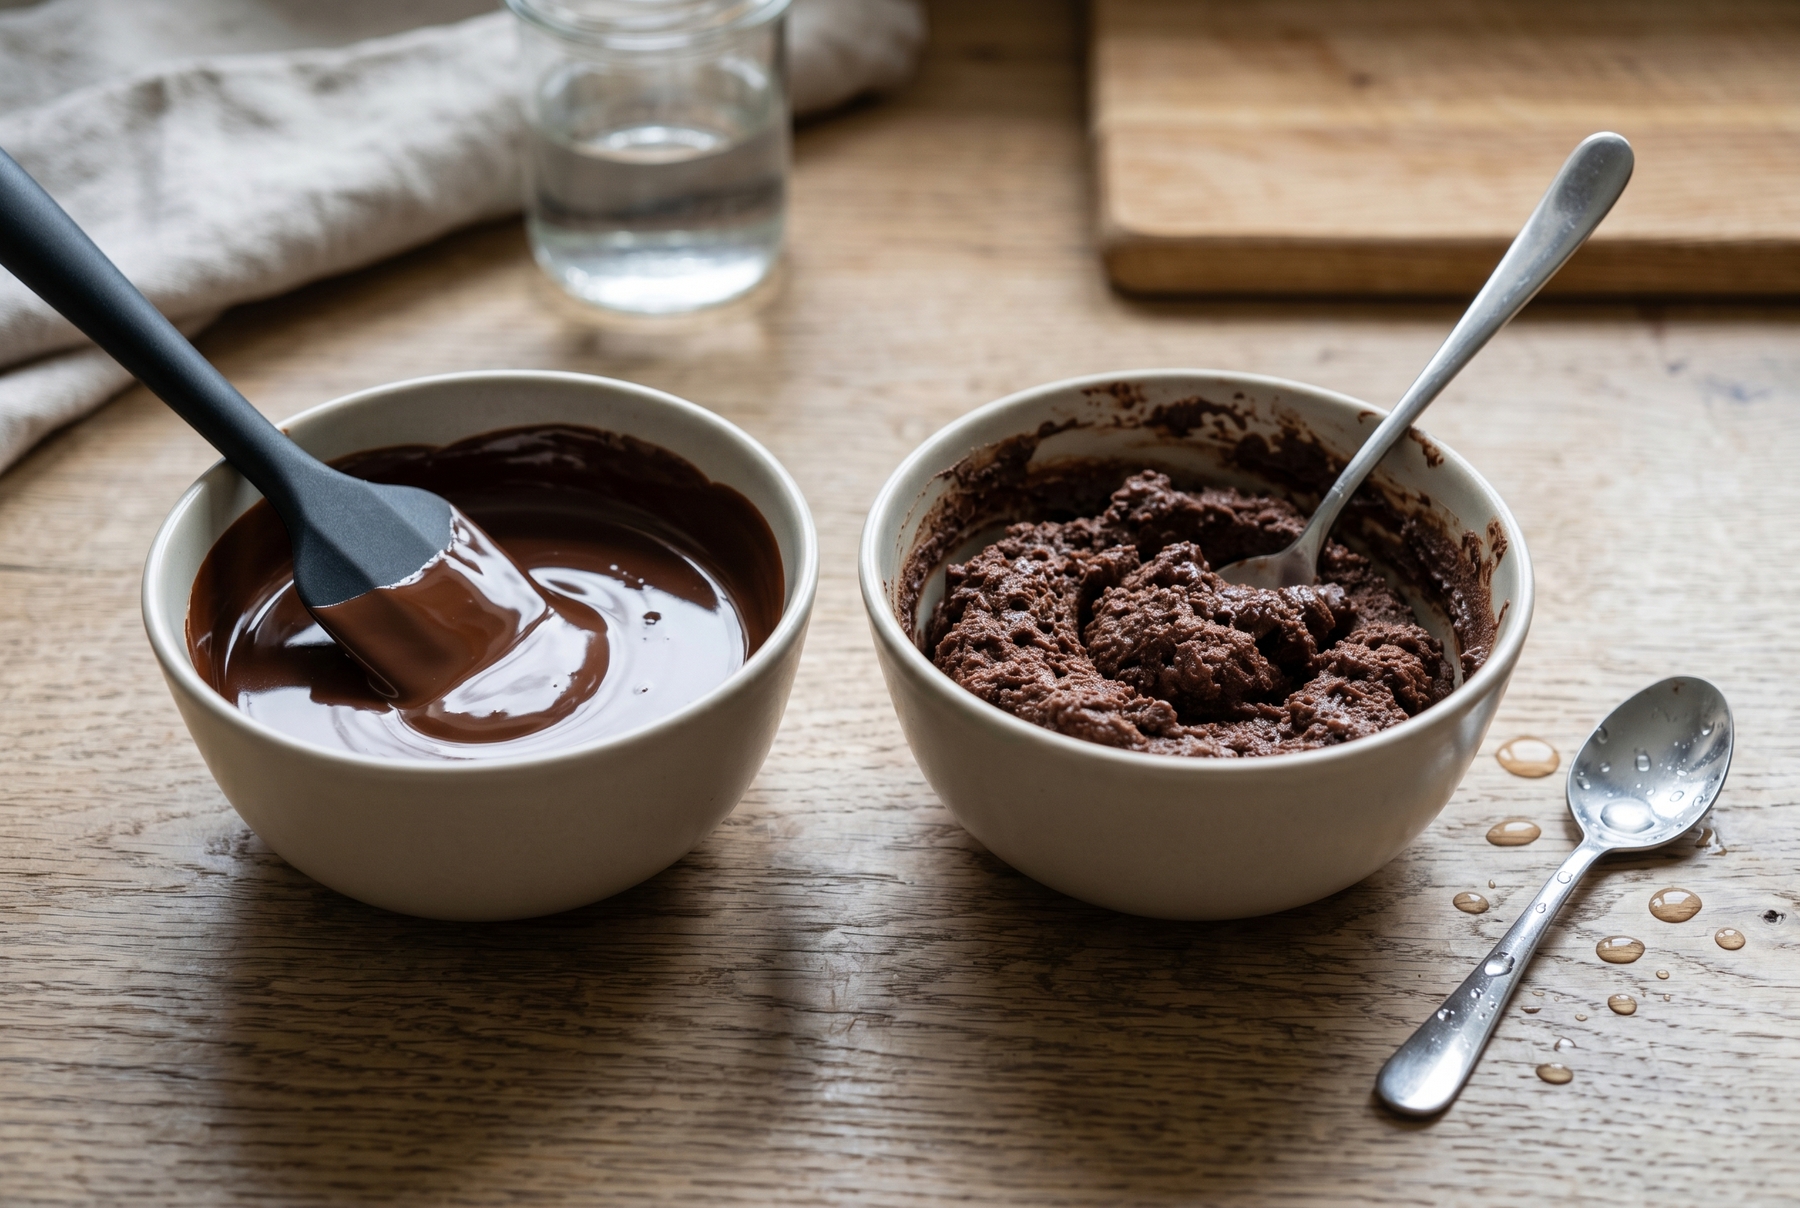
Even a drop of water can turn fluid chocolate into a thick clump. This mass can no longer be tempered but works well for fillings.
How to Secure and Preserve the Result
Finished chocolate loves a cool room, around 18–20 °C (64–68 °F), and dry air. It is best stored in an airtight container, away from odors (cocoa butter absorbs ambient aromas like a sponge). Be cautious with the refrigerator: condensation settles on the cold surface, the moisture dissolves the sugar, and you end up with that very rough sugar bloom.
You need a good thermometer, a dry spatula, a cool kitchen, and a bag of couverture with the correct composition.
0 comments